WHITEOUT NAVIGATION
By: Zack McGill
If you’re into mountain sports, learning the basics of whiteout navigation is essential for off-trail travel in the mountains. This is especially true if you live in a place that has large expanses of above tree line, snow covered alpine terrain and/or glaciers. This resource presents tools, strategies, and techniques to keep in your quiver for those low visibility days.
This resource has two main sections:
1. Where to Travel (Tools to know where to travel in a whiteout)
Whiteout Navigation Plan | Navigation Tools
2. How to Travel (Strategies and techniques for how to travel and stay on course)
Handrails | Bearing Off | Travel Techniques
Where to Travel
Ever been caught out in a whiteout? It’s a fairly common occurrence in the mountains, so, if you haven’t, you will. It’s disorienting to say the least, especially in glaciated or snowy terrain with no distinguishable terrain characteristics. People refer to it as being “stuck inside the ping-pong ball.” And it is. Everything is white and your body no longer understands its place in space and time.
I’ve literally fallen over while standing still because my body thought it was still moving. I’ve also walked in a complete circle on the Sulphide Glacier of Mount Shuksan in a whiteout when I thought I could get away with contouring and not looking at a compass. Wrong! No matter how well you know (or think you know) terrain, a whiteout can throw you off. Below are the things you need to know to make the best decision on where to travel.
Whiteout Navigation Plan
The only real reliable way to know where to navigate in a white-out is to be proactive and have a whiteout navigation plan already sorted before being in the terrain. Relying solely on a GPS unit or cell phone that runs off batteries that are susceptible to cold and could run out of juice for your navigation needs in high stakes glaciated terrain is just plain irresponsible. You may get away with it, but the mountains are harsh teachers. You may not be so lucky the next time.
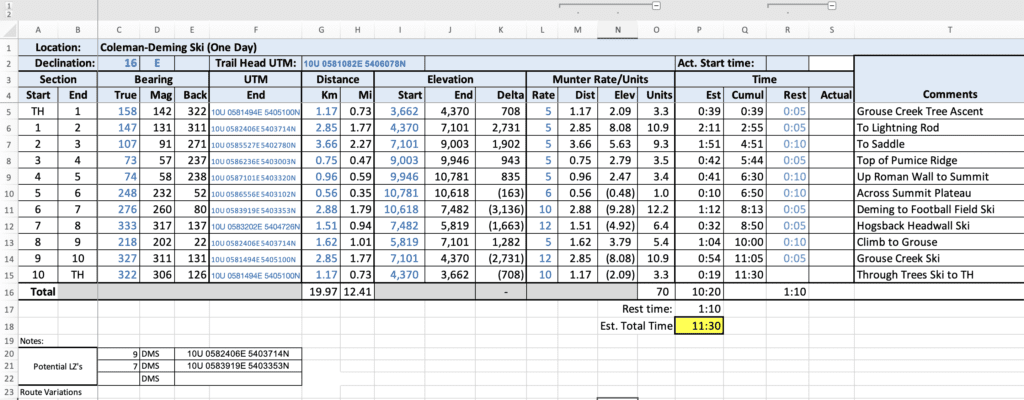
Instead of getting by on a hope and a prayer, create a whiteout navigation plan! These plans can be as complex and detailed as you’d like but need at the core three main details: Waypoints, Bearings, and Back Bearings. Below is an example of one of my complex whiteout navigation plans that also includes UTMs, distance, elevation, and munter rates (check out our LNT Resource if you want to learn about Munter Rates). I’ve got loads of these for most of the more complex tours I guide. Yay spreadsheets that autofill information!
Waypoints
Most simply, waypoints are digital flags placed along your route at regular intervals you can use to navigate through terrain. Think of them like the trail of bread crumbs Hansel and Gretel used to find their way home. Ideally, waypoints get placed at the beginning and end of your route, and anywhere a change in direction is required.
Waypoints also work best at obvious terrain features. Examples of these are but not limited to: a Ridgeline, summit, individual tree, large boulder or boulders, a lake, cliff, drainage, valley, or highway. Your goal is to go then from waypoint to waypoint to get to your objective and then reverse the waypoints to get back home. Of course, if you can see and you’re not in a whiteout, you can possibly cut corners and take more efficient paths, but it’s nice to know that if the poop hits the fan, you can find your way home.
Bearings
Alright, so if we create a bunch of digital bread crumbs to follow, that’s great, but they don’t do you much good it you can’t see them! If waypoints are the bread crumbs, bearings are how you travel to the next bread crumb without getting lost. In my whiteout navigation plan above, you can see that I included the compass bearings from one waypoint to the next. Once I adjust for declination and take my bearing at a known waypoint, I can feel confident that I’m traveling generally in the right direction. If you’re stumped on what I mean by declination or how to specifically take a bearing, pause here and check out our Basic Backcountry Navigation resource. Once you give that a gander, come back this post.
Back Bearings
My main goal every time I go to the mountains is to come back home again. To that end, it’s just as important (or more so) to know how to get back home as it is how to get to the next waypoint. Back bearings are what get you to the car where the beer is waiting and, by extension, home. You like back bearings. Calculating the 180 degree opposite of your bearing to a waypoint gives you the back bearing. In the navigation plan above, you can see on line one that the bearing from the TH to the first waypoint is 142 degrees. Therefore, 142-180 = -38. 360-38 = 322 degrees for the back bearing.
Navigation Tools
GPS
As you likely already know, cell phone applications like CalTopo, Gaia, and FatMap turn your cell phone into a GPS unit you can use to navigate. This works even in airplane mode. Yes, this means you are being tracked all the time, but we all voluntarily carry around our cute little tracking devices because they also allow us to play candy crush… or whatever it is you kids play now.
This is certainly the more affordable option if you already own a thousands of dollars pocket computer… gosh I miss flip phones. Or, you can drop hundreds of dollars on a stand-alone GPS unit. The drawbacks to using your cell phone as a GPS unit are: battery life (cell phones die quicker), and usability in wet conditions (like a whiteout). Touch screens don’t work well when wet.

Map
Believe it or not, these still exist. You can even get them laminated or place then in a plastic bag so they don’t disintegrate in the rain or snow. I don’t always carry a map if I’ve got my Inreach, my Cell Phone, altimeter, and compass, but it’s best practice to have an analog backup to the technology. Anytime I’m traveling in more complex terrain, I carry one. Remember this sad incident in the alps a few years back? Being without adequate navigation tools can be a death sentence.
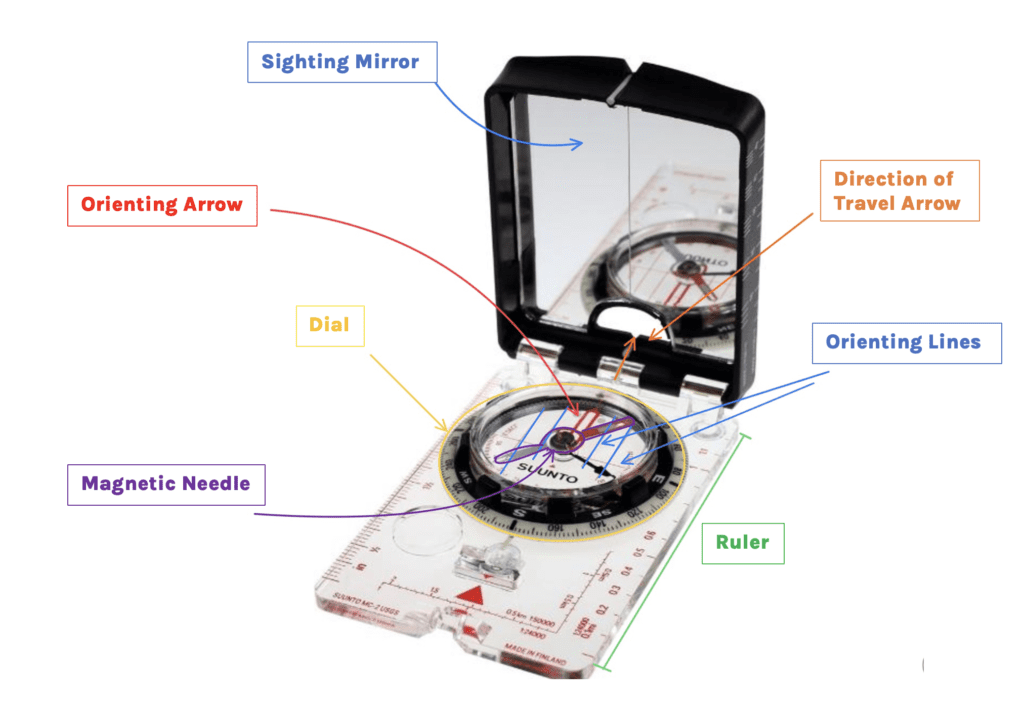
Compass
This is THE navigation tool and SO much easier to keep handy and pull out to check on where you are than a cell phone when the weather is bleak. If you did your homework and have a solid whiteout navigation plan, then you just need to follow your compass bearing.
Altimeter
Cell phone applications like the ones I mentioned above can provide you with altitude information, but it’s really nice to have an altimeter handy so you can easily reference it on the go. Also, watch batteries tend to last longer than your cell phone. There are quite affordable altimeter watches now that (if calibrated regularly) are quite accurate. Knowing your elevation is essential when navigating in a whiteout. I love COROS watches for their accuracy and mind blowing battery life.
How to Travel
Now that we’ve talked about where to travel and some tools to help you along the way, here’s some strategies and techniques to help keep the team together to your destination.
Handrails
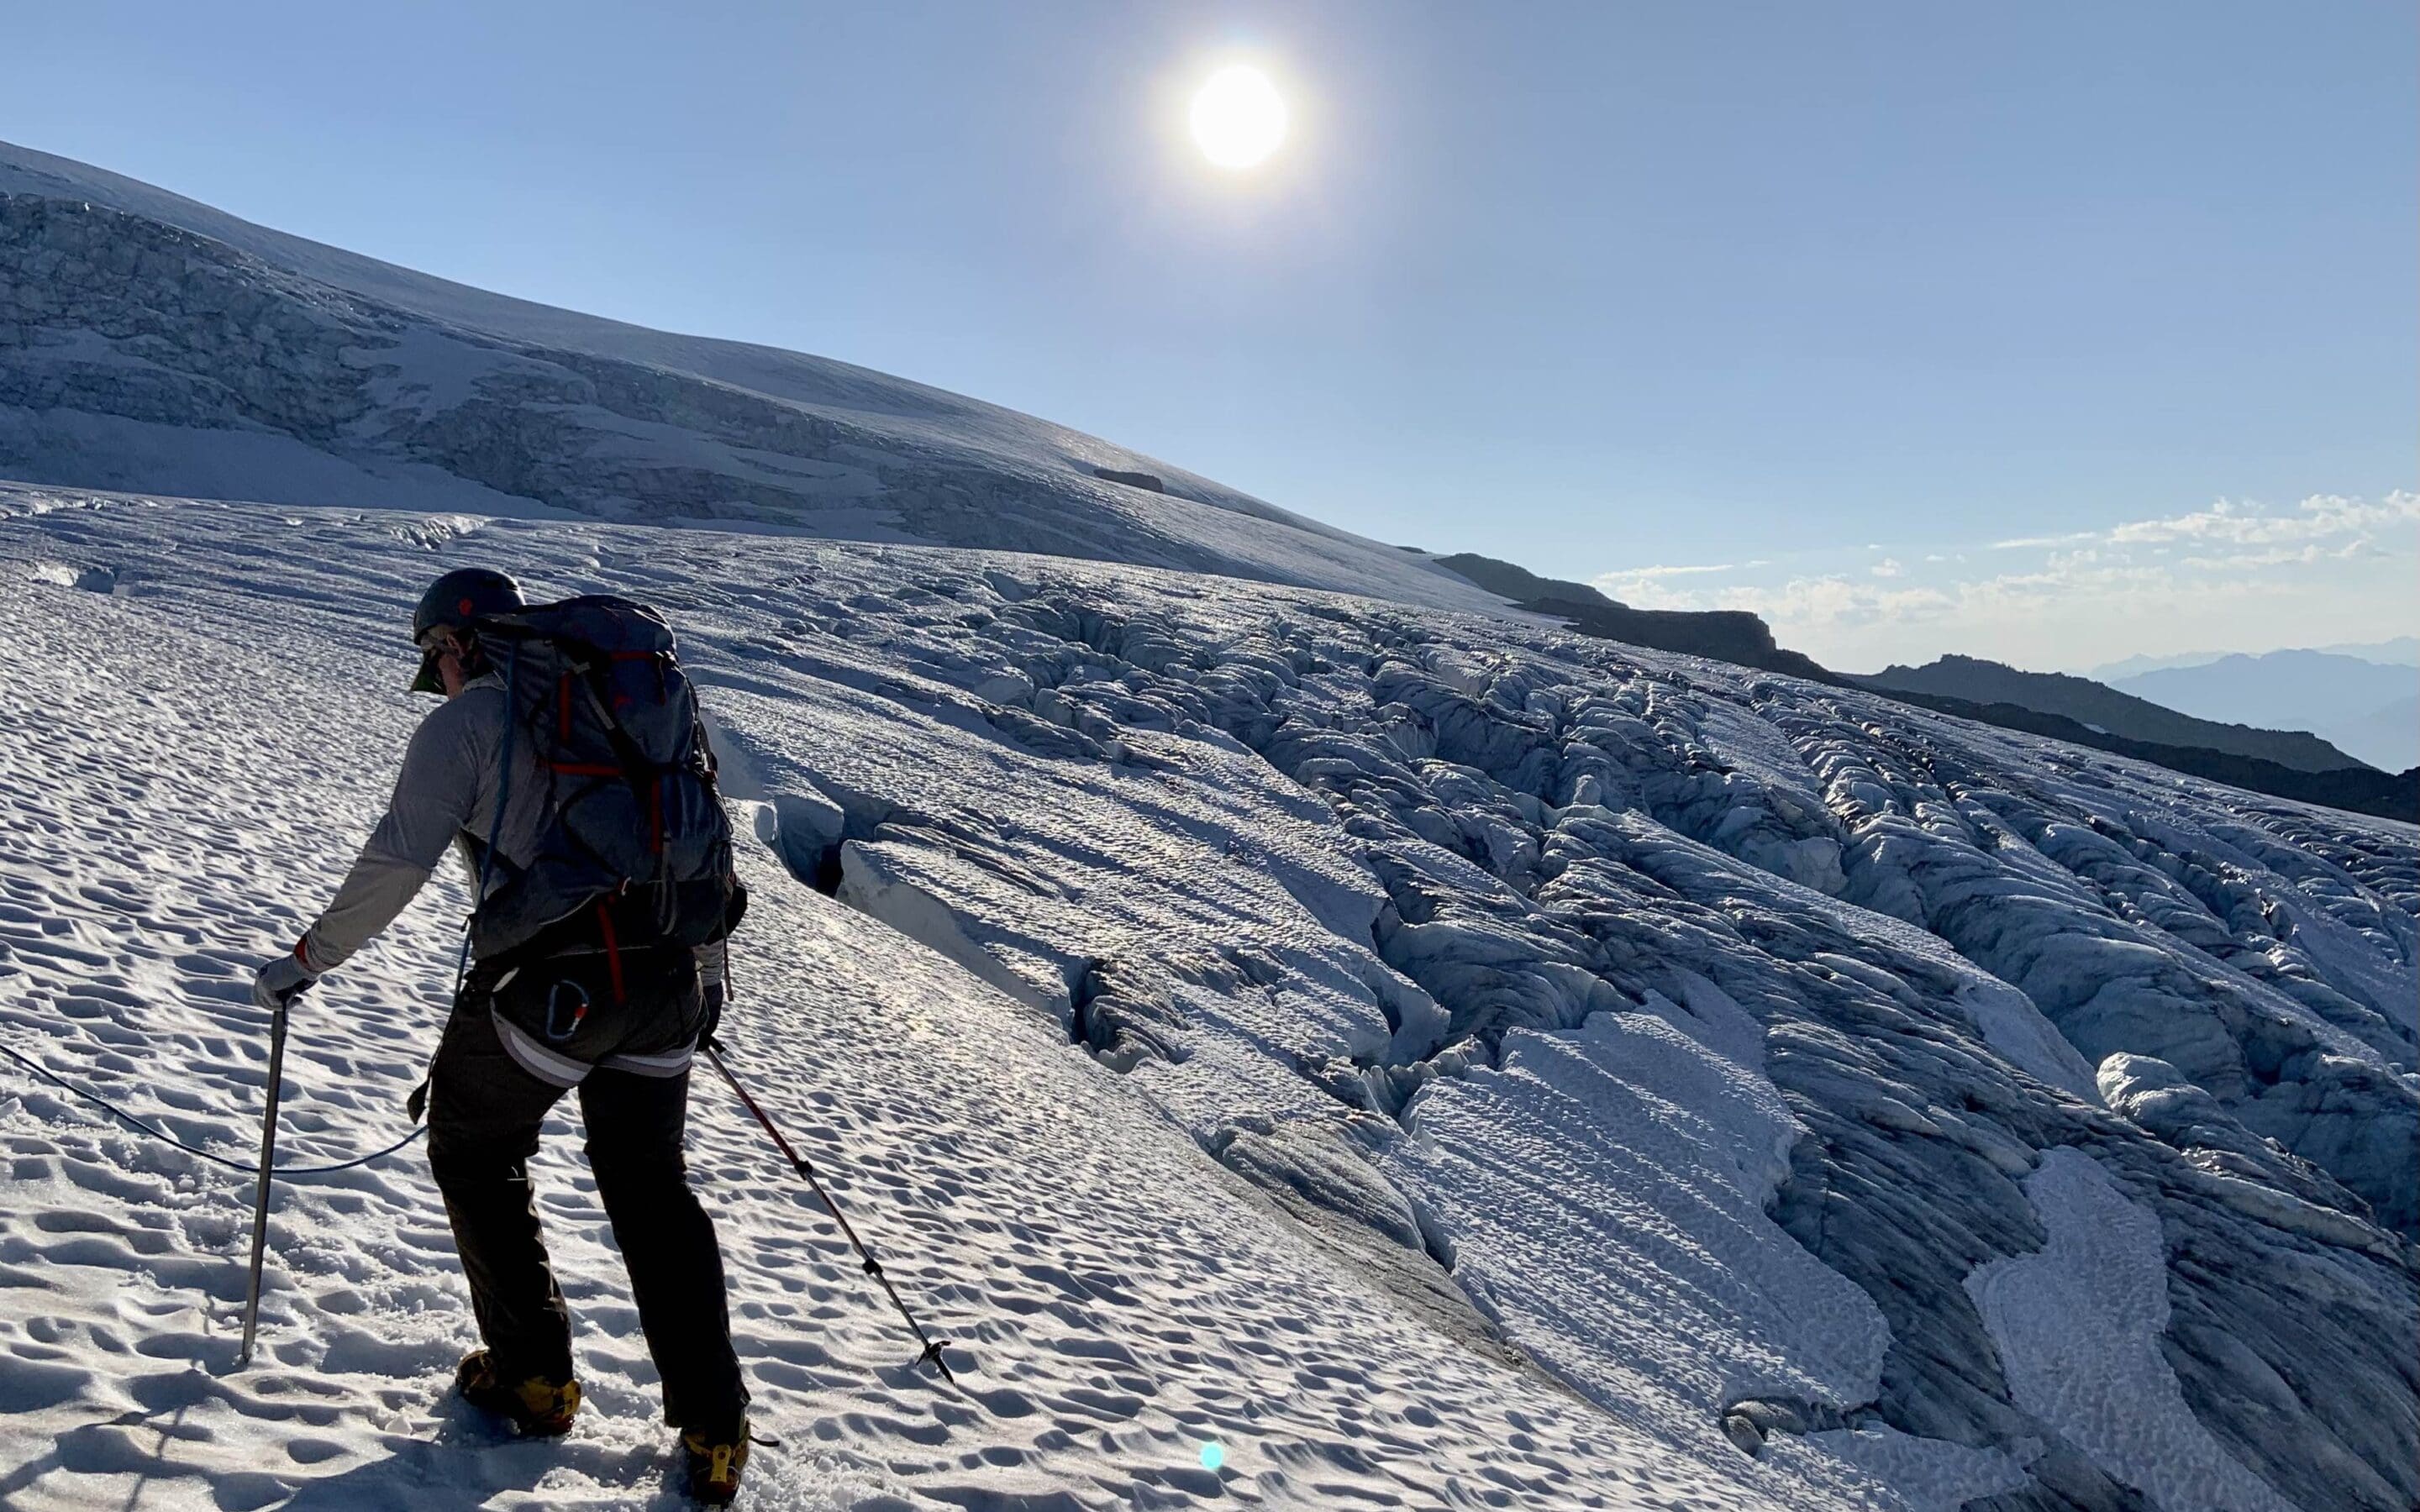
Just like a handrail up a flight of stairs, handrails in navigation are obvious physical terrain features that, once you latch on to them, will take you where you want to go. Examples of handrails you could use are roads, creeks/rivers, ridges, valley bottoms, and couloirs. These are all obvious terrain features that you’ll recognize when you hit them, even in a whiteout, and travel for great distances, allowing you to travel along them with the peace of mind that you’re going at least somewhat in the right direction.
Below is an example of a ridgeline handrail, or, more specifically, the top of the lateral moraine leading to the Easton Glacier route on Mount Baker. Even in a whiteout, as long as you don’t stray from the top of the moraine, you’ll make it where you want to go.

Bearing Off
Bearing off is when you intentionally take a bearing that is a few degrees (or more) off of your desired destination. You may be asking yourself why you’d intentionally take a bearing you know is off? Don’t we want to be precise and follow our bearings exactly? Yes, we should definitely try to follow our bearings exactly, but, being human, we’re prone to making mistakes and it’s impossible to actually walk in a straight line in a whiteout.
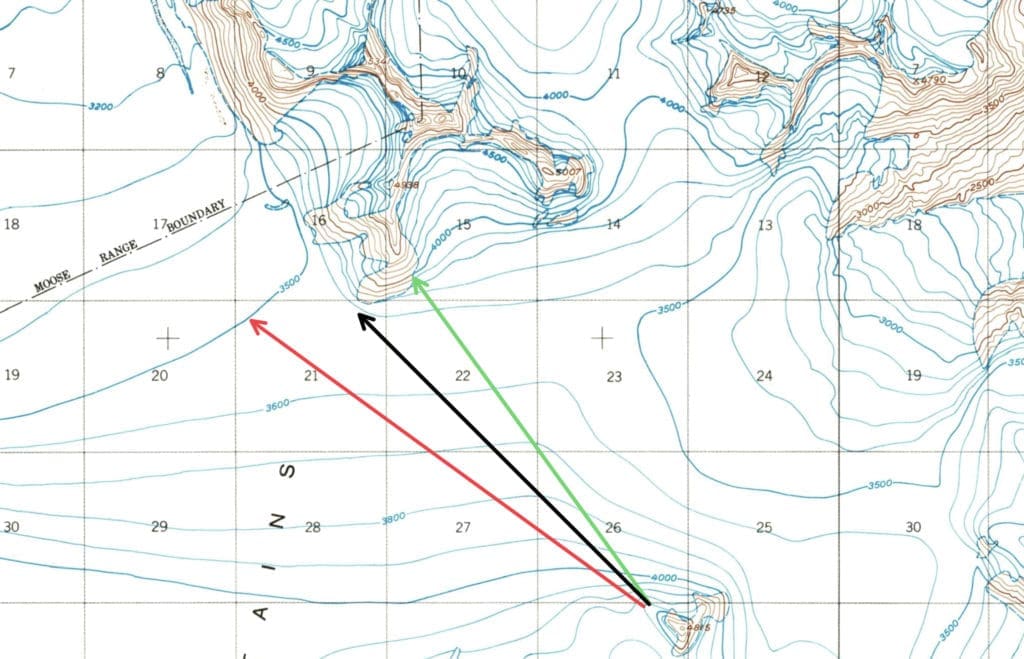
For example, I worked a number of years in Alaska for Outward Bound on the Harding Ice Field. This massive open expanse of snow and ice was commonly hidden from view as fog and low clouds continually plunged us into the ping pong ball. This was before I carried a GPS and all we had was map and compass to get us through.
To travel in this terrain, we had to be darned sure we were traveling towards some obvious terrain feature (Handrail) that we’d know when we hit it. There was no blue dot to show us where we were. So we’d take a bearing that was intentionally off (green arrow in the example below) in order to hit a feature where we needed to change direction. Where we actually wanted to go (black) would be easy enough to get to if we could see, but in a whiteout, if we missed the feature, we’d end up out in the middle of the ice field with no physical handrails to know where we were (red). Bearing off is just a way of building in margins for error.
Travel Techniques
Physical Markers
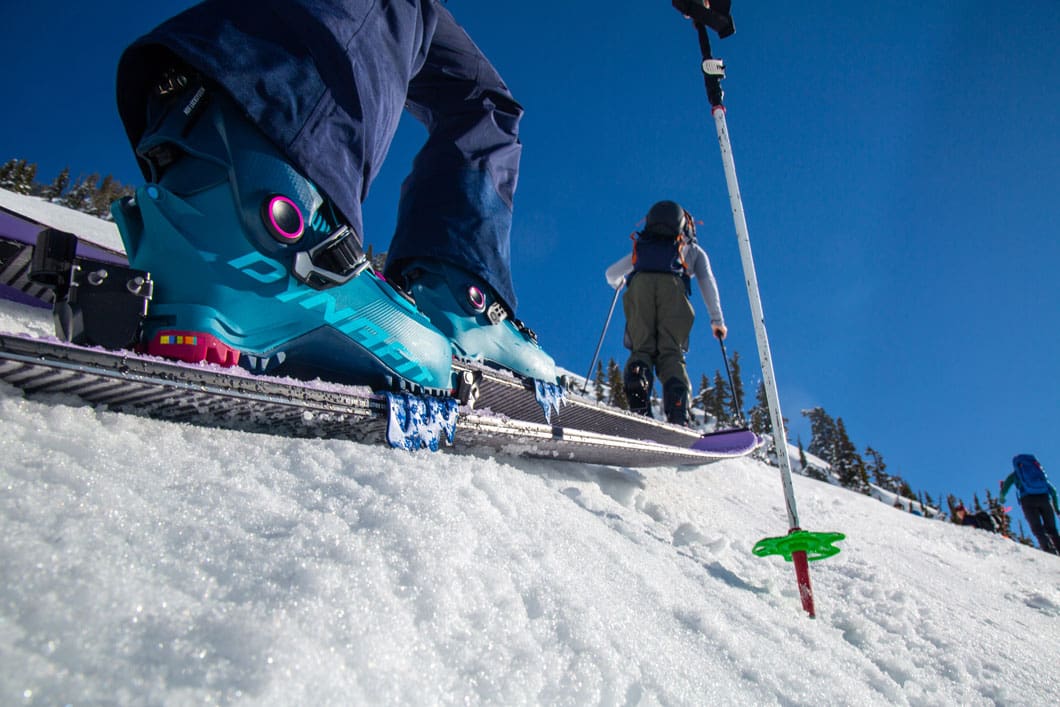
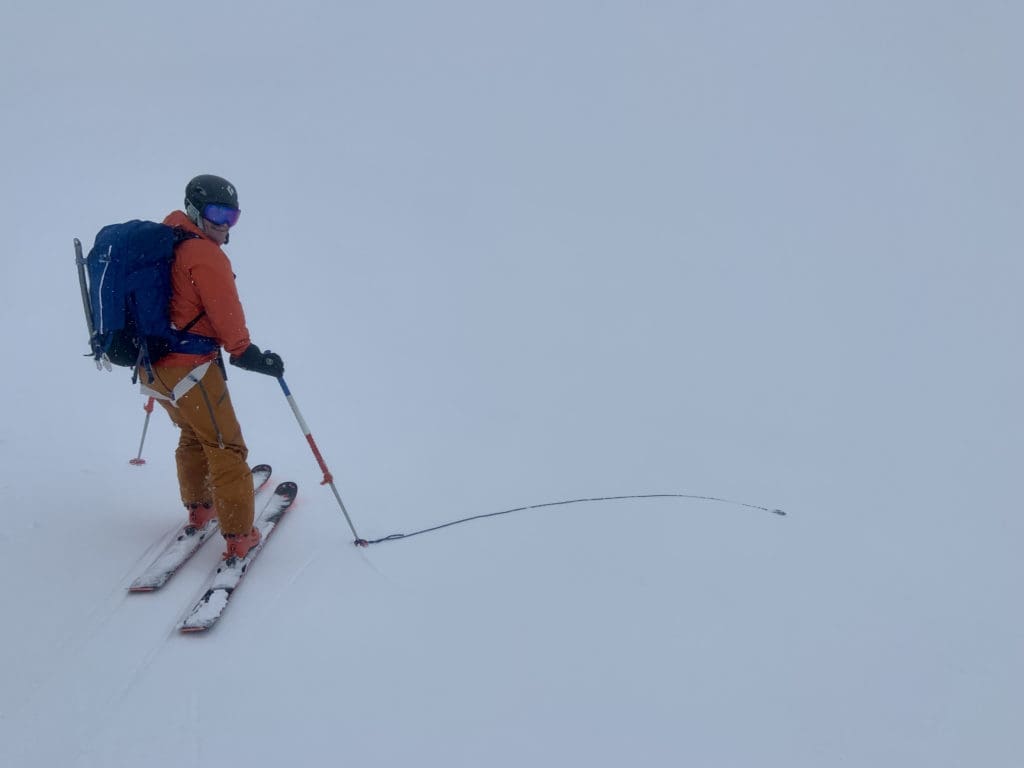
For you backcountry skiers and riders who’d like to be able to still ride in a whiteout, physical markers on the slope are a way to make it happen. You’re still not going to ride very fast, but it’s better than walking or skinning… usually.
Placing physical objects on the slope in a whiteout provides some contrast for our brains to cue in on and give us an idea of where our body exists in relation to that object. Here’s some common physical markers:
- Tracks: An often not thought of physical marker is your up track! In a whiteout, intentionally keep my switch backs tighter together in order to have something to look at on the ride back down. Your uptick also doubles as a handrail. Very convenient. Watch out though… sometimes in a big storm with a lot of snow accumulation your up track can get filled in before you head back down!
- Pole Toss: Toss a ski pole a little ahead of you on the slope and then ski to it. Pick it up. Repeat. Downsides of this are that you could throw your pole into a crevasse, down a steep slope or cliff, or other a thing where you lose your pole. You also have to ride without it’s assistance.
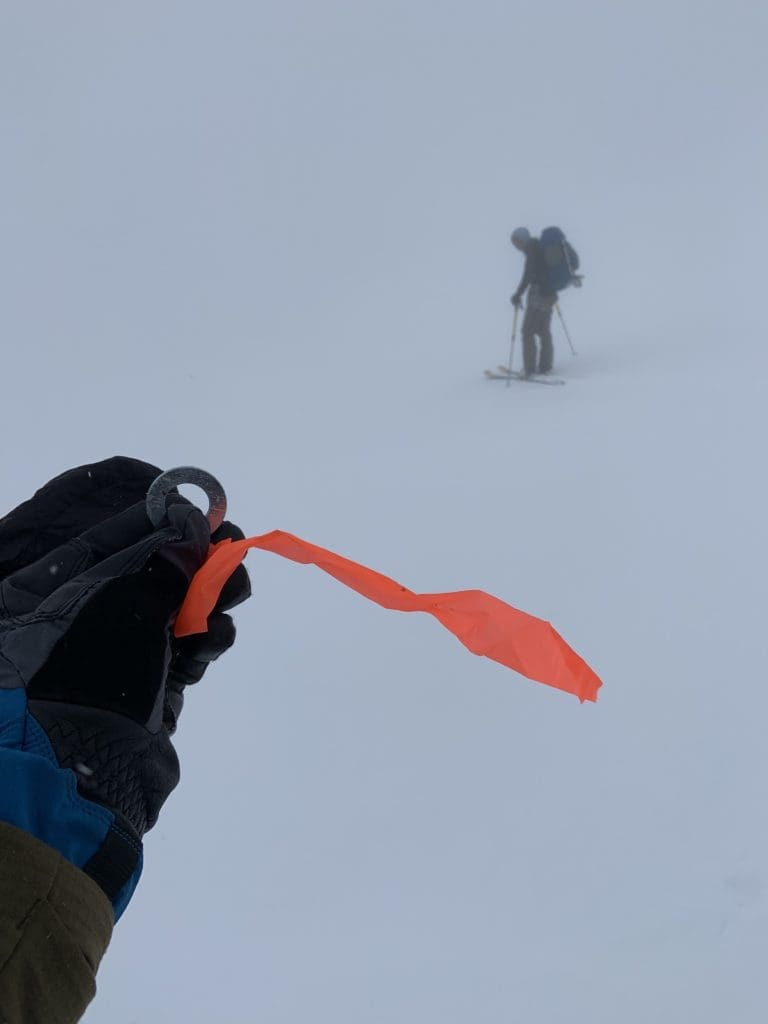
- Washer Whip: Utilize large washers with flagging tape around them (I like orange) tossed at regular intervals downslope. Skiing with multiple people, the first person can just concentrate on skiing to the furthest washer and the last person can then pick up the washers on their way by.
- Cordelette Fishing: Clove or tie one end of your cordage to the tip of your ski poles (this is great when you’re carrying climbing gear). You can then get in a pretty good flow of flipping the cordage in front of you, making a turn, flipping it again, making a turn… etc. Just watch out about skiing over your cordage! Your ski edges are sharp and it’s a quick way to retire that brand new cord you just bought by putting a core shot in it.
- Wands: Commonly in big, glaciated terrain, folks use wands as physical bread crumbs placed at regular intervals to navigate. I’m not a big fan of this in most contexts (thus why I put it last). If you do go this route, make sure you pick up your wands on the way back unless you need to leave them for other parties so they don’t just become trash on the glacier!
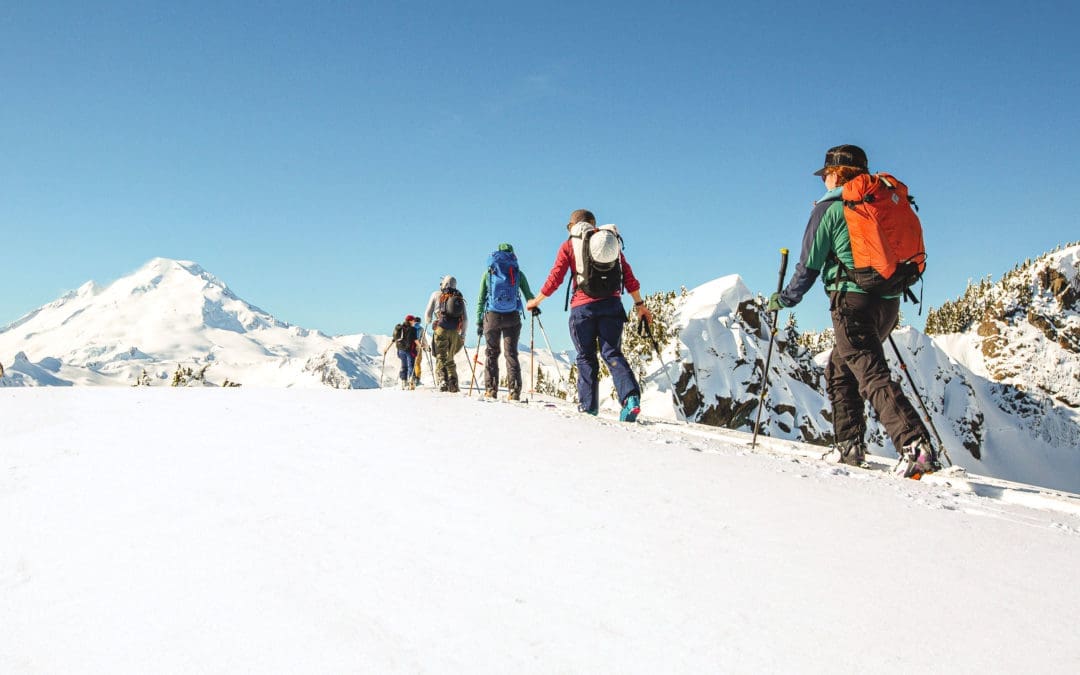
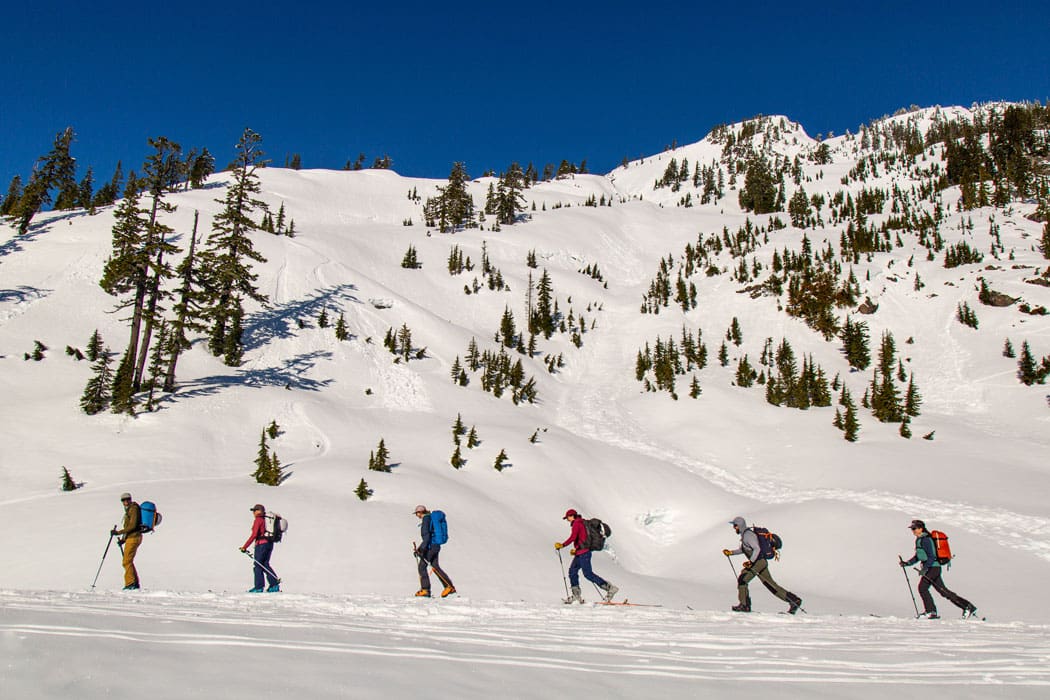
Iron Caterpillar
If this isn’t your default uphill travel technique, it should be! Stay tip to tail with the person in front and behind you so that the whole squad is together. Even if you’re not in a whiteout, it makes sense to keep the squad close together so that everyone can communicate needs, observations, and be involved in decision making. Exceptions to this are if you’re traveling in glaciated terrain in a whiteout. Since you definitely can’t see the crevasses, you’ll want to spread out so only one person is on a snow bridge at a time. If this is the case, it makes sense to then put on a rope. That way, you’re still traveling like a Caterpillar and staying together, just a larger one. If you’re curious about glacier stuff and how to rig your rope, check out THIS resource.
Check the Leader/Leap Frog
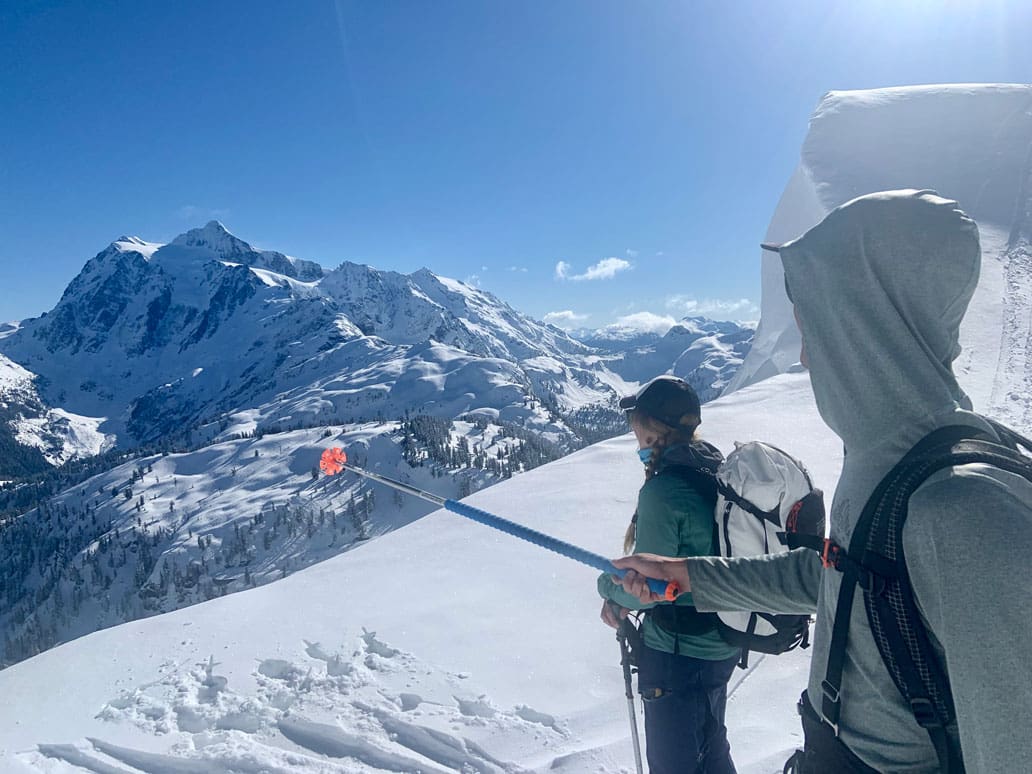
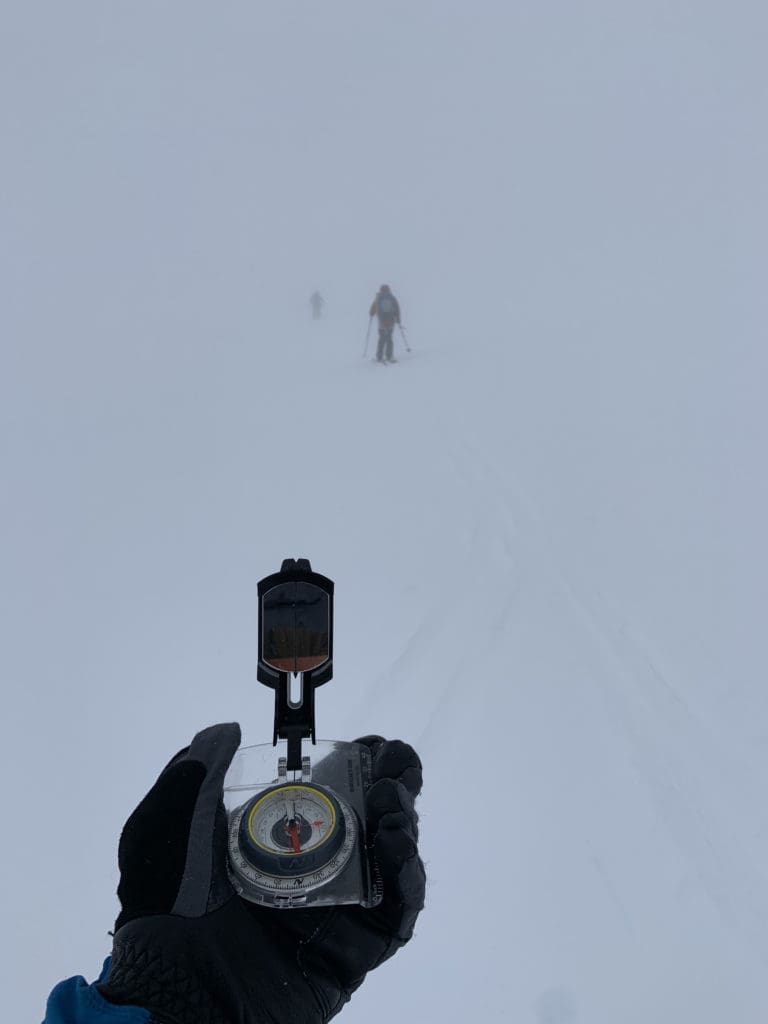
As I mentioned above, I’ve definitely walked myself in a circle on more flat terrain in a whiteout even though I thought I was mostly walking in a straight line. To avoid this, give the last person in your iron caterpillar the compass and bearing. Then, as you travel, they can regularly check the compass bearing against the leading person and adjust their direction left or right as required.
If there is only two of you, you’ll want to leapfrog. Simply have the leader walk along the bearing for a ways (usually to just before they’d go out of sight) while the rear person stands still and holds the compass bearing. The person with the compass can then tell the person out front to move left or right to be in line with the bearing. Once you’re happy that they’re where they should be, the back person can catch up to them, reacquire the bearing, and repeat.
Want to learn more about backcountry skiing or riding? Check out The Backcountry Skiing Guide. If you’re more interested in climbing, check out The Alpine Climbing Guide!