The Backcountry Skiing & Riding Guide
By: Zack McGill
Welcome to the Backcountry Skiing Guide! This is a living document that consistently updates with the latest and greatest in the industry. For you climbing addicts, the The Alpine Climbing Guide is same-same but for alpine climbing!
At Cascade Mountain Ascents, we believe that open communication, collaboration, and education are the keys to enjoying the outdoors responsibly and safely. This Backcountry Skiing & Riding Guide will:
- Provide a path to build the expertise required to enjoy backcountry skiing and riding.
- Be a resource for experienced backcountry travelers to brush up on the latest and greatest.
- Be a living document that will constantly update as things progress in the industry.
We hope reviewing this resource at the start of each season becomes a part of your ritual.
How to Use The Backcountry Skiing & RidinG GUIDE
This resource is broken down into five sections:
- Types of Backcountry Skiing & Riding (What is possible?)
- Gear (What do I need?)
- Skills/Techniques (How do I do it?)
- Planning Resources (When and Where do I go?)
- Continuing Education (How do I get better?)
Each section contains a summary with some of the more important components of what is being discussed with a link to a more in-depth resource on each topic. All of us at CMA come from outdoor education backgrounds, so the information is not only useful… but hopefully engaging. In each resource, we provide our thoughts and experiences on the topics, industry best practices, and links to additional articles, videos, and blogs we’ve found that already do a great job at explaining the concepts.
How you navigate this resource is up to you and your learning process. If you want the easy to digest summary because you’re new to backcountry skiing or riding, you’ll likely not stray far from this resource. If you are used to placing bets in the backcountry and have years of experience, you probably stopped reading this at the sections links and are on to whatever specific thing you came here to look up. You do you Boo-Boo.
Oh, and if you don’t see something in this resource that you want to learn more about, please let us know. We’re psyched to answer your questions. For real… email us. Please. Please do it.
Much love,
The Collective at Cascade Mountain Ascents
Types of Backcountry Skiing & Riding
(What is possible?)
“It always seems impossible until it’s done.”
– Nelson Mandela
Approaching the Impossible
If you’ve never traveled in the backcountry winter environment with skis or a board or have limited experience there, entering that world can be daunting. It should be! There’s a lot to know. How the gear works, what layers you need, avalanches, tour planning, not to mention the financial investment… entry into the sport can seem impossible. Don’t worry, we’ll start simple with what types of backcountry skiing/riding are out there and build from there.
Most simply, there are four different ways to enjoy the backcountry on your skis or snowboard. Backcountry touring, ski/split mountaineering, traverses, and mechanized skiing and riding. This section introduces you to each of these types of backcountry skiing and riding so you can decide what gear, training, and sections of this resource to invest time and money into. Or not… you can always decide to bail and that’s fine too. This game is certainly not for everyone.
Backcountry Ski and Split Touring
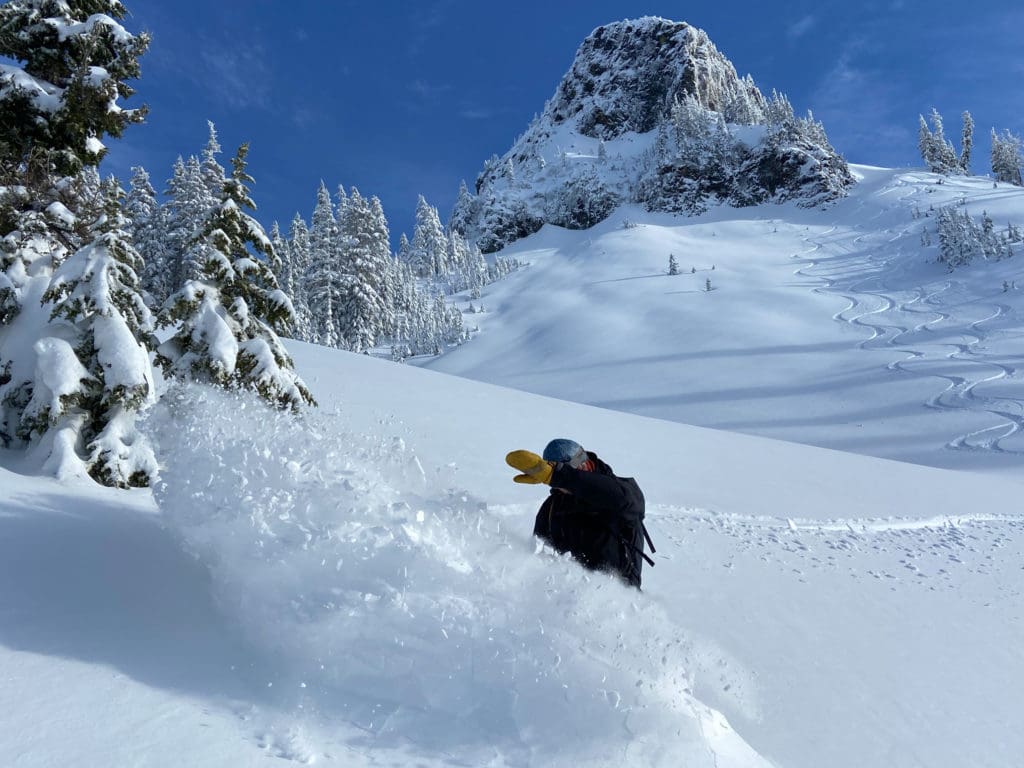
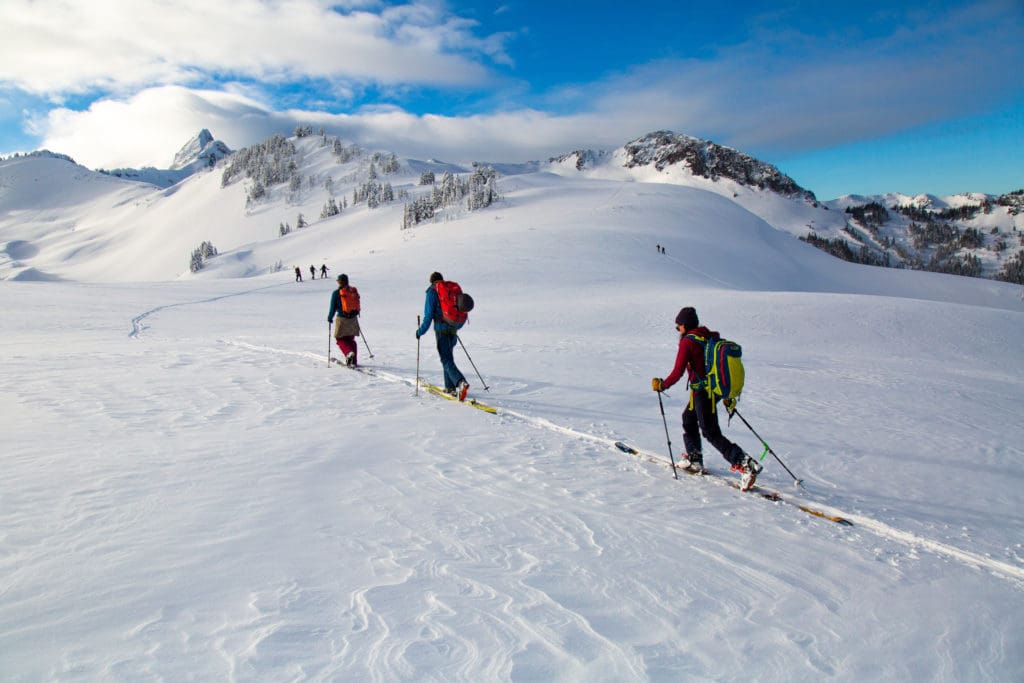
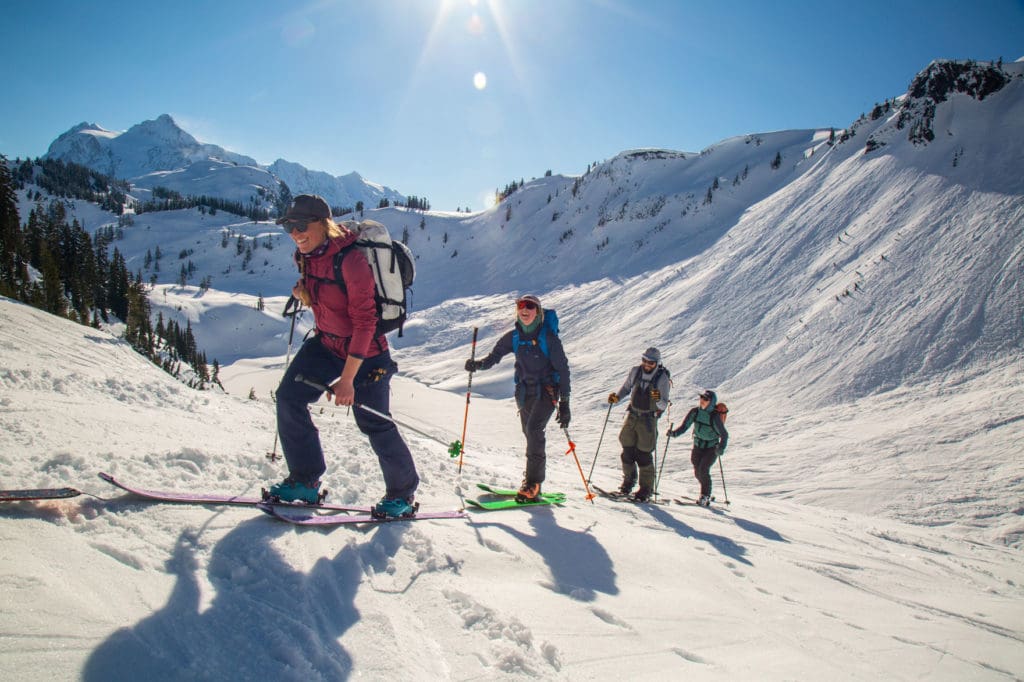
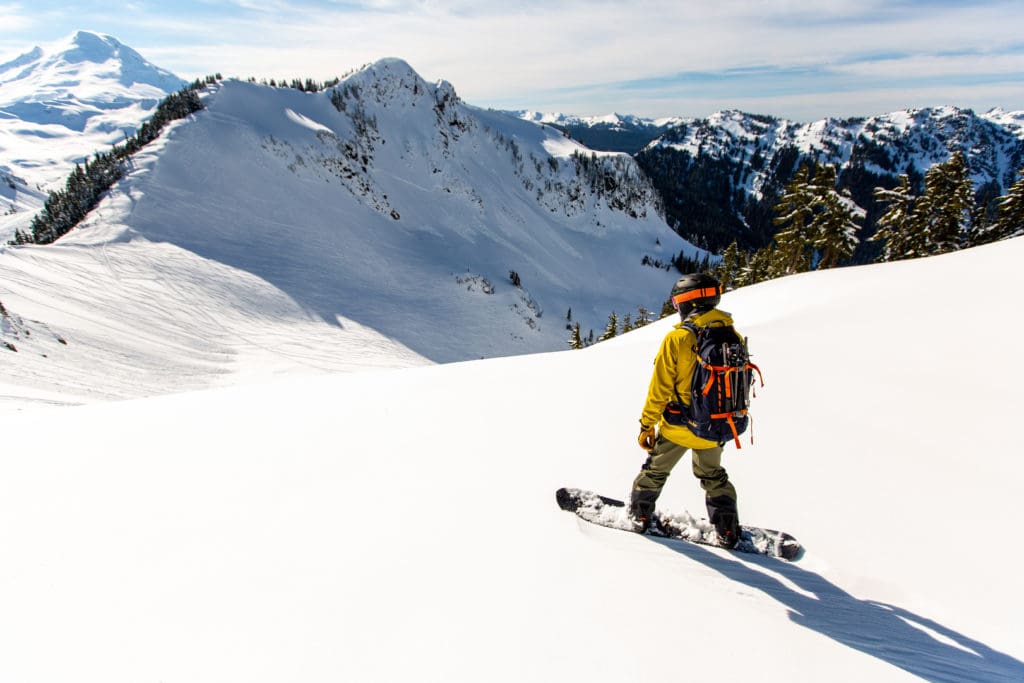
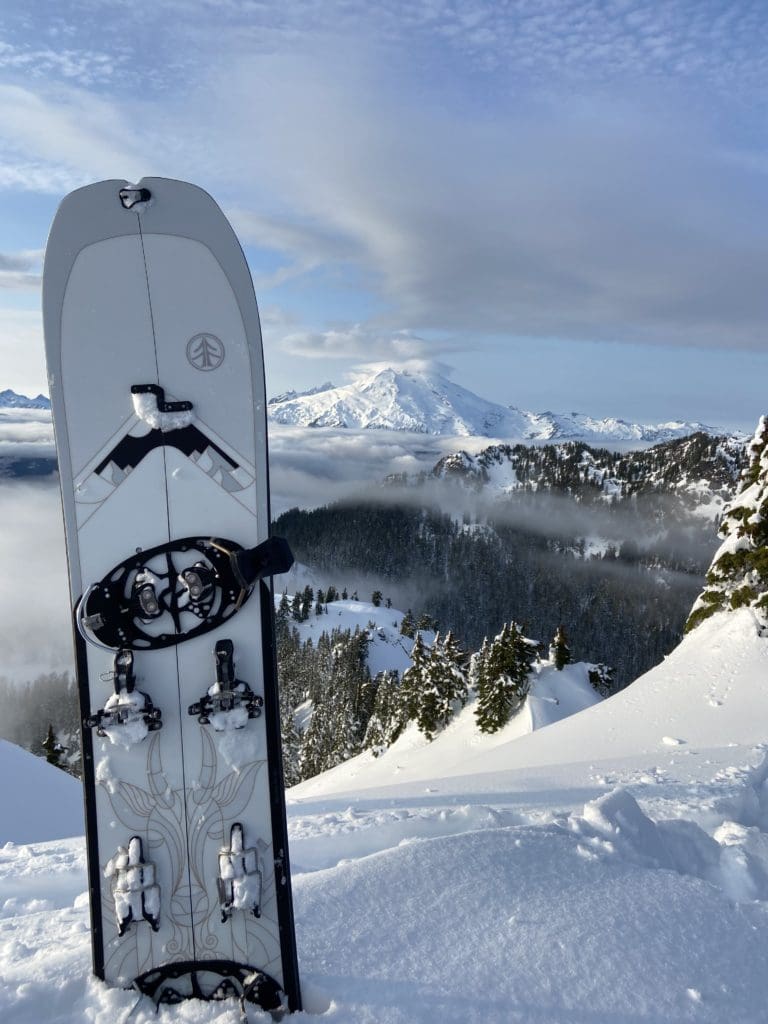
There are many humans on this planet who will never get the allure of backcountry ski and split touring. Besides the ride to the trailhead, backcountry touring is entirely human powered. That means no ski lifts, snowmobiles, or other mechanized forms of travel.
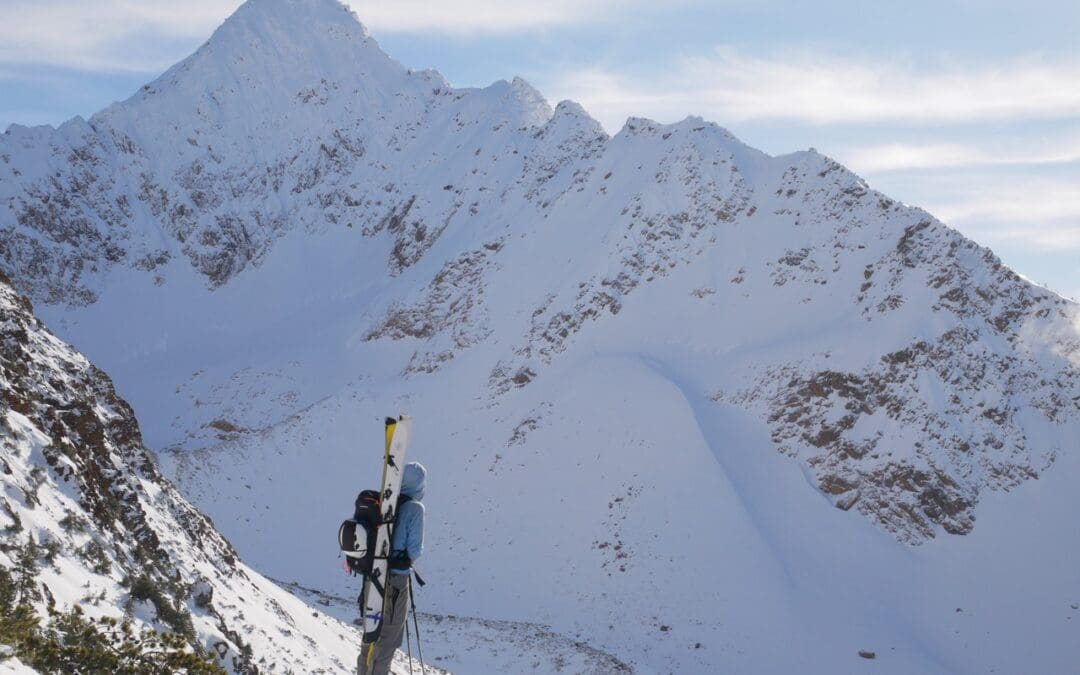
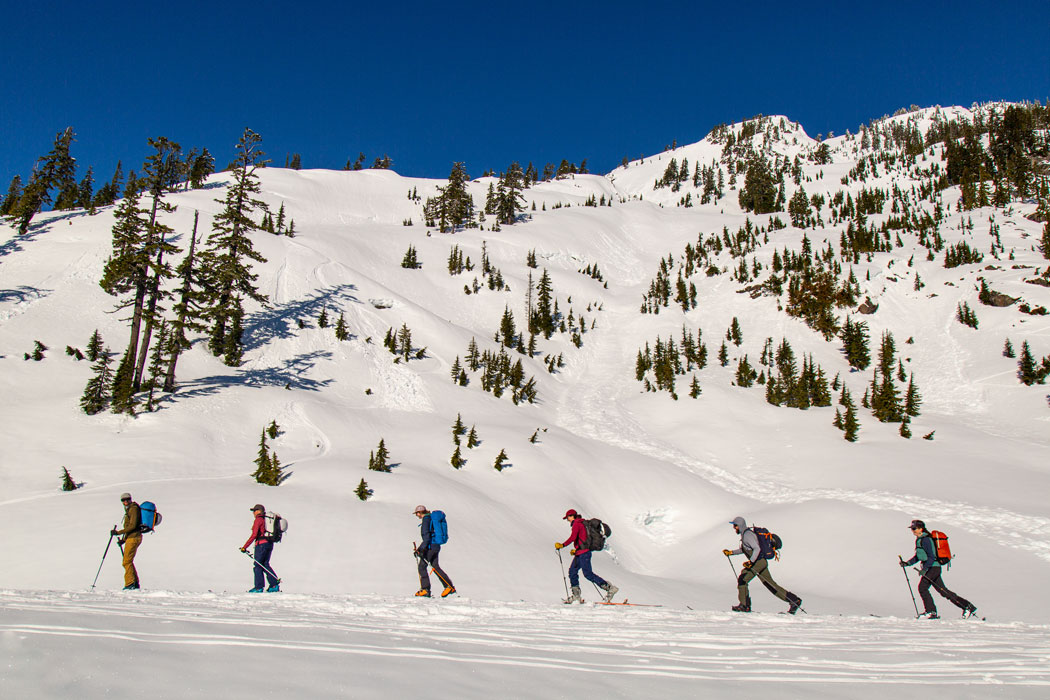
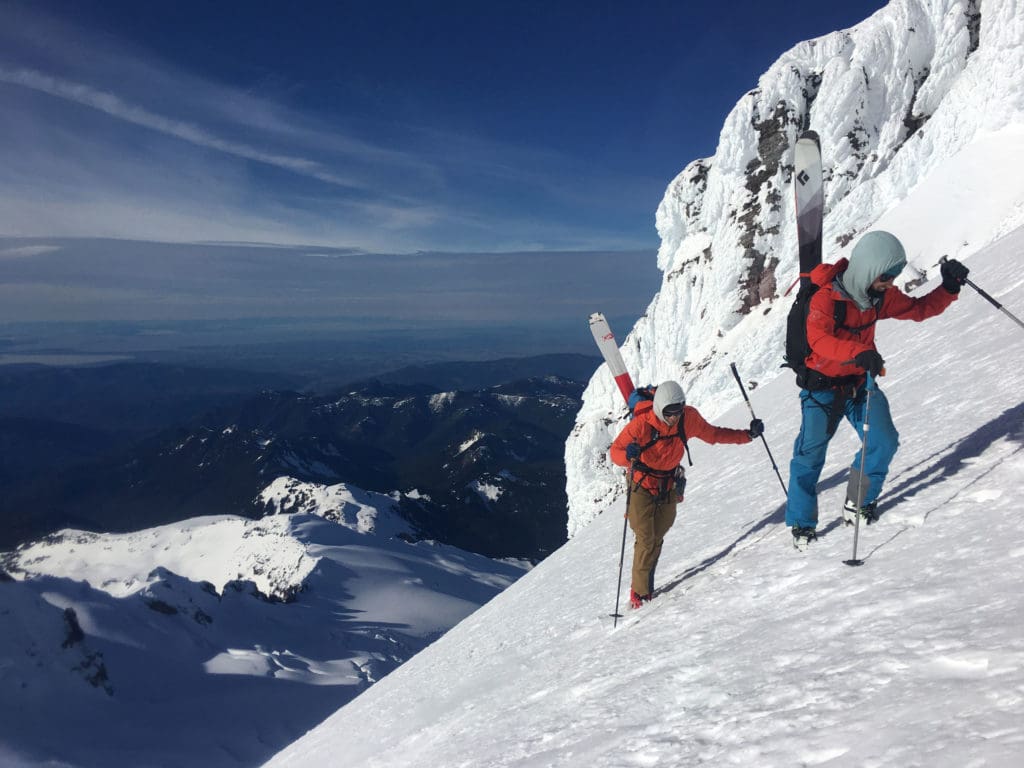
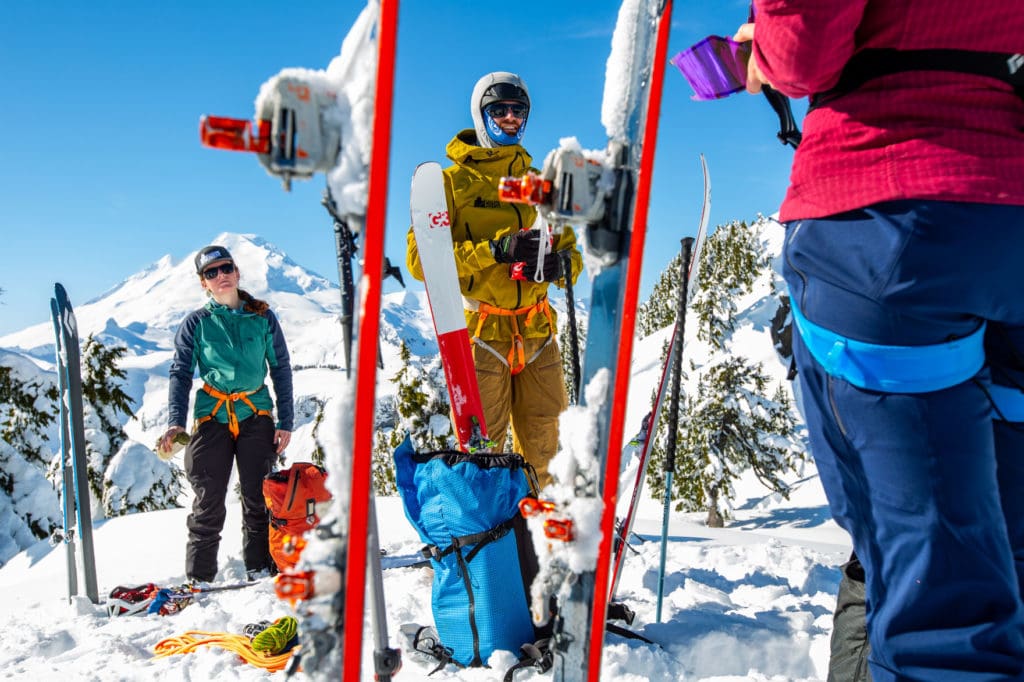
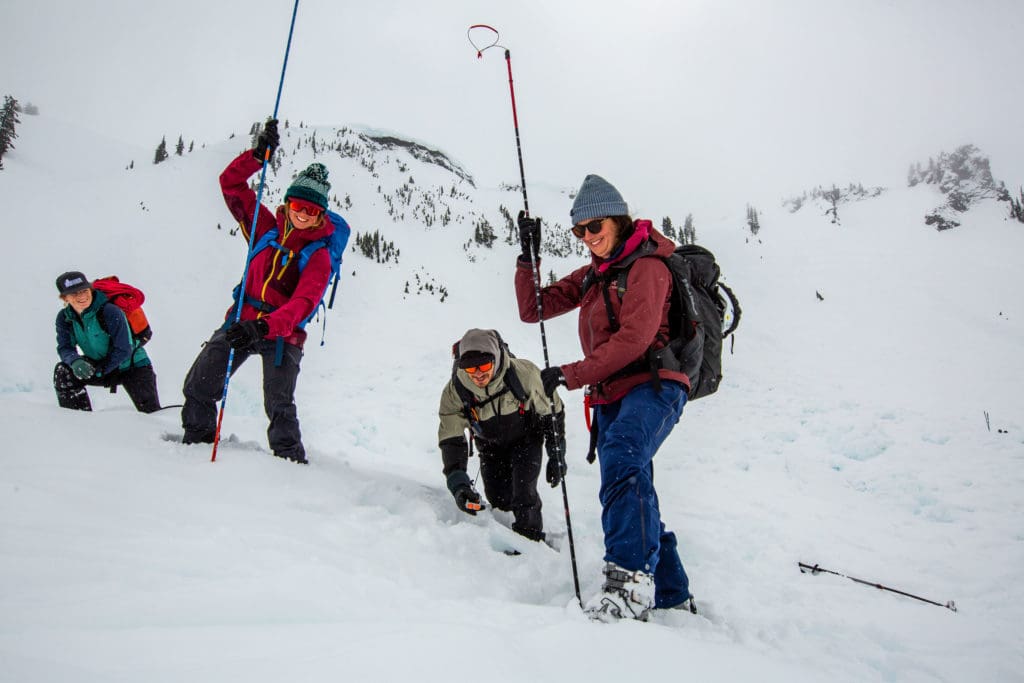
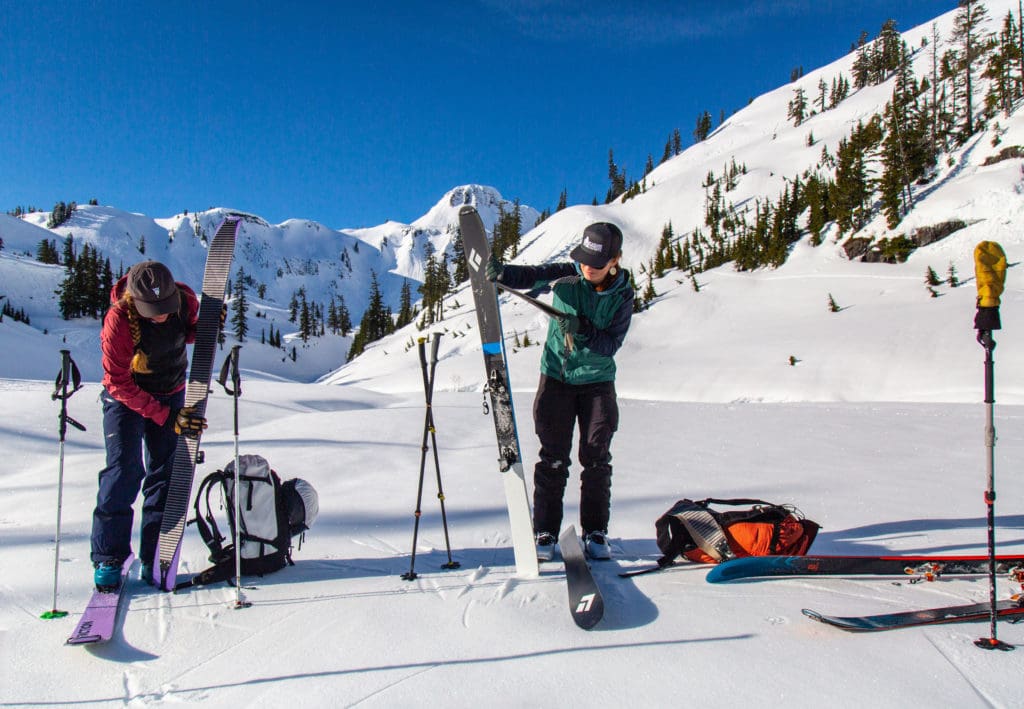
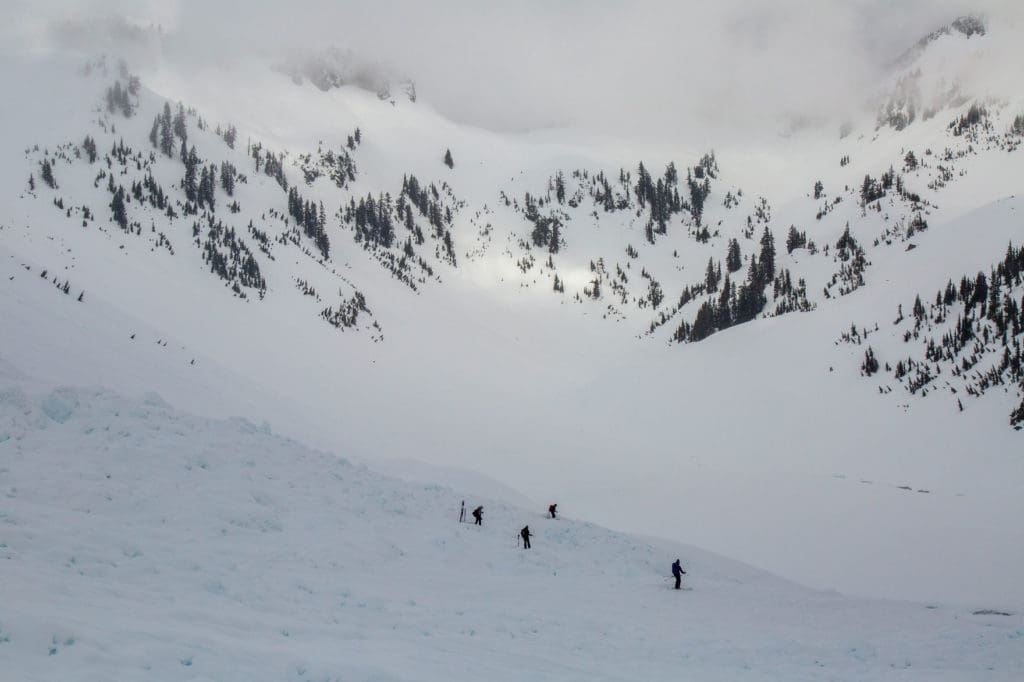
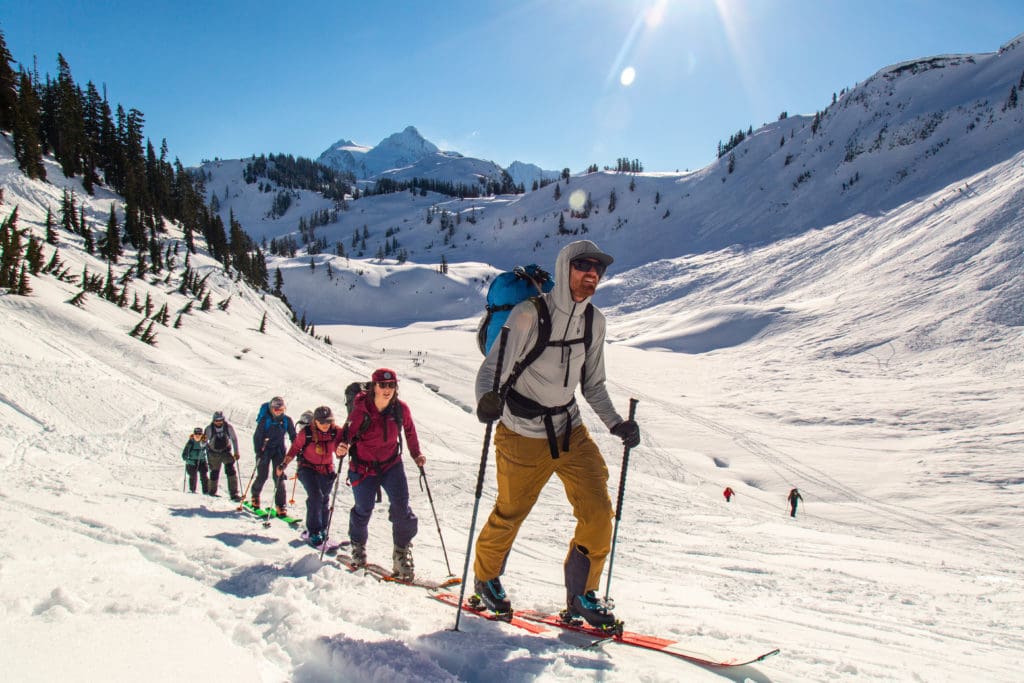
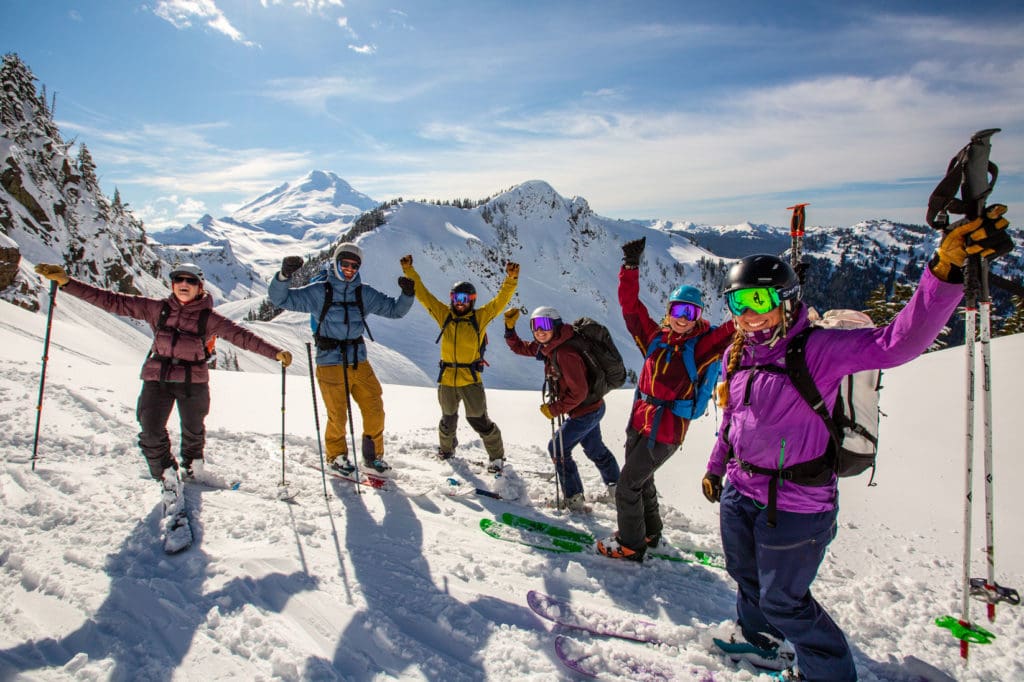
Similar to non-climbers trying to understand why you’d climb a cliff that has a trail or road to the top, folks wonder… “Why walk uphill in order to ski!?” As if we’ve never heard of a chairlift or hot chocolate in a warm lodge. In the world of backcountry touring, it’s not just about the down. In fact, the majority of your day is spent climbing, so for those of you that enjoy walking uphill, this activity is a delight. Just look how happy the people are in the photo below. So many endorphins!
Backcountry touring is often done “off piste,” as the Euros say, or outside of ski resorts in uncontrolled terrain. This means you’re in charge of your own safety and the safety of your group, and no… you can’t carry your own explosives to mitigate avalanches, you just have to avoid them.
That said, many ski resorts are starting to allow users to travel uphill in bounds at certain times and on marked uphill routes. Sadly, some ski areas that initially allowed uphill access have since rescinded that option after some backcountry users (booooo) failed to respect posted policies (not picking up their dog’s poop, traveling outside of designated up tracks, and touring outside of hours to name just a few no-no’s). Bummer.
Anyway… backcountry touring is the first born of Nordic and alpine skiing. It is a combination of both, but embraces sub disciplines like telemark and Randonnée. The defining characteristic of backcountry touring is that your heels are free (not bound to your boards) so that you can make uphill progress without looking like you have big, dumb snowshoes on your feet. Once at the top of a slope you want to ride, you can then lock in your heels as a skier (unless you’re into that telemark “free the heel, free the mind” stuff), or put your split board back together as a snowboarder.
The explosion in popularity of backcountry skiing and riding since COVID is mind boggling. With folks tired of Vail’s hostile takeover of all snow on the planet and paying $200 per day to stand around in lines, and the alure of fresh snow and fewer people, how could it not? That said, there are many barriers for entry into the sport. First and foremost is the price tag.
Even if you’re buying most things used (which you should totally do) you’ll spend between $1,000 and $2,500 for all the essential gear. Touring, similar to hiking and backpacking, also requires navigation and route-finding skills but with the added complexity of navigating avalanche terrain. It’s a lot, but nowhere near the complexity of our next type of backcountry skiing and riding: Ski and Split Mountaineering.
Ski and Split Mountaineering
Ski and Split Mountaineering is a blending of backcountry touring described above and mountaineering. As such, the skill set required expands beyond navigation, walking good, and knowledge of avalanches to include technical rope systems, anchor building, and rescue techniques (especially if you’re going to ski or ride in glaciated terrain).
That said, ski and split mountaineering does not always involve ropes and there is no clear delineation between touring and mountaineering. If we had to choose a line, it’s that ski and split mountaineering is typically objective based (Gnar Portal Couloir on Mt. Scary Sick), AND the objective necessitates a much broader skill set and deeper level of mountain sense.
If you are a solid backcountry skier or splitboarder who wants to get into the world of ski mountaineering, then it’s time to focus on mountaineering. Check out The Alpine Climbing Guide if you’re new to that game. You need to be as comfortable off skis/board as on them. Often, skiers and riders look pretty good until they have to unclip from their equipment and climb or walk in steeper terrain. Holy baby giraffe legs.
You’ll need some mountaineering equipment: climbing helmet (that’s also rated for skiing/riding), rope, harness, crampons, and ice-ax, but also a climbing skill set. Spend some time to learn the essential Knots and Hitches, go climb at the gym to figure out balance and movement, get fit AF, and find a mentor.
Ski Traverses
Traverses involve tons of touring and often involve ski mountaineering since they likely occur in mountainous terrain, but they’re unique enough to earn their own category. Usually for backcountry skiing and riding, you start and end at the same place. For traverses, you travel longer distances often over multiple days and sometimes end up in a completely different place than where you started (though not always).
Some traverses like the Watson or Forbidden Traverse here in the Cascades get done in a day where others like the Haute Route, Silvretta, or Spearhead Traverse take multiple days to complete. The Coast Range Traverse is a multi-month endeavor that takes tourers from Squamish, BC to Skagway, AK over 1,429 mile, so even traverses themselves can be in different leagues. The main difference between traverses and the other types of backcountry skiing and riding is that traverses allow you to access terrain that is otherwise too remote to ski or ride… unless you have an airplane or helicopter to help you (more on that next).
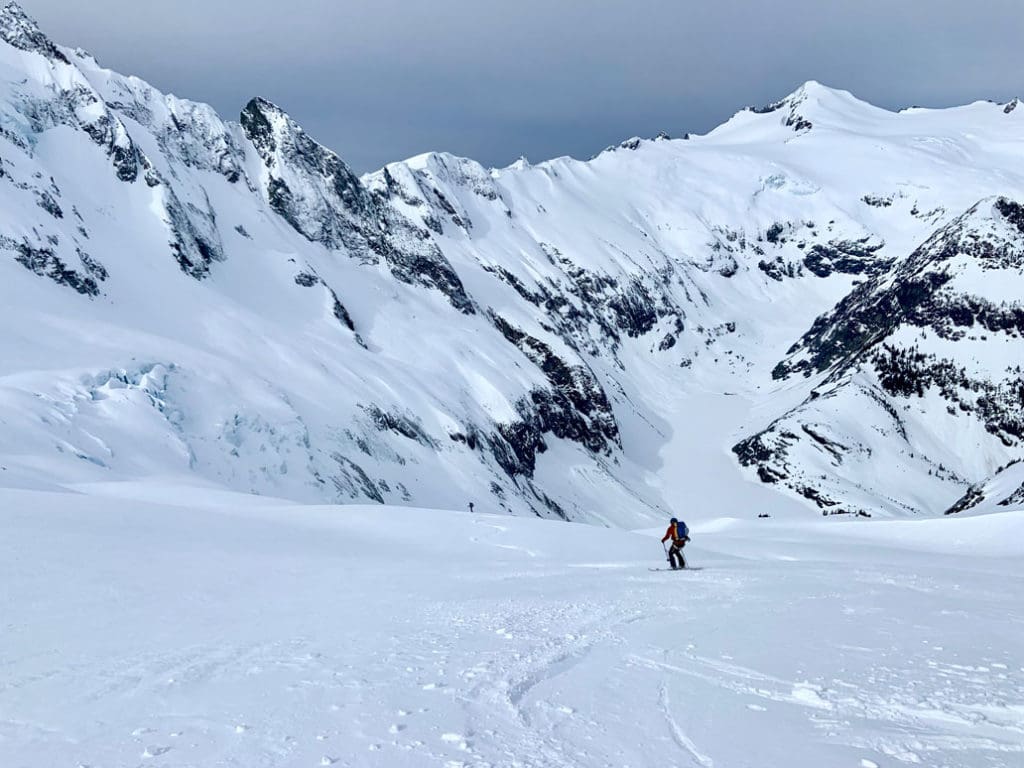
Some traverses have well maintained huts that create ease of access and amenities that enable smaller backpack sizes. In the alps, for example, you just need a sleeping bag liner to use in the beds at the huts, all food is provided for you besides some snacks, and there’s good beer on tap. In the Cascades, we don’t have a sweet hut system. The terrain is extremely rugged and requires participants to carry everything they need on their backs. You ever try to ski with a 50-pound pack? It’s a different world. Better start practicing if you want to explore the North Cascades with its seemingly endless backcountry lines and traverses.
Mechanized Skiing and Riding
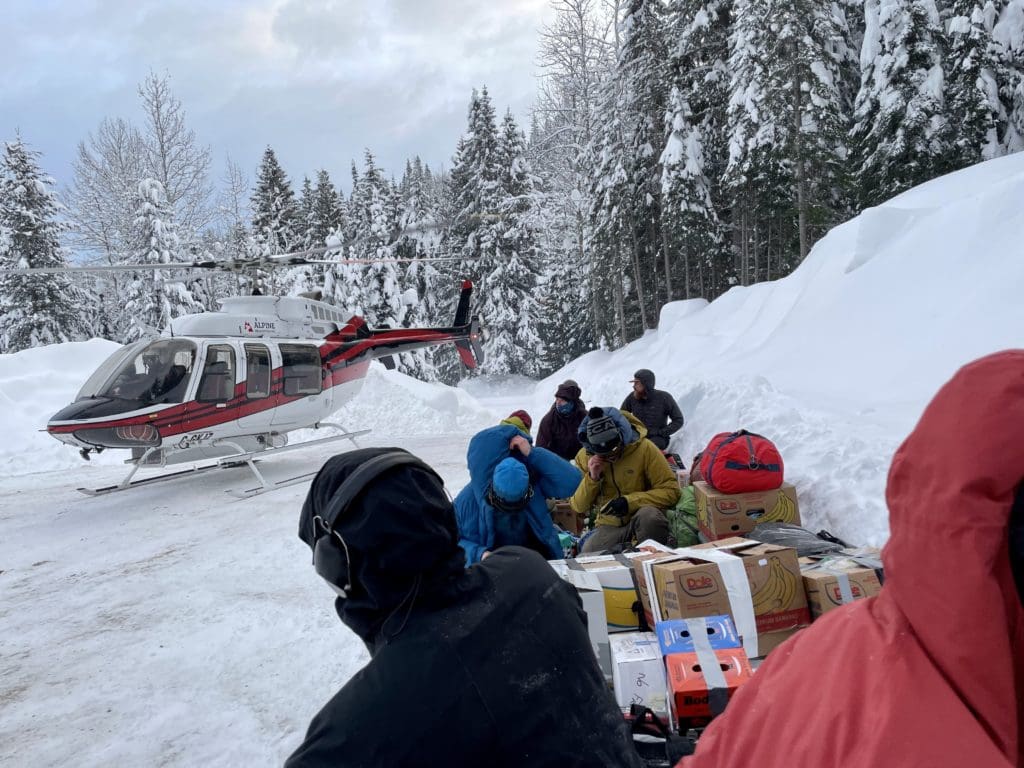
Mechanized backcountry skiing and riding uses the power of machines to aid humans in the uphill portion of adventures. Purchasing snowmobiles or paying for a ride on a helicopter increases the price and environmental impact of your backcountry adventure by leaps and bounds, but hey… it’s really fun, so worth it? When you get to spend a week riding with 19 of your friends out of a remote hut in BC with no one else around, it sure feels like it!
Mechanized travel is the opposite of touring but is still in the “backcountry” since it often occurs in uncontrolled avalanche terrain. Some helicopter operations do avalanche mitigation with explosives, but not to the extent that ski resorts do since helicopters have access to a much larger swathe of terrain than just a single mountain at a ski resort. You can’t just drop bombs on everything!
Riding lifts or trams at resorts to access “sidecountry” like the Shuksan Arm at the Mount Baker Ski Area is probably the most cost-effective and least environmentally impactful form of mechanized riding. Folks just ride the lifts up and then walk or skin out the ridge to wherever they want to drop from.
Beyond riding lifts, folks can take snowmobiles, snowcats, E-bikes, ski planes, and helicopters to get into terrain. Mechanized skiing and riding is often through a guide service since the cost of purchasing and operating helicopters and snowcats is immense, but snowmobiles and E-bikes are cheaper options available to the layman to get out deeper into terrain. That said, maintaining and riding snowmobiles (sleds) is an endeavor in and of itself and E-bikes are really only good for spring time missions. The first few times you use a sled to go backcountry skiing or riding, you’ll likely spend your entire day learning how to ride the thing and get it unstuck than skiing or riding.
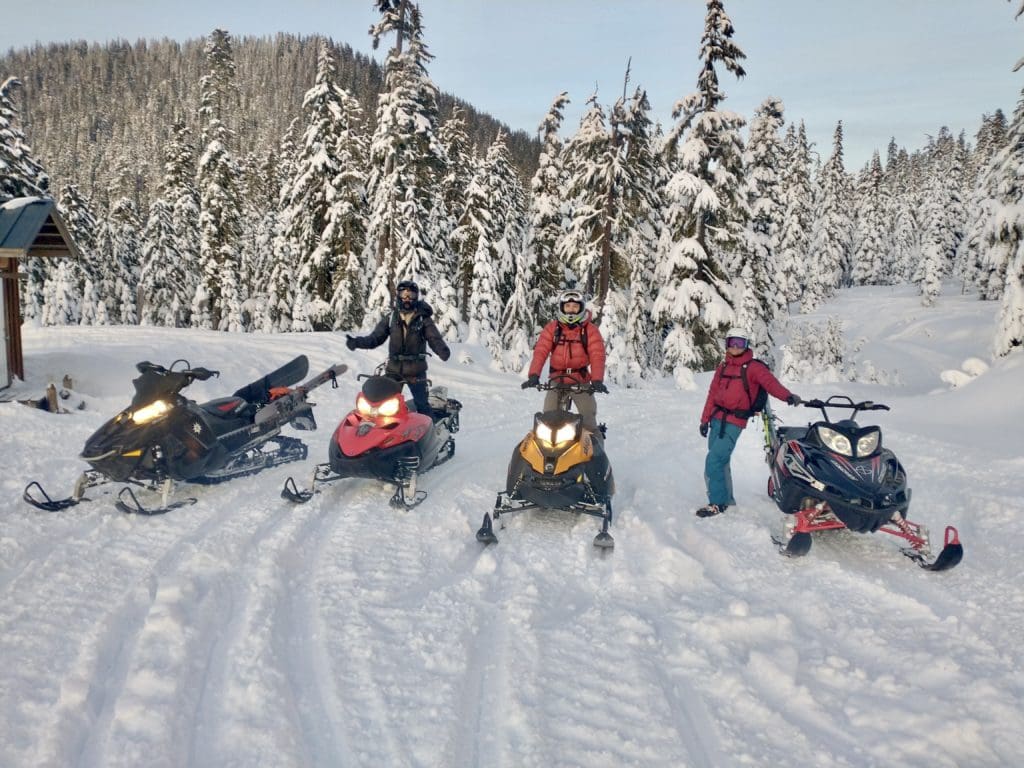
Like anything else, however, you’ll probably eventually get it. Probably. Then you can decide how you want to operate: Use the sled as a tool for access, use the sled for laps, or just go ride the sled and screw the walking stuff. Whichever route you go on a given day, just make sure to respect public land regulations. Machines aren’t allowed everywhere, and you risk $5,000 fines and jail time if you enter wilderness.
That said, there’s likely not going to be a ranger standing at the wilderness boundary to ticket you (they are VERY understaffed) so folks routinely knowingly choose to ignore wilderness boundaries and ride their sleds into closed areas. Don’t be these people. Wilderness boundaries are there specifically to limit human impact on an area. Riding your big, loud snow machine through an alpine meadow might be the most impactful thing a human can do there in the winter. Don’t be a dick.
Don’t get us wrong, we LOVE riding snowmobiles, but there’s plenty of places to ride in Washington that aren’t in wilderness areas. If the shaming, jail time, and risk of a hefty fine don’t motivate you enough to not ride in wilderness, there’s precedent for snowmobile access to be restricted in non-wilderness areas because of the actions of some motorized users entering wilderness areas. Don’t ruin things for everybody else!
Gear for Backcountry Skiing & Riding
(What do I need?)
“Tell me what I want, what I really, really want”
– Spice Girls
Essential and Non-Essential Gear
The dopamine hit of hitting that “Buy Now” button and pulling the trigger on purchasing that a new, sexy piece of gear is real, but so is the price tag. In this section, we’ll delve into what gear is essential vs non-essential for backcountry skiing and riding, what it does, and why it’s important. Below you’ll find the list of items that include some commonly overlooked essential items (like a repair and first aid kit). If you know what you’re interested in learning more about, just click the link below.
Avalanche Transceivers | Snow Shovel | Probe | AT Skis | AT Ski Bindings | Splitboards | Skins | Ski Crampons | AT Ski Boots | Riding Specific Backpack | Airbag | Repair Kit | First Aid Kit
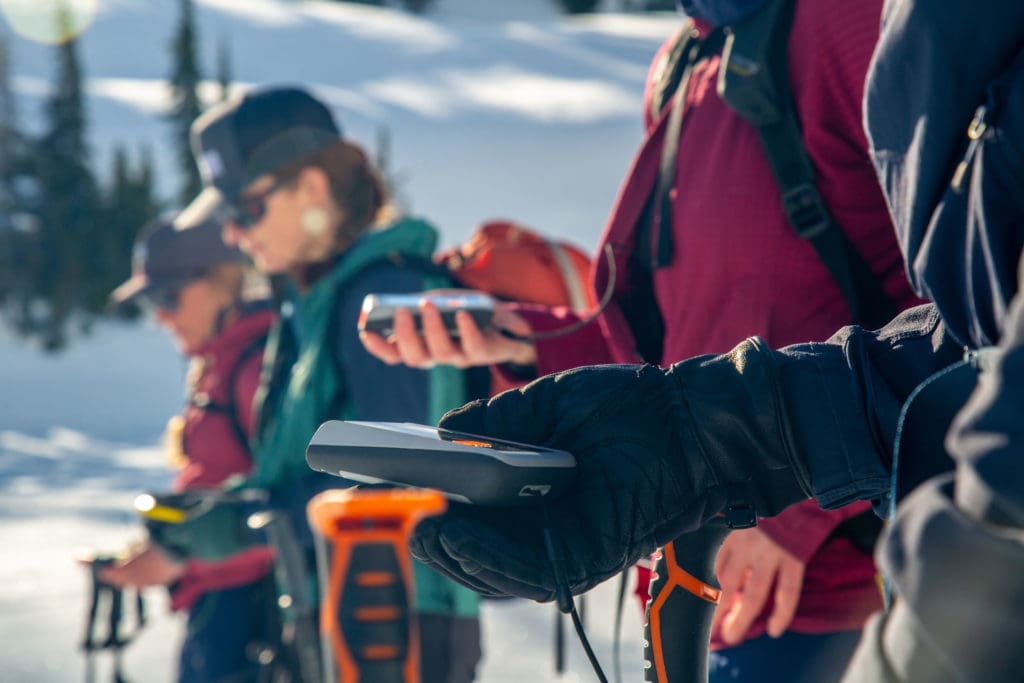
Avalanche Transceivers (Beacons)
The first of the essential items needed for backcountry skiing or riding is an avalanche transceiver (or avalanche beacon). These devices should be worn on your body anytime you’re entering the backcountry whether you think you’ll be skiing/riding avalanche terrain or not. Many folks are even wearing them in bounds at ski areas since avalanches can still happen in bounds and deep snow immersion fatalities are all too common. It’s good to be searchable!
Lots of clothing nowadays has RECCO tags sewn in, but, in the United States anyway, that stuff is mainly for body recovery. We just don’t have the infrastructure set up like many places in Europe to use the technology effectively for an actual rescue. So… wear a beacon!
How They Work
Though more modern-day beacons can get complex with features, at their heart, beacons are quite simple: they transmit and receive a radio signal at a standardized frequency that other avalanche beacons can hear. They have two modes: “transmit” and “search.” You’ll also hear “send” and “receive.” For clarity and the sanity of your friends, just pick one set of terms to go with.
When you’re out touring or riding your snowmobile, your beacon should be set to transmit (send). If someone near you is caught in an avalanche, you then can switch the beacon to “search” and follow in auditory and visual directions to the buried human.
New or Used?
For the most part, purchasing used gear is awesome because you’re reusing equipment that would otherwise probably just end up in a landfill somewhere. Your avalanche beacon, however, is not something to cut corners with.
There’s no Carfax history report for an avalanche beacon that lets you know if it was exposed to extreme temperature fluctuations’ in someone’s car for months or dropped on the concrete a few times. Maybe they didn’t take out the batteries over the summer and now the inside is corroded so badly that it’s a miracle the thing even turns on. What we’re getting at here is that you better be darned sure you know the history of a beacon if you’re going to purchase it used. Your life and the lives of others literally depend on it functioning properly.
The life span of an avalanche beacon is ten years, but technology is evolving at a rapid rate. Even avalanche beacons five years ago are outdated compared to the fast processors and power of today’s beacons. All this to say if you’re going to buy something in your backcountry skiing or riding kit new… make it your avalanche beacon.
Manufacturers of avalanche beacons market beacons advertising gimmicky features sometimes (like using your beacon as a clinometer… just… why?) but all avalanche beacons work pretty much the same in transmit. The biggest differences arise when you go to search. Some more advanced beacons can actually tell you how many folks are buried, if they’re buried close together, allow you to suppress or ignore certain signals, and even check the transmit frequency of other beacons to see if they are detuned. It’s a lot. If you want to keep it simple, just purchase a new, 3-antenna beacon.
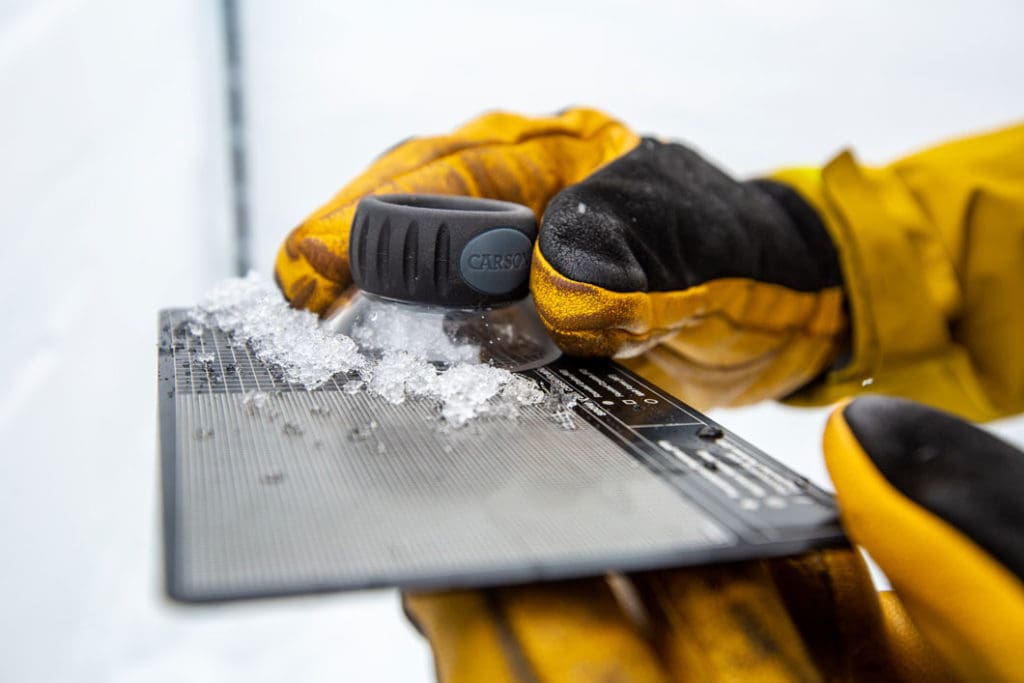
Want to learn how to test beacons to make sure they are working correctly? Check out our resource on Function Check for Avalanche Beacons.
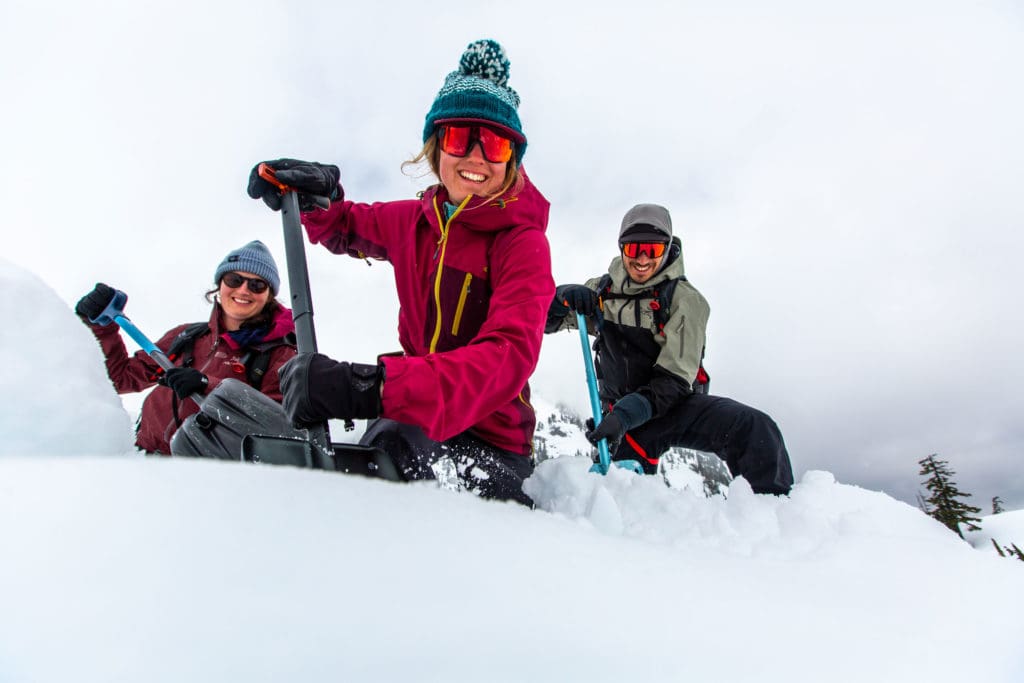
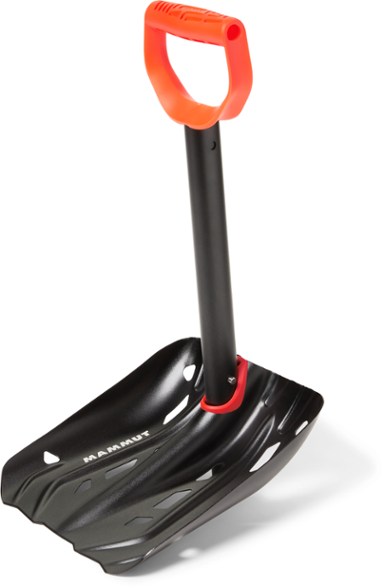
Snow Shovel
The second essential piece of gear is the snow shovel. If an avalanche buries someone and you left your shovel in the car, good luck moving over a ton of snow set up like concrete with your hands. During a rescue, the majority of your time is spent digging, so get a good one. There are a lot of subtle differences between shovels and not all are created equal. Below are some of the considerations.
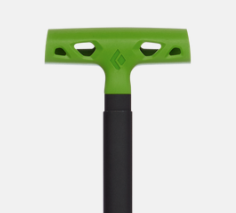
Size and Shape
Shovel blades vary in shape and size. Small blades are easier to handle, but way less efficient at moving larger amounts of snow. On the flip side, larger blades can move more snow, but take more strength so you’ll tire more quickly. If you’re a small person, get a small shovel blade. Unless you do cross-fit or something and have big, strong arms and back muscles. Naw… even then. Shoveling with a small snow shovel is often more efficient than consistently under-filling a large shovel when you’re tired. Usually, for us every day humans, it’s best to get a medium-sized blade. Thanks Goldilocks.
For the shape of the blade, you’ll notice that some blades are flat where others have varying amounts of curve. Unless you’re digging snow pits all the time and want to carve that perfectly smooth pit wall so that your observation on NWAC is super pro, we recommend against the flat blade. Instead, get a curved one. Curved blades make it easier to move lots of snow more efficiently. You can even find some models with serrated blades to help cut through firmer snow and ice.
Material
Unless you’re setting the speed record on Denali in your lycra onesie with a super light kit with plastic shovel because that FKT is way more important than your life, get a metal snow shovel. You don’t want your shovel to break if you actually need to use it to cut through avalanche debris. Aluminum is strong and still quite light.
Shaft and Grip Types
Most, but not all, snow shovels have telescoping shafts that give you several different options for length. Definitely get a shovel that can have a longer shaft, especially if you’re a longer human. They give way ore leverage for digging and without the added shaft height… hello back pain. All you over 30s know what I’m talking about. Shorter shafts are more maneuverable in tight spaces (person upfront in rescue scenario or carving that corner in your pit). Shafts that are oblong or triangular in cross-section can offer increased rigidity and strength. If you’d like to learn more about how to use your shovel efficiently in a rescue scenario, check out our resource on Strategic Shoveling for Avalanche Rescue.
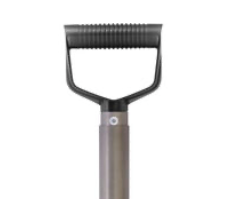
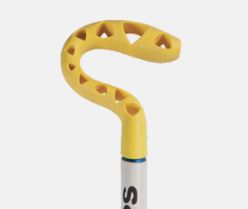
The most common grip types are T and L shaped grips (lighter and more compact) and larger D-shaped grips (more comfortable to hold and can be used with mittens). Now that COVID is less of a thing, you can go back to gear shops and touch all the handles without being judged too much. Do it. Finding a shovel that feels good in the hand and fits you is important. Personally, I like snow shovels that offer the ability to configure the blade into a hoe, or “hoe mode.” One, because it’s fun to say “engage hoe mode” and two you can move a lot of lower density snow quickly and efficiently.
Storage
Store your snow shovel inside your backpack. All of it. That means the blade, shaft, and handle all live inside. I’ve personally collected three shovel shafts/handles in the backcountry while out touring because they’d fallen out of someone’s backpack. If you can lose parts of your shovel just walking around, think what an avalanche would do to it. Bye shovel! Just like how you should wear your beacon on under a layer in the harness or in a pocket, protect your other essential gear from getting separated from you as well. If your shovel won’t fit inside your backpack, get a riding specific backpack and leave your small pack for summer day trips.
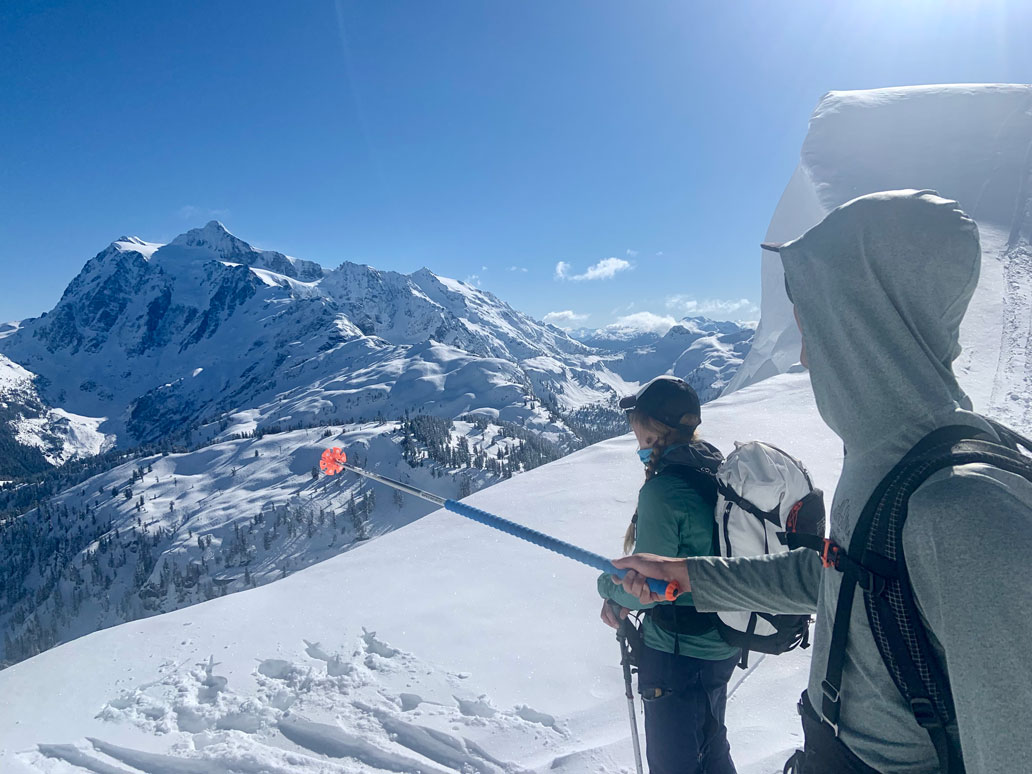
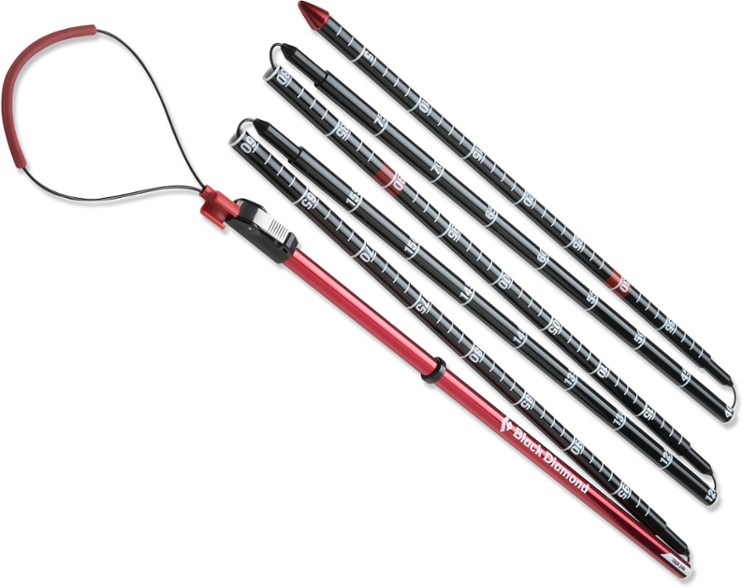
Probe
The last of the snow safety essentials that completes the trinity of “Beacon, shovel, probe” (often said as one word) is the probe. This is the analog complement to the fancier functionality of your avalanche transceiver. Probes help to pinpoint the location of an avalanche victim and measure their burial depth. When time is literally life and death, knowing exactly where to dig and how much snow you have to move is essential to performing a rescue.
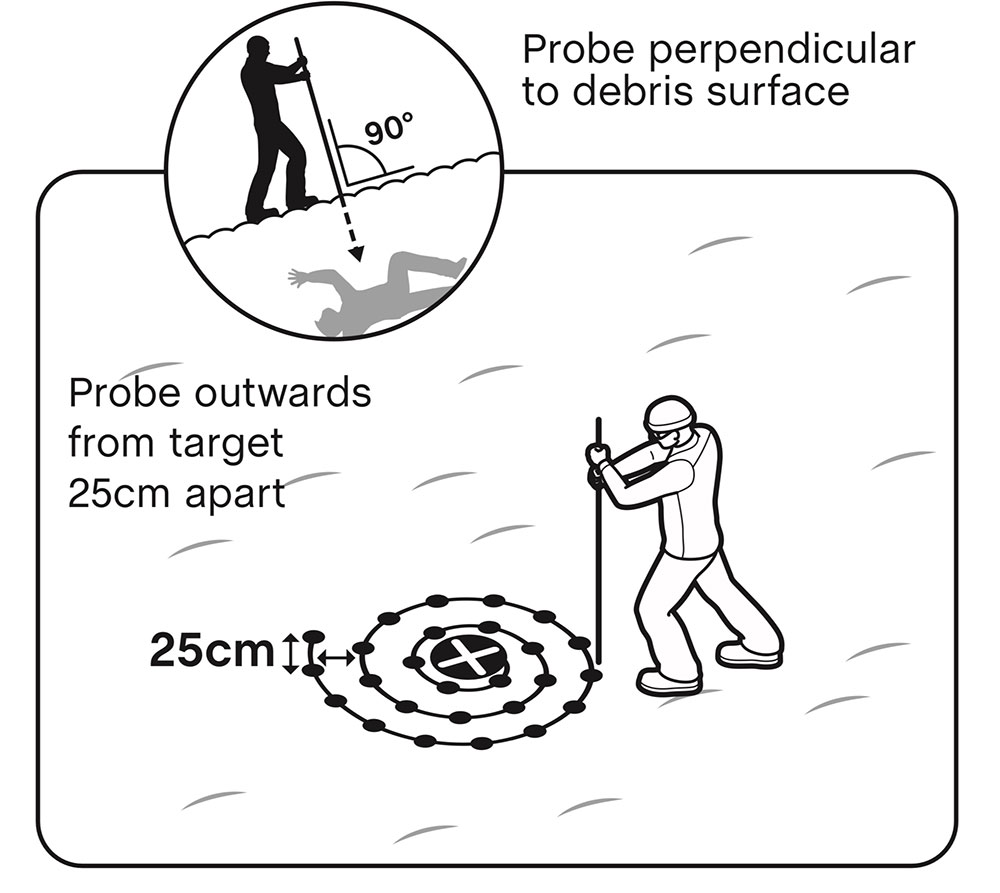
Size
Size matters. If you’ve taken an avalanche awareness course or other avalanche education, you hopefully remember that the average burial depth of someone caught in an avalanche is about 1.5 meters. At a bare minimum then your probe should be two meters. Smaller probes are lighter and pack easier for your ski-mo race, but what you’re actually giving up for that weight and space savings is significant. Every centimeter can matter in a deep burial, so get a probe between 240 and 320cms. Longer probes are easier on your back (especially if you’re ever in the unfortunate position of working a probe line) and won’t leave you wishing you had a longer probe in a deep burial scenario (hopefully).
Material
Aluminum or carbon are your materials of choice for probes. They’re both quality materials, but carbon has some major downsides. Despite carbon being a lighter weight option, it is more expensive and can break more easily than aluminum. Carbon snaps, aluminum bends. Aluminum probes are just slightly heavier and tend to penetrate tough and dense snow more effectively (something quite desirable in a rescue).
The ski-mo crowd obsessed with vert and big distances favors carbon while avalanche professionals, mountain guides, and patrollers tend to choose aluminum. You can always get more than one probe based on conditions and the objective. Make sure you get the appropriate materials for the activity you might need it for though. I snapped a carbon probe the very first day I had it in a shoveling drill on a rescue course. Wrong application of carbon.
Storage
Starting to sound like a broken record here but put it inside your backpack! Preferably keep it in the riding specific backpack where it can live in a designated pocket and not in that dumb little storage bag that will blow away or get buried someday to become backcountry garbage.
AT Skis
Alpine Touring (AT) skis can be any downhill ski you’d like as long as you’ve got an AT ski binding mounted to it. However, if you actually want to enjoy backcountry touring, there’s some things to consider when selecting your pair.
Weight
Since you no longer have a ski lift to get you and your stuff to the top of the mountain, weight is important to consider with any piece of backcountry equipment, but skis are a place where you can shed some significant pounds. As fun as metal top sheets and maple cores are for the downhill… skis that use materials like Aspen or Paulownia for the cores and carbon fiber in the laminates will make the uphill experience (the majority of your day) much more enjoyable. Carbon fiber is quite stiff (even stiffer than fiberglass), so you can get similar flex properties with less material. In general, your biggest, fattest, longest, pontoon of a pow ski should be under 9lbs. for a pair. Smaller skis should be lighter than that.
Size and Shape
It used to be that super long and skinny skis were the crem de la crem of downhill performance. Now we’ve gone the opposite way, with skis being a bit shorter and wider. Most backcountry AT skis tend to be within 164 – 190cm in length and 90-130mm under foot. What size, width, and shape depends mostly on who you are as a human (weight, height, ability) as well as the type of snow you’re getting the skis for.
Wider skis are generally better for powder, but also for riding through breakable crust (ugh, the worst), wet shmoo, chubby pow (thanks for that one Jason Speer), or other “variable conditions” as we put it politely here in the PNW.. Yeah, keep laughing Colorado… at least our base is solid. Have fun riding your facet, death cake.
Narrower skis are best in the spring during the corn harvest when you’re skiing fast and actually carving. Rolling your pow skis up on edge over and over is way harder on your joints. Longer skis can be really nice for going fast in big terrain, but are super annoying to kick turn with and tougher to jump turn in steep, consequential terrain. Even as a tall human (6’ 5”) I tour with 186cm in length skis. No way I’m going to haul anything bigger than that around with me.
As far as camber goes, it all comes back to what you’re wanting out of the ski. If you just want to ride pow all day, get reverse cambered skis that allow you to get your pow bounce on — springing out of each turn like you’re jumping on a trampoline. Want something that is responsive in firmer conditions or corn skiing? High cambered skis are the ticket. Flat-ish cambered skis with early rise do pretty well in most conditions (except deep pow). Early rise is when the tip of your skis start to bend back upwards further back on your skis. It makes your skis ski shorter and engaging a turn easier. It’s awesome.
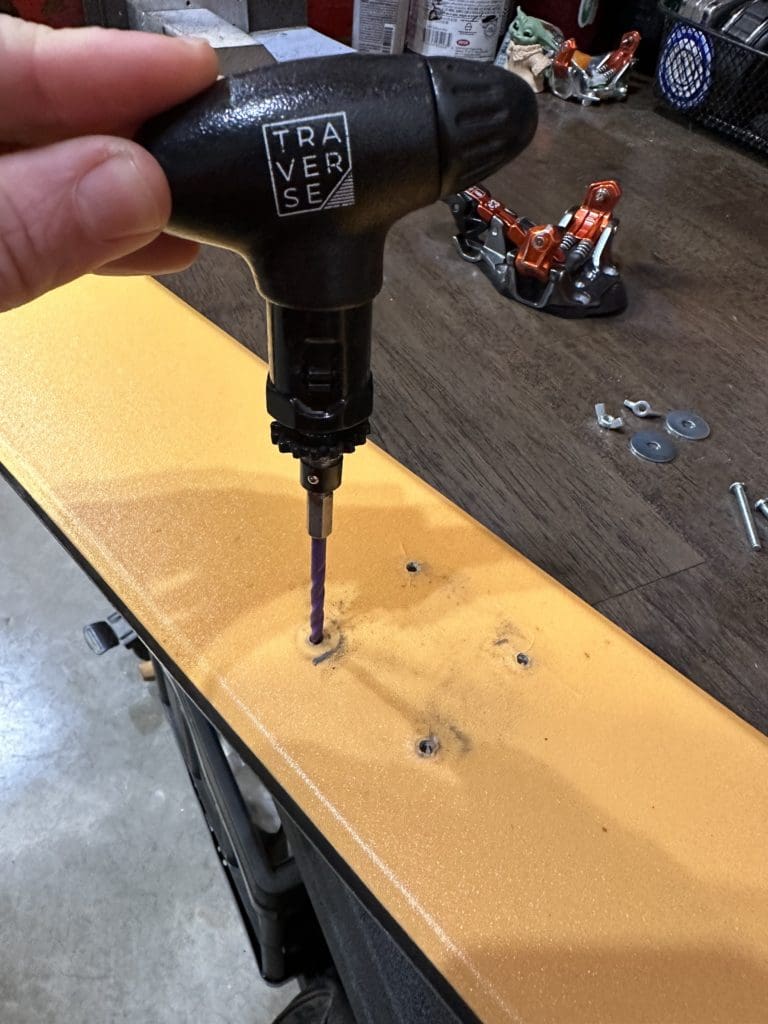
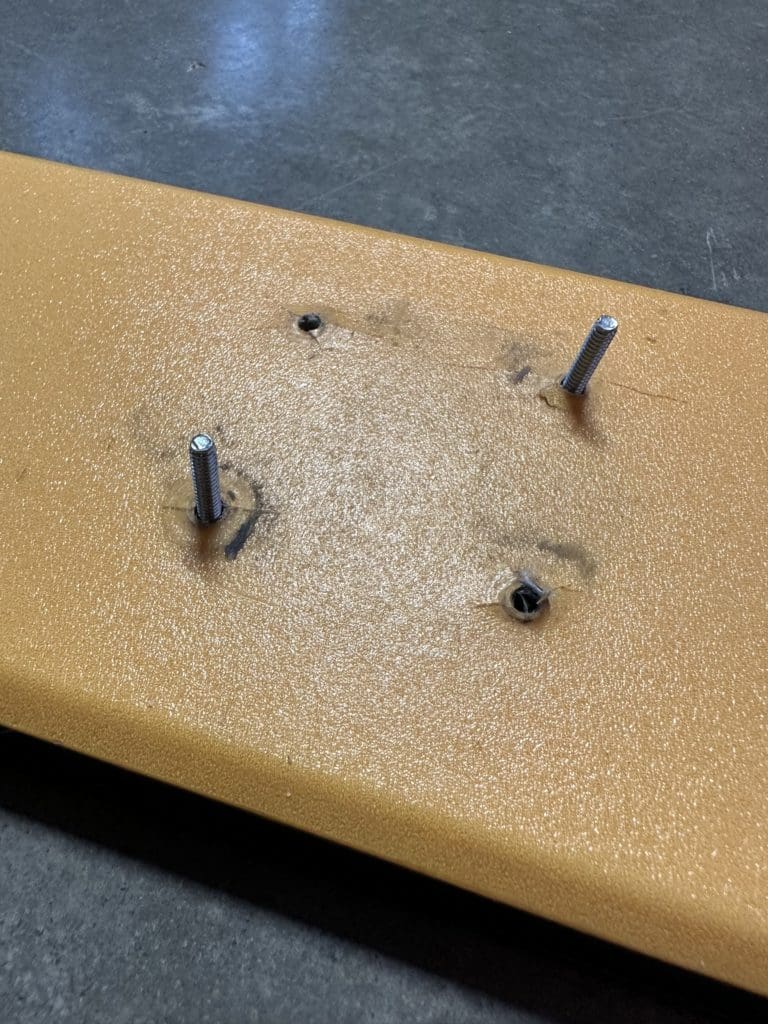
On the other side of your ski, it’s nice to have flat-ish tails. These hold a skin clip much better than full twin tips, are easier to kick turn, and plunge more easily for quick snow anchor set up. A lot of backcountry specific skis even have a notch or a plate in the tails for your skin tail clip. If you don’t have a notch in your skis and have or know someone with a Dremel too, you can make your own notch!
Anyway, there’s a lot to be said about AT skis and which ones to get or not get. It’s really nice if you can get out and demo a pair before committing to them since they’re so expensive, but, if you can’t, hopefully now you’ve got a good base of knowledge for what to look for.
AT Ski Bindings
Before AT ski bindings, the backcountry in the winter was dominated by a gang of people called “telemark” skiers. This now rare breed of human has almost died out, but there are many who still roll their eyes to the phrase “fix the heel, fix the problem” and boldly drop the knee. Though these people can rarely be trusted, they’re a hoot to hang out with if you ever get the chance. In all seriousness though, with the advent of the modern AT ski binding, anyone can tour uphill with a free heel and then alpine ski downhill with a fixed heel. Technology!
Tech Vs Frame Bindings
There’s a bit more to the story than that, however. Over the last ten years especially, AT ski have evolved along two different tracks: frame bindings and tech bindings. Frame bindings are skewed to the downhill side of things. Bigger, heavier, and more complicated, frame bindings take an alpine binding that pivots at the toe for touring and attaches it to a frame that can lock to the ski for the down.
All the benefits of a fully-featured alpine ski binding for the down however, rarely make up for how much it suffers on the up. Frame bindings are heavy and inefficient. Every step you take forces you to lift the full weight of the entire frame and binding. Ever seen Frankenstein walk in the movies? Yeah. They also tend to make you look like that because the pivot point on most frame bindings is too far forward. If you’re mostly skiing downhill though, sure… get yourself a frame binding.

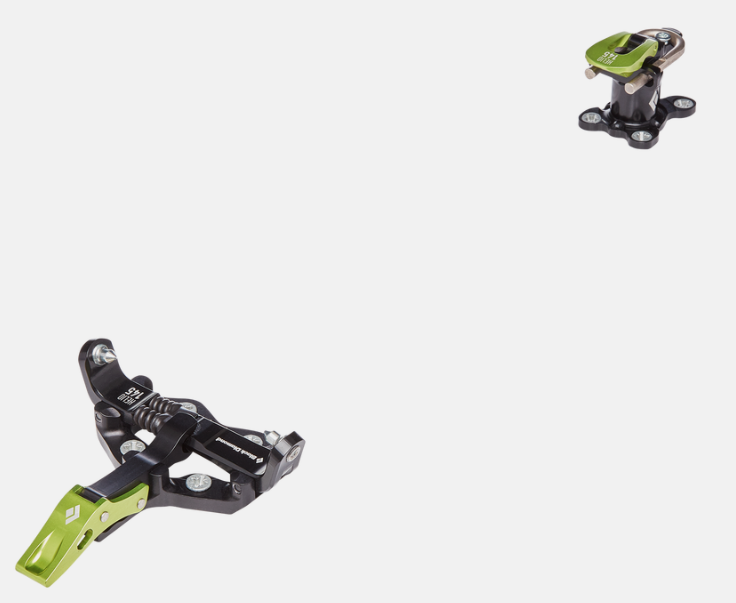
If you actually plan on backcountry touring, get yourself a tech binding. These bindings are lighter, more responsive, and the most efficient on the uphill, which is the majority of your day. Tech bindings attach to your boot by snapping two pins into the sides of the boot toe. Then, on the downhill, the boot can lock down to the ski via two more pins in the heel. Obviously, you’ll need a particular tech binding compatible boot to make a tech binding work, but you’re going to want that anyway. Walking around in an alpine boot is just asking for blisters everywhere. (More on boots later). The springs in the toe and heel mechanisms create DIN-like characteristics, but, unfortunately, don’t offer true DIN reliability or the highly responsive power transfer you get from a true Alpine binding.
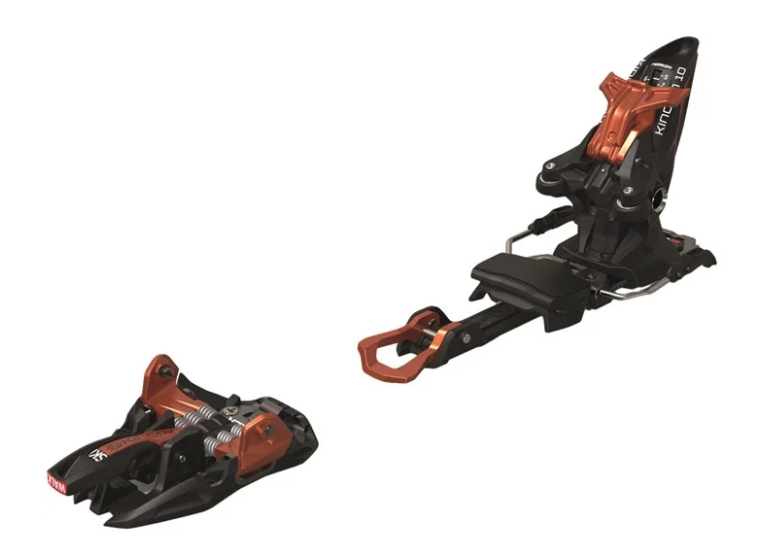
Lately, many manufacturers have experimented with hybrid tech bindings that use an alpine heel piece that slides back while touring and a toe piece that can shift between tech and alpine. As guides, we’ve seen all of these styles of bindings break or malfunction over and over again. There’s even the commonly used phrase “getting shifted” in the industry now for when the Solomon Shift binding fails to do what it’s supposed to do. It’s a cute idea, but not the best in practice yet if you tour a lot and do more than a transition or two. The more moving parts, the more problems that can (and do) arise.
If you plan to mostly earn your turns and you aren’t an ultra fit mega athlete, get a classic tech binding. However, if you mostly ski lift-access backcountry, laps off your snowmobile, huck off cliffs, and can’t be bothered to ski slower than 50mph, you may want to go with a frame binding or this nifty adapter from Daymakers Touring that turns your downhill setup into a touring set up for the uphill and then can be removed to just ride your downhill skis.
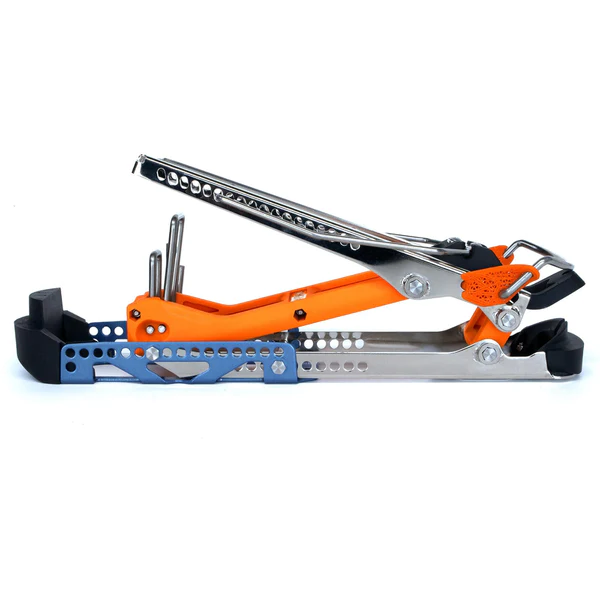
Heel Risers
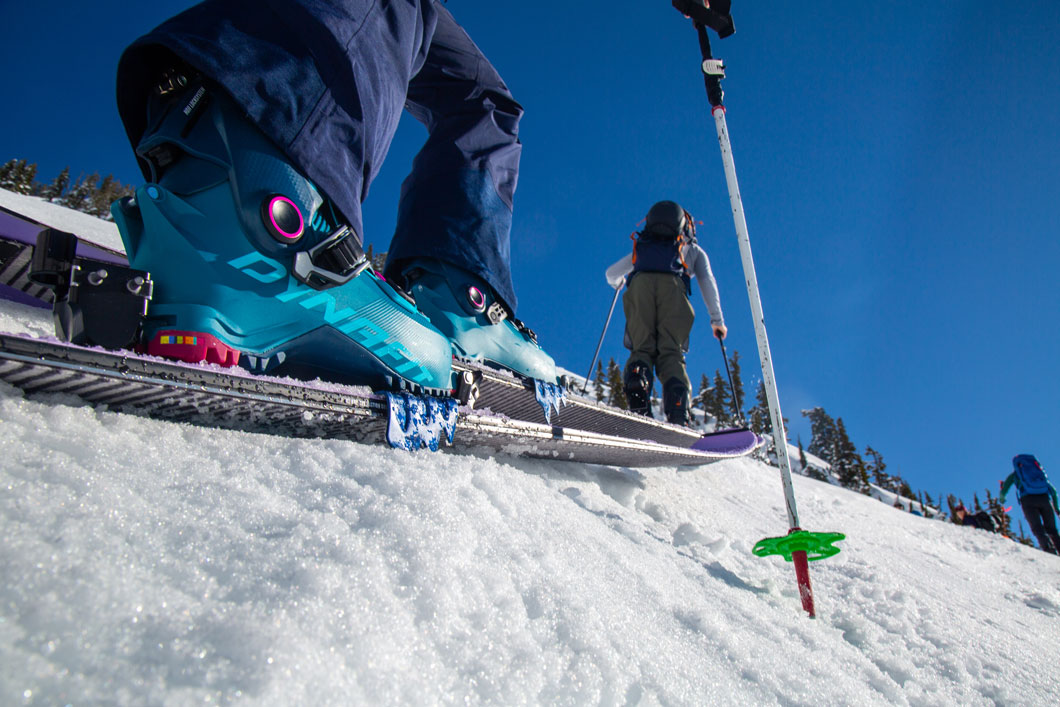
Heel risers improve efficiency by decreasing calf fatigue. The majority of bindings build heel risers into the heel piece in such a way that they can be flipped up or down with a pole. You’ll find them on everything from snowshoes to the most advanced tech binding out there. These relatively simple things allow users to apply more even pressure across the entire ski or splitboard when skinning uphill – allowing the climbing skins to do their job and stop you from sliding out and smacking your face.
Weighting the heel, which is when your skins grip best, if much more comfortable with heel risers. That said, you don’t want to use them too much! Check out our resource on skinning techniques for Phil’s thoughts on the matter.
Splitboards
Splitboards are just that: a snowboard that is split in half to create skis on the up and then lock back together for the down. Just like with AT skis, it’s easy to get in the weeds as far as construction, bindings, size, and boots, but we’ll give you some broad strokes to understand the options available. If you want a deeper dive on Splitboarding, check out our Beginners Guide To Splitboarding Resource. In short, splitboards, unlike skis, by definition are designed for backcountry specific use. You don’t want to ride your splitboard inbounds if you’re used to hucking off of every feature you lay eyes on.
Size and Shape
For splitboards, the same logic presented above for skis applies! What shape, size, and style of splitboard you go for depends on your preferences and what kind of snow you most often come in contact with. A good starting point is early rise with flatter camber, but trying out different boards in different conditions will help hone in on what works best for you. If you plan to ride in a place that gets a lot of snow, it’s a good idea to size up from your inbounds set up to handle the pow.
Boot and Binding Systems
If you’re just getting into the backcountry touring world with a splitboard, your biggest decision comes down to what boot/binding system to put on your board. For this, you have two main options: Hard boots or soft boots. Yes… that’s right… hard boots. You may be saying to yourself: “Wait, I snowboard so I don’t have to wear the dumb, uncomfortable plastic boots and riding downhill in hard boots sounds like a completely different experience.” Yep. But hard boots offer some very tangible advantages that are hard to ignore.
Primarily, hard boots solve the biggest problem in uphill touring for splitboarders: side-hilling in firmer conditions. Holding an edge in soft boots with a soft boot binding if really difficult (even for experts). Unfortunately, it’s not all pow out there in the backcountry and there is a lot of firm sidehilling in backcountry riding. Consequently, it’s pretty common to see splitboarders in soft boots (especially if they don’t have ski crampons) blowing it on sidehills and sliding down on their faces.
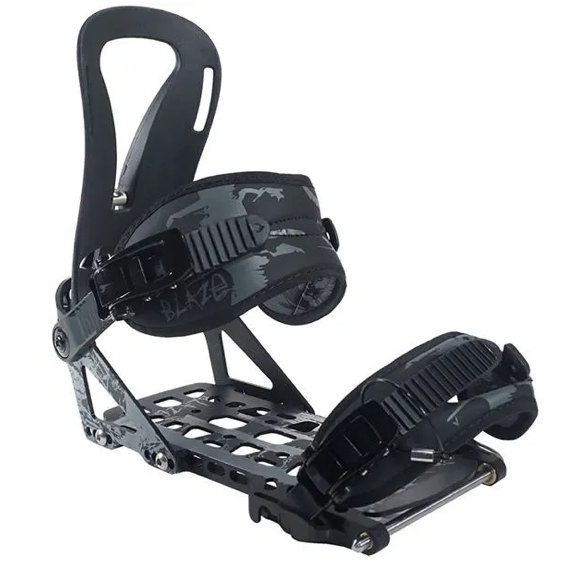
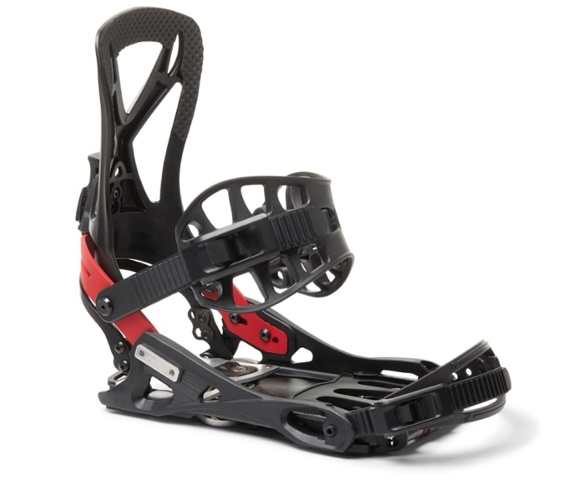
Hard boots paired with AT tech style toe piece make touring way easier by adding rigidity. They are also much lighter weight than a soft boot system. Plates are still required on the downhill to provide structural rigidity, but these are stowed in the pack until it’s time to snowboard. If your goal is primarily touring on your splitboard (which is mostly what you do out there) then a hard boot set up might be for you.
Soft boots, on the other hand, are the standard for a reason. The boots and bindings look and act a lot like normal snowboard bindings except that the base plates allow the bindings to transform. On the uphill, the bindings mount facing forward utilizing a pin system at the toe. The pin system utilized is different depending on the manufacturer, but avoid older bindings that utilize a trailer hitch pin if you’re buying used. It’s heinous to deal with. Either way, these pins allow the toe to pivot for walking with the heel remaining free. On the downhill, you then take the bindings off the board and (after putting the board back together) slide the bindings onto the baseplate via a rail system. The best soft boot systems out there are being pioneered by Spark R&D and Karakoram.
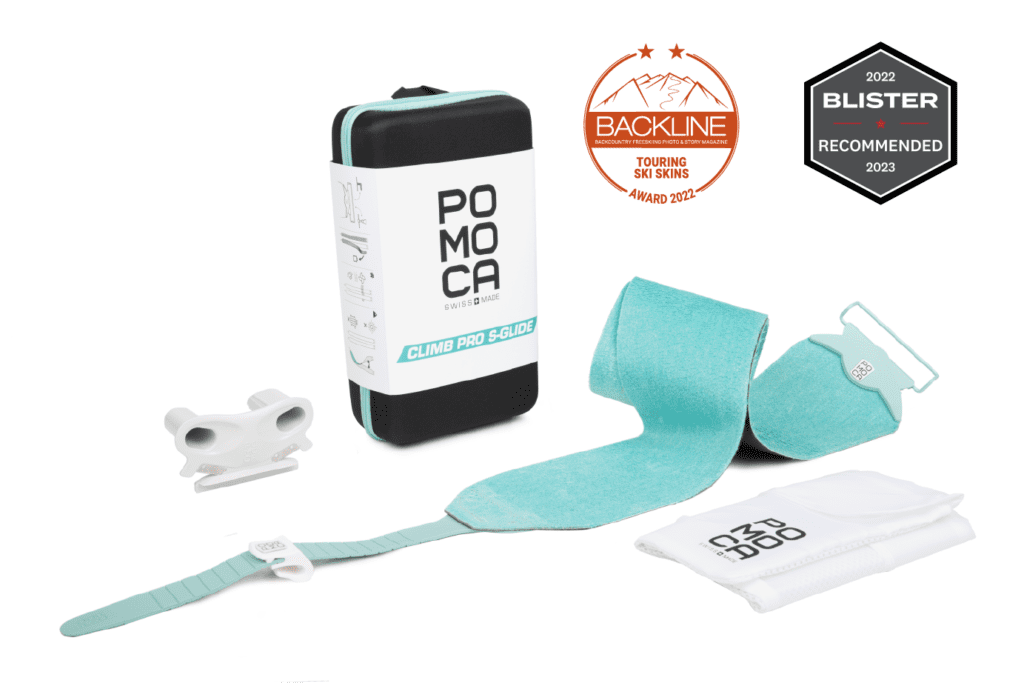
Skins
The majority of your time touring is spent walking, and that’s tough to do without climbing skins. They allow you to tour uphill with your boards on your feet rather than post-holing to your nips while booting. On one side is glue to attach the skins to your skis/board and the other plush to provide friction for uphill progress. The plush is made of either mohair, nylon, or a mix depending on the glide to climb ratio you’re going for… so oil and goats. We used to club seals to make climbing skins, so… progress?
Size
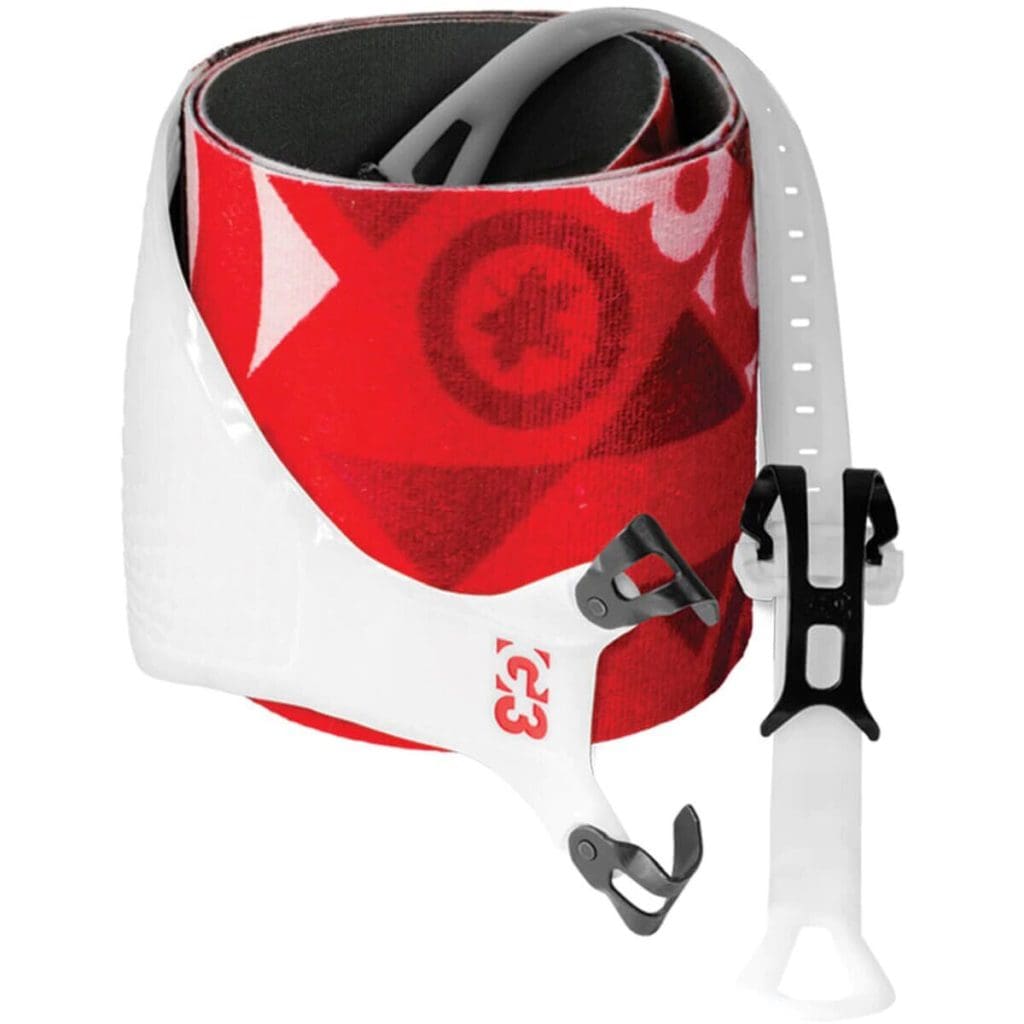
Some ski and splitboard manufacturers allow you to order pre-cut skins that fit your skis or board exactly already without the fuss of trimming them yourself. Most, however, do not. If you need to trim your own, skins need to cover as much of the base of your boards as possible while still leaving your metal edges exposed. All skins that require trimming come with a skin trimming tool and a “how to trim your skins” tutorial, but not all trimming tools and processes are equal. The Black Diamond skin cutting tool, for instance, is absolute garbage and creates way more work and hassle for you. The G3 skin cutting tool makes it easy. Worth spending a few bucks to buy one even if you purchase skins from somewhere else.
Buying skins is easy for splitboards. Just pick the correct length to fit your board and then trim them to fit the width. For skiers, sizing is tougher unless you get the pre-cut skins that some manufacturers like K2, Dynafit, and La Sportiva make. Some manufacturers (similar to splitboard skins) make skins in generic lengths that then just need to be trimmed to width. Others (like Black Diamond) just have options for width and come in longer sections that have to be trimmed not only for width, but length. Then you have the added “fun” of attaching the tip loops to the skins. So. Frustrating. Regardless, if you have to trim for width, make sure that you get skins that are wider than the widest part of your boards (usually near the tip).
Material
As said before, skins have three main material types: mohair, nylon, or a mix. If you’re wanting more glide, mohair (goat hair) is slippery. This provides less friction on the skin track. It is also a lot more light weight and less bulky. The sacrifice you make is in durability and it doesn’t climb as well as nylon. Good old nylon (oil) has less glide and is bulkier/heavier, but it is much more durable and climbs brilliantly. If you want a little of each of those worlds, different mixes of nylon and mohair allow you to play with glide to climb ratios and preferences. If you’re just starting out or are on a splitboard, definitely go with nylon. You’ll appreciate the extra grip on the uphill.
Attachment Type
There are tons of different attachment systems out there now, but all of them either hook, knotch, or loop over tips and then clip at the tail with an adjustable strap. Dedicated touring skis have flat or notched tails to keep the tail clips on, but you can notch your own with a Dremel tool if you want to backcountry tour with your twin tips. G3 also makes Twin-Tip connectors to keep your skins sliding off your tails every time you kick turn.
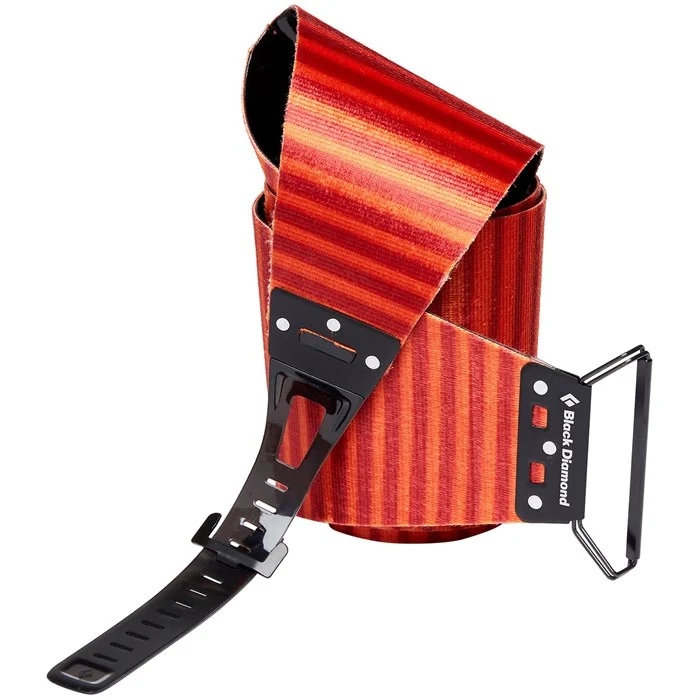
Practically all skins use glue to attach the skins to your skis or boards. Some skin manufacturers are experimenting with non-glue attachments, but the few we’ve seen don’t work in practical application. Gecko skins were a nightmare to keep attached in the PNW snow climate. Maybe in drier, colder conditions they’d work better.
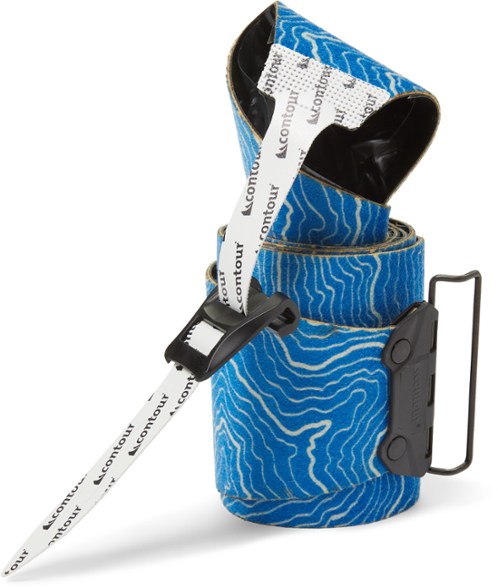
The CAMP Contour Hybrid skins are seemingly a combination of the best qualities of hot melt skins and “glueless” skins. They do not require reglueing, seem to remain tacky (even at low temps), rip easy, and stick to ski bases well as long as you’re diligent with not getting snow on them. If they do get snow on them, they become pretty darn useless and don’t stick at all! When it’s stormy out… these skins can be a headache to maintain.
Some of the best all around skins we’ve tried are made by Pomoca. Their Climb Pro S-Glide offers a great balance of durability with glide. They’re spendy, but totally worth the money. Only complaint is the tip clip is easy to break/lose, so you’ll want to carry a spare.
If you’re using standard climbing skins, over time, the glue on your skins will get less sticky or, become a gloppy mess (leaving sticky residue on your ski bases). If that’s the case, it’s time to reglue your skins or just iron them. Check out the video below for how to do that.
If they’re totally beat and ripped to shreds, buy a new pair.
Storage
To prolong the life of your skins and keep them from becoming a gloppy mess too soon, proper storage is key. Out in the field, if you’re transitioning to downhill, just fold each in half (glue to glue), fold them up, and stick them in your pack. No need to put them back in your skin bag or use skin savers. For real. You’ll be fine. Putting skin savers on when it’s nuking out is a frustrating waste of time. Some folks choose to put the skins in their front jacket or bib pockets to keep them warm on cold days. This keeps the glue tacky so it will adhere better. In colder snow climates, this is pretty common practice. In WA, and warmer snow climates, it’s rarely needed. G3 makes the “love glove” for storage of skins that actually is pretty slick in the field, but not necessary.
Once you’re home, the skins should be dried as quickly as possible without applying direct heat or having them by a heater. Leaving skins wet and folded makes your glue less effective. Hang them over a coat rack or door until they’re dry and then you can fold them back up. For prolonged periods of storage (like the summer) put skin savers on and leave them in a cool, dry, place.
Curious about how to use skins? Check out Phil’s Skinning Techniques for Backcountry Skiing resource.
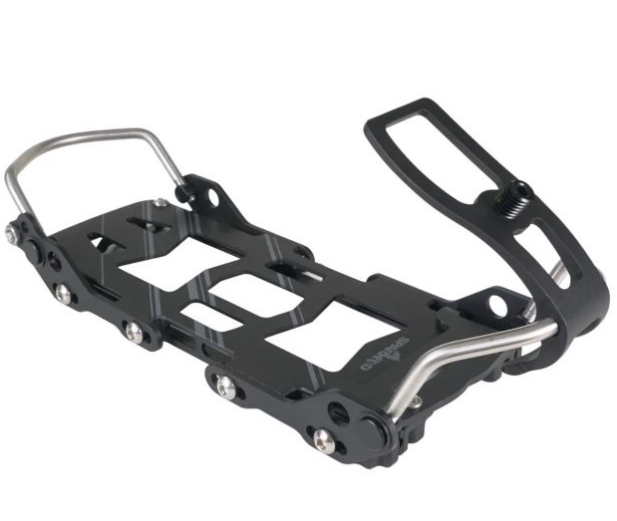
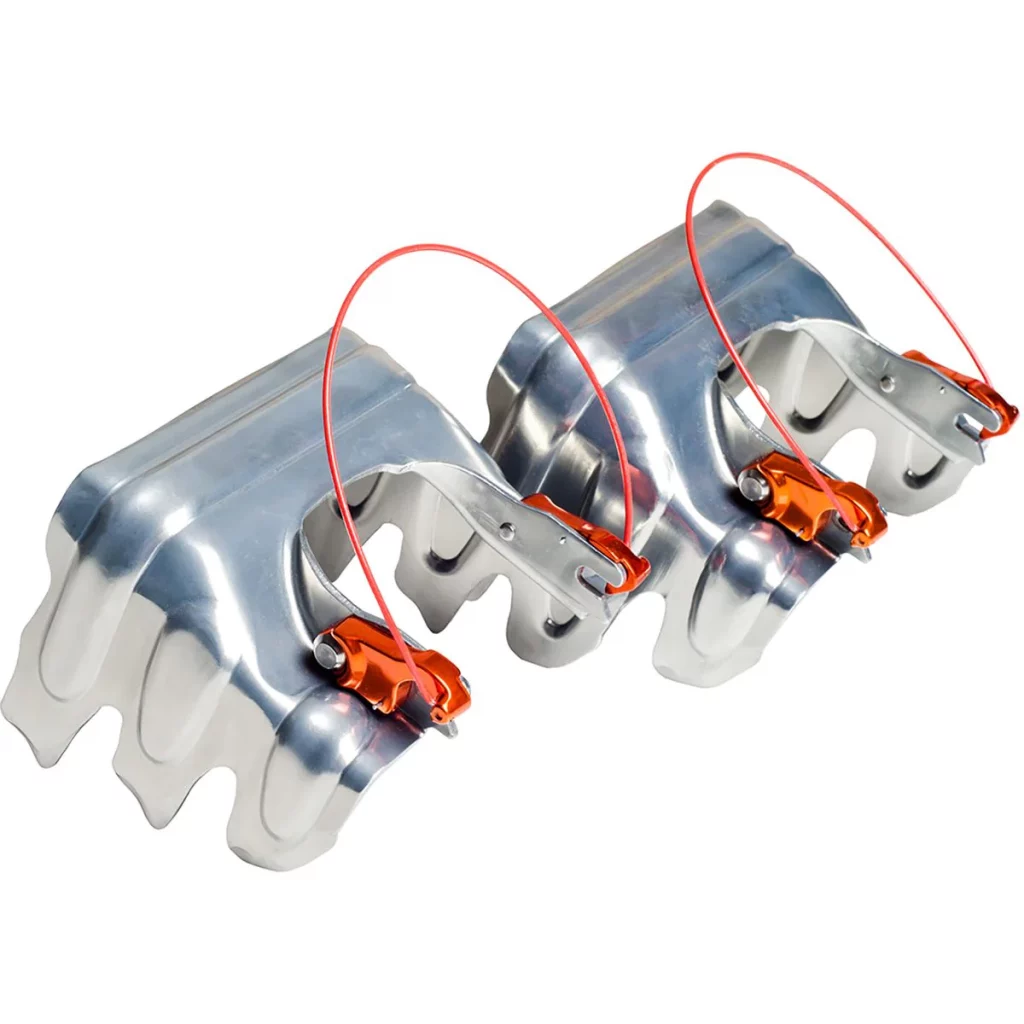
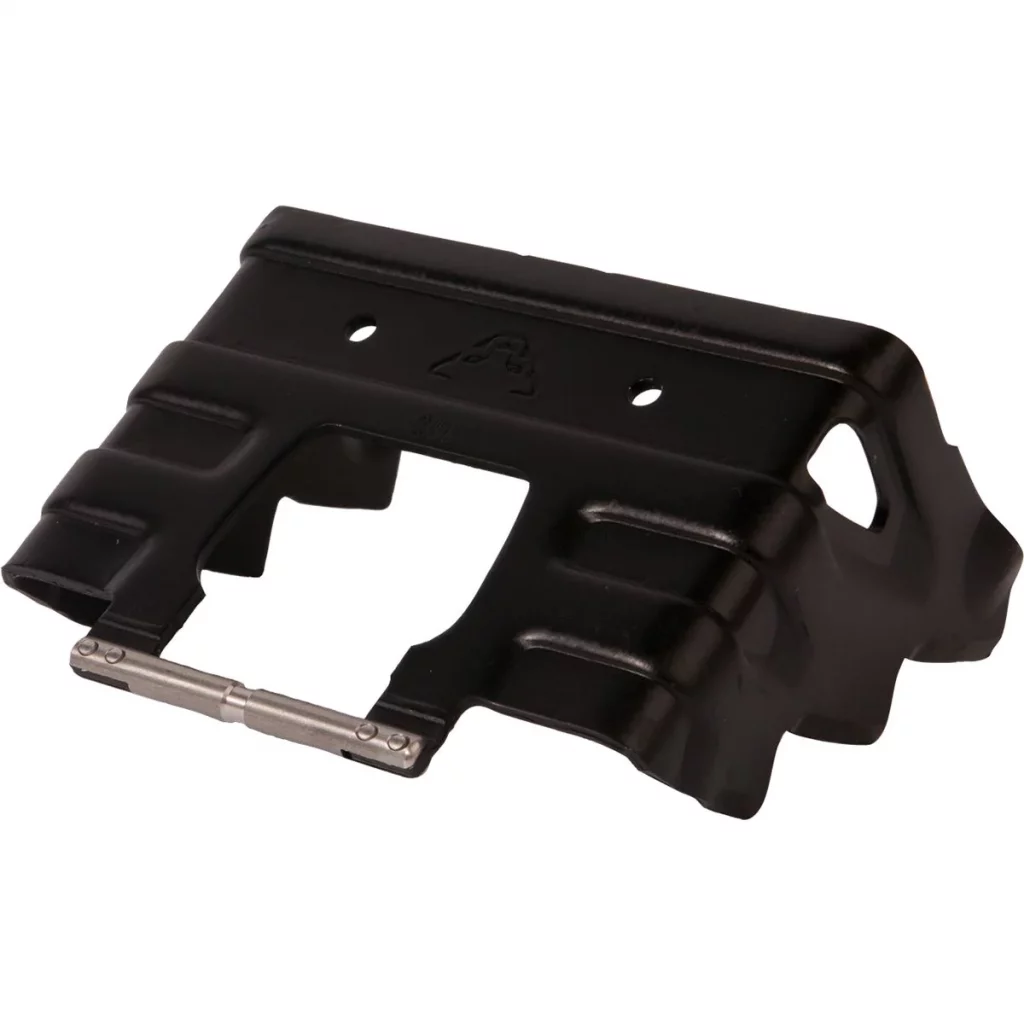
Ski Crampons
Ski crampons for backcountry skiing help backcountry skiers and riders gain purchase on firm snow when skins alone don’t quite cut it. These light, little tools can turn a tedious icy ascent into a stairway to corn heaven.
The majority of the time you’ll be out touring, you won’t need ski crampons. Unlike climbing skins which are designed to be used in all skinning conditions, ski crampons are a specialized tool for dealing with firm snow, and any tool with a specific use can be overused. If you can skin fine without them, you should, because they will inhibit your ability to glide on lower angle slopes and have a tendency to snag up on your skis when breaking trail in the soft stuff.
Like a boot crampon, a ski crampon provides more purchase on hard or icy conditions. They insert directly under your boot and are hinged so the crampon can release from the snow as you lift your foot, then bite when you step back down. Side hilling in firm conditions, especially for a splitboarder, is made easier with the addition of this tool to your kit.

Size
Ski crampons need to be sized to your ski/board waist. You’re looking for the smallest available size that is as wide or wider than the waist of your ski. Too much wiggle room makes the crampons less effective and more likely to bend or break the attachment points. For example, if you’re tearing it up on some 108 underfoot sticks that take universal ski crampons, you’re going to want to get a 110 crampon, since the sizes break on 10mm increments. The same is true for splitboard crampons.
Compatability
Ski crampons are designed to be compatible with particular types of bindings and widths of skis, so make sure you are getting the right ski crampon for your setup. Many companies use the universal system, which have a narrow bar on the front of the crampon that slips into a groove behind the toe piece of the binding. Other companies have their own proprietary attachment method. If you’re unsure, talk to your local ski shop or your binding manufacturer about what to get.
For more information on ski crampons, check out Phil’s resource: Ski Crampons for Backcountry Skiing. For a full tutorial on skinning techniques that include ski crampon use, check out our resource on Skinning Techniques for Backcountry Skiing.
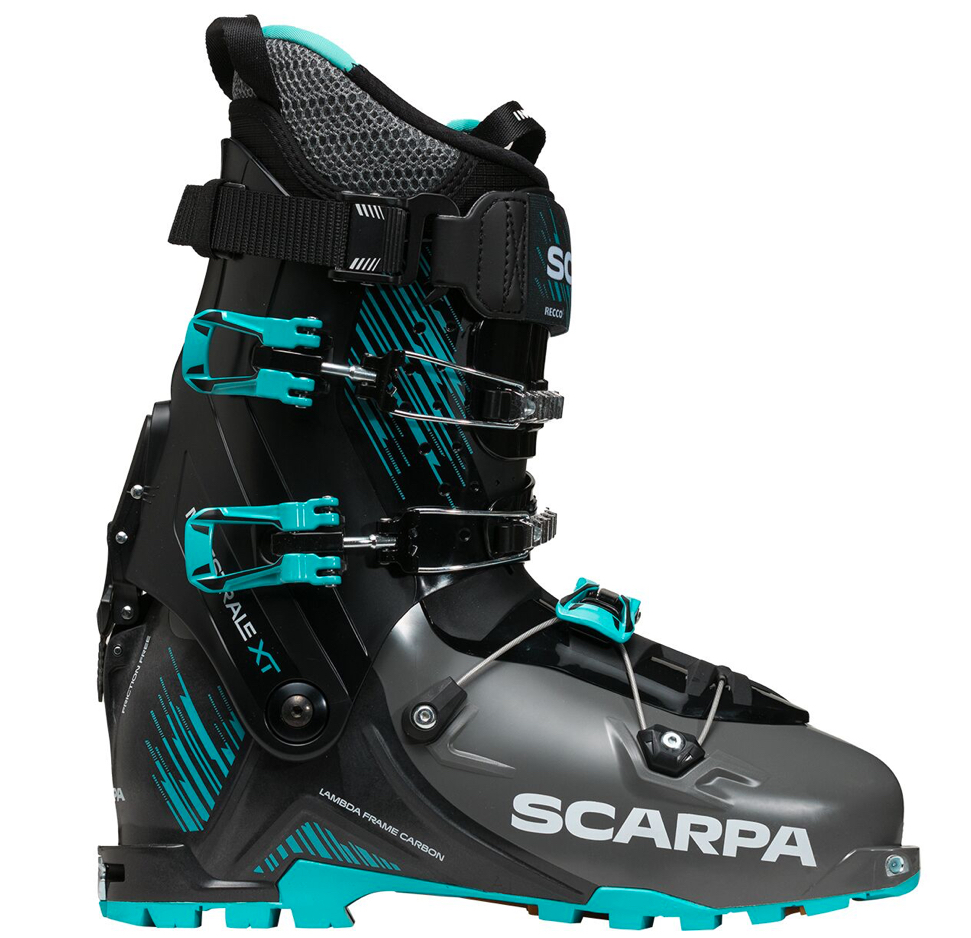
AT Ski Boots
Unless you’re using a frame binding that can take an alpine boot, you’ll need an AT ski boot to click into your binding. Since alpine boots are designed to go downhill and not up, treat yourself to an AT boot rather than subjecting yourself to the pain and suffering of touring in an alpine boot/frame binding combo. There’s a lot of crossover between AT ski boots and alpine boots, but the primary difference is the ski/walk mechanism. This allows you to actually have range of motion while touring and not frankenwalk everywhere.
Types
As it is with all backcountry touring equipment, there are AT ski boots that are designed more for downhill performance and some that are designed more for uphill performance. Which boot you choose depends on what kind of rider you are. If you’re only riding lifts primarily and dipping out for a lap or two on occasion, you’ll probably prioritize a downhill oriented boot and visa-versa.

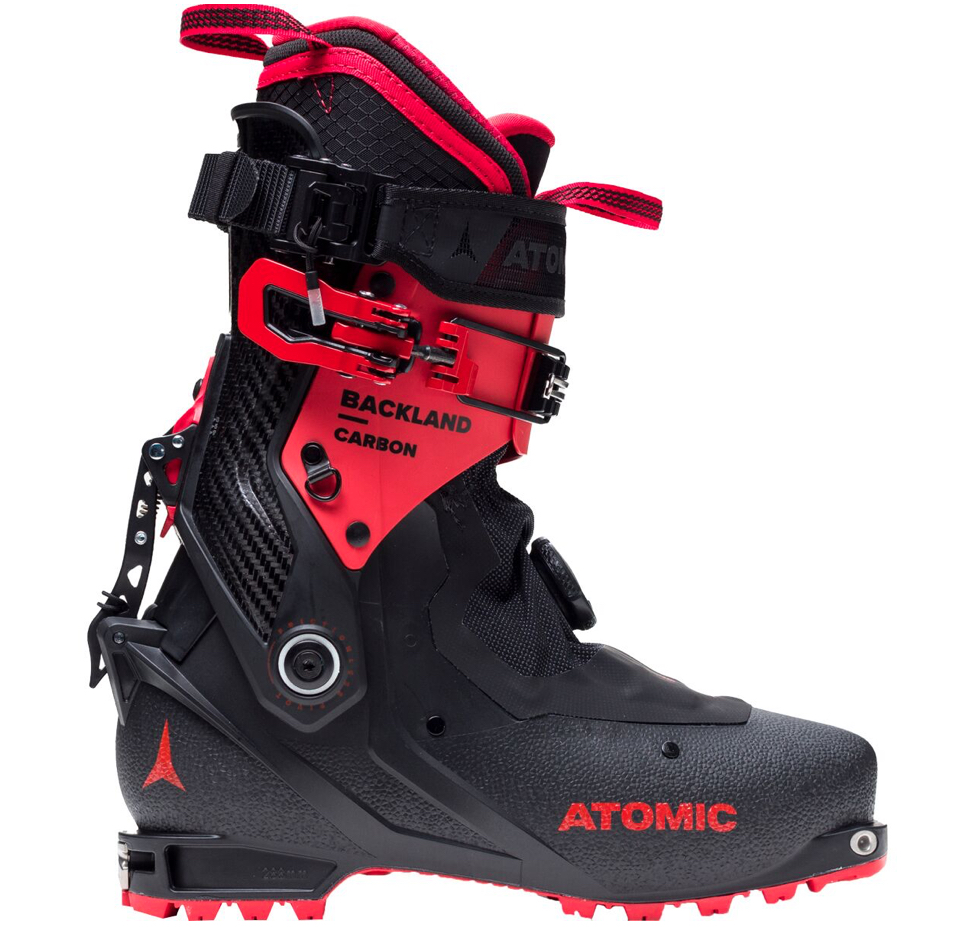
Uphill boots typically are lighter (made of carbon), have a tongue, tech binding compatible inserts, large range of motion, higher pivot point, and fewer buckles. Downhill oriented AT ski boots look and feel a lot like your typical alpine boot with the addition of a ski/walk mechanism and tech inserts.
Over the last few years, uphill oriented AT ski boots are actually skiing great downhill. Especially with some slight modifications (like adding a Booster Strap). Some two buckle AT boots now ski just as well as some four buckle AT boots. It’s nice to have multiple different types of boots to handle different objectives if your wallet allows, but, if you’re just investing in your first pair, it’s worth buying something right in the middle.
Ski/Walk Mechanism
Since the majority of your day is spent walking uphill in backcountry touring, it’s nice to have gear that makes it less difficult and more enjoyable. A ski/walk mechanism is mandatory to that enjoyment. Without it, the cuff of the boot is rigid and unable to pivot back and forth as you walk. Once switched to walk mode, you (magically) have range of motion and are much more comfortable!
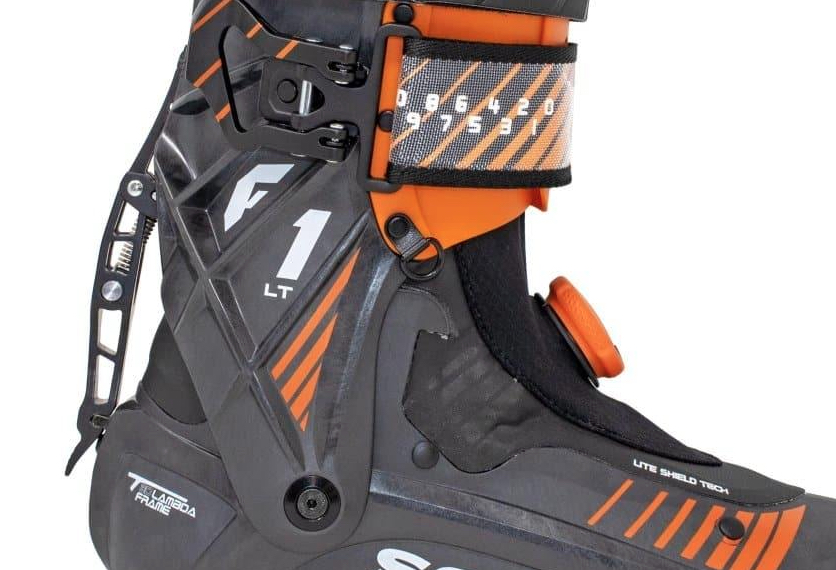
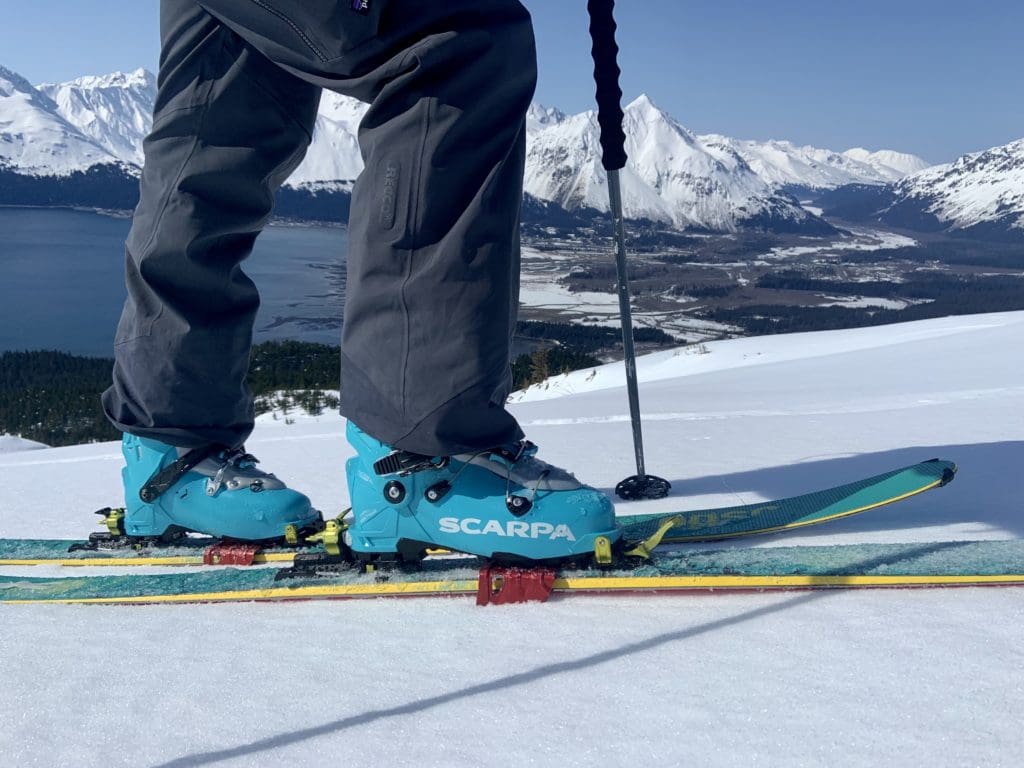
Not all ski/walk mechanisms are the same or created equal, however. The majority of these mechanisms are located on the back of the boot (spine). Brands like Atomic and Scarpa have their ski/walk mechanisms as THE spine of the boots. Depending on the year of boot, it’s either a physical notched spring loaded lever that lifts on and off a pin (like the photo above), or a switch that rotates the lever for you. When the lever is down, the boot is rigid and able to transfer power directly through the spine of the boot. Once flipped up, the boot is no longer a downhill tool. Good luck skiing your floppy noodles.
The problem with these lever/pin systems is that they are prone to freezing and getting clogged with snow. In order to go into ski mode, you’ll have to clear the snow from the pins or else they won’t lock down. Providing some taps with your poles directly on the lever as it’s seated over the iced up pin usually does the trick. It’s good to confirm that the lever is all the way locked before starting your descent. Popping out half way down as you’re trying to turn at speed is not very fun.
Brand like Dynafit get around this problem by storing their ski/walk mechanisms in the cuff buckle. To go to walk mode, you simply unbuckle your boot – something you’ll probably want to do on the uphill anyway for comfort.
Buckles
If you’re a resort skier, you know the alpine boot cam buckle very well, but there are also wire and ratchet straps. Yes, traditional alpine boot cam buckles provide the best power transfer for downhill performance, but they don’t work well with a tongued backcountry boot. Instead, manufacturers use wire buckles to extend the reach of cam buckles and ratchet straps over the top of the foot to lock you in.
Some lighter weight boots like the Scarpa F1 utilize a BOA attachment system like you see on cycling shoes and now many snowboard boots. This BOA systems isn’t really a buckle, but takes the place of buckles entirely. The system is made up of a micro-adjustable dial, lightweight laces, and low friction lace guides. By pushing in the dial, you can then tighten the laces to your desired tightness. Then, by pulling up on the dial, you can quickly release the laces. It’s pretty slick, but if the laces break, your boot is going to be floppy and loose. Luckily, you can get a replacement BOA system for $20 and should definitely carry it as a part of your repair kit if you’re going to be out on a consequential or longer mission.
Tech Inserts
Get a pair of boots with tech inserts. Do it. Almost all AT ski boots these days come with them anyway. Without them, you cannot connect to a tech binding.
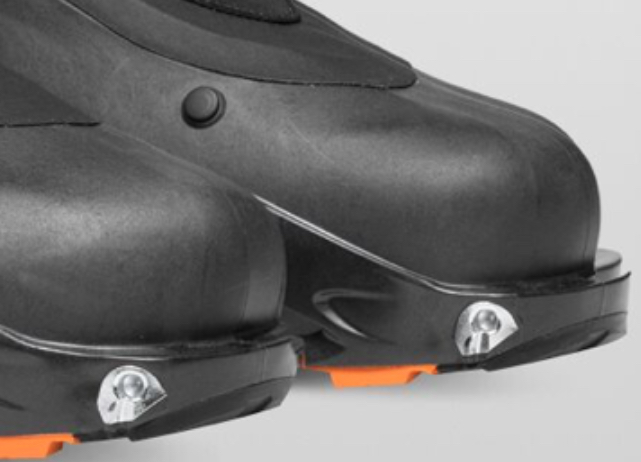
Soles and DIN Compatibility
If you’re going to be mountaineering in your ski boots because you like to climb up mountains and ski back down, you’ll want lugged soles. These look much like the soles on standard mountaineering boots and actually allow you to walk around on rock or variable surfaces and not look dumb slipping/sliding around. These types of soles usually can’t be used on alpine bindings or frame bindings, however, because of DIN standards for release. Smooth alpine soles are best for DIN reliability, but are atrocious to scamper around in.
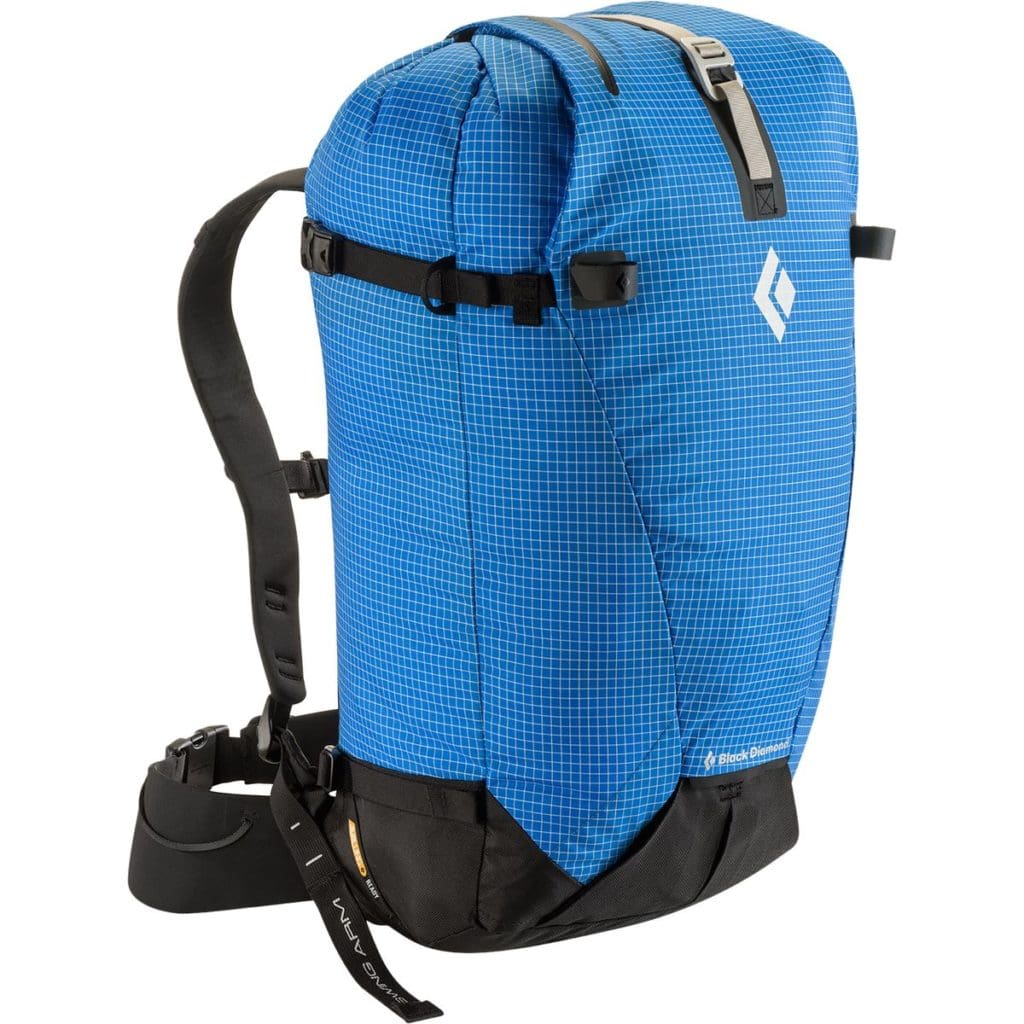
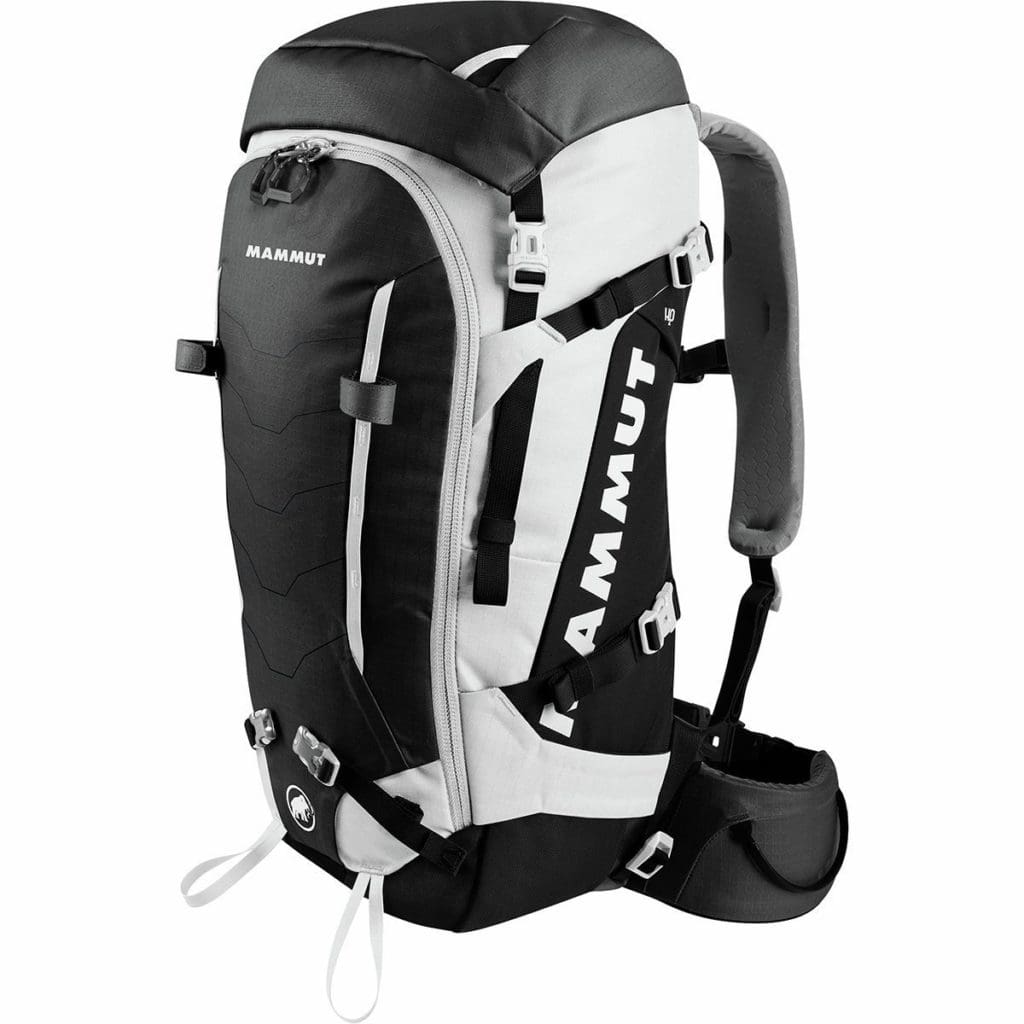
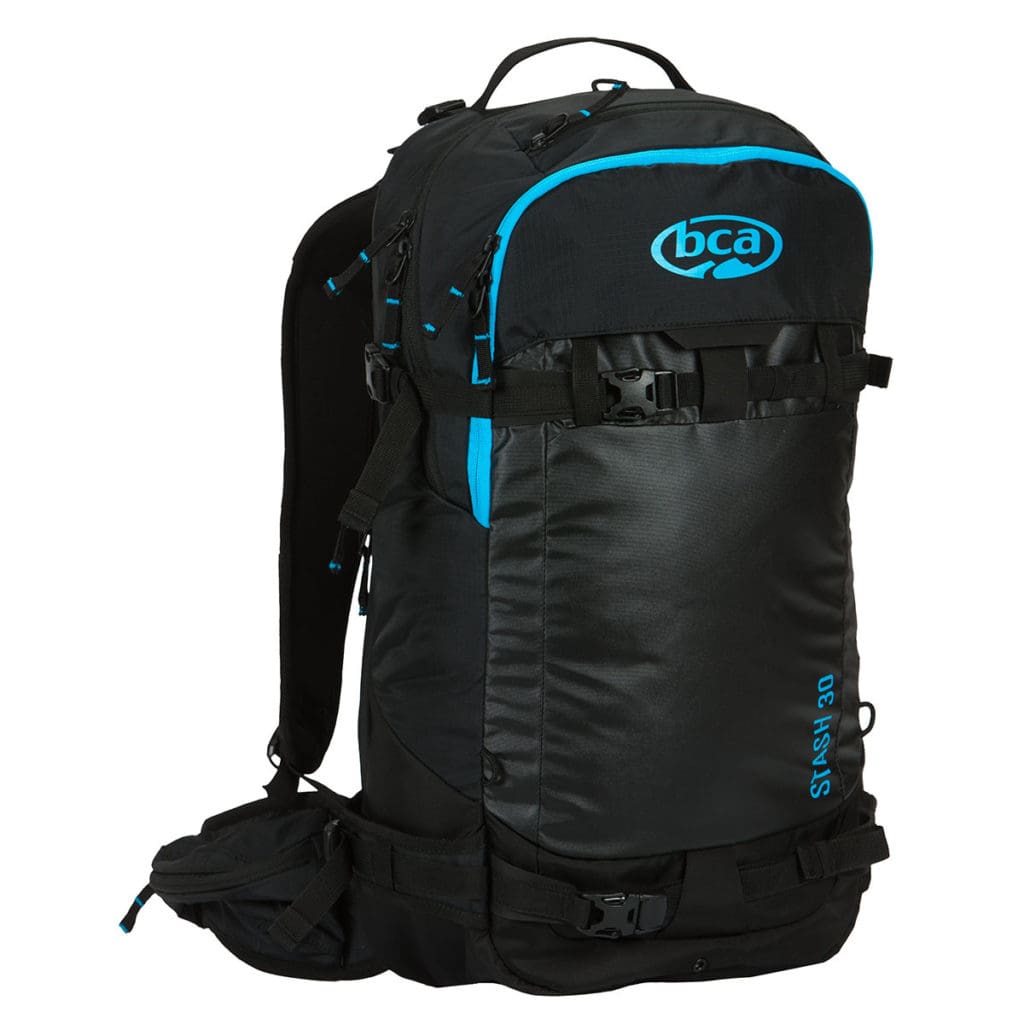
Riding Specific Backpack
Arguably Essential. For sure… you can get away with a non-riding specific backpack as long as it is big enough to fit all your things. If you’re serious about getting into the backcountry, however, you’ll want one.
Size
You’ll want a backpack that can fit everything inside. Typically, that means something from 25L-45L capacity. Having anything strapped to the outside of your backpack will go “bye-bye” if you were ever caught in an avalanche. If you’re day touring, 25L-35L works great (especially if you’re splitting up essential group gear amongst the other members of the group). If you’re going out for a longer tour or mountaineering, a 45L pack will actually git your rope and rack inside. When in doubt, bigger is better.
As far as size of frames go, most packs come in general sizes (small, medium, large). This can be incredibly annoying to folks outside of the “standard body type.” If you have a shorter or longer torso, make sure to look at the sizing of the packs and read reviews before purchasing to get the input of others about how things will fit you.
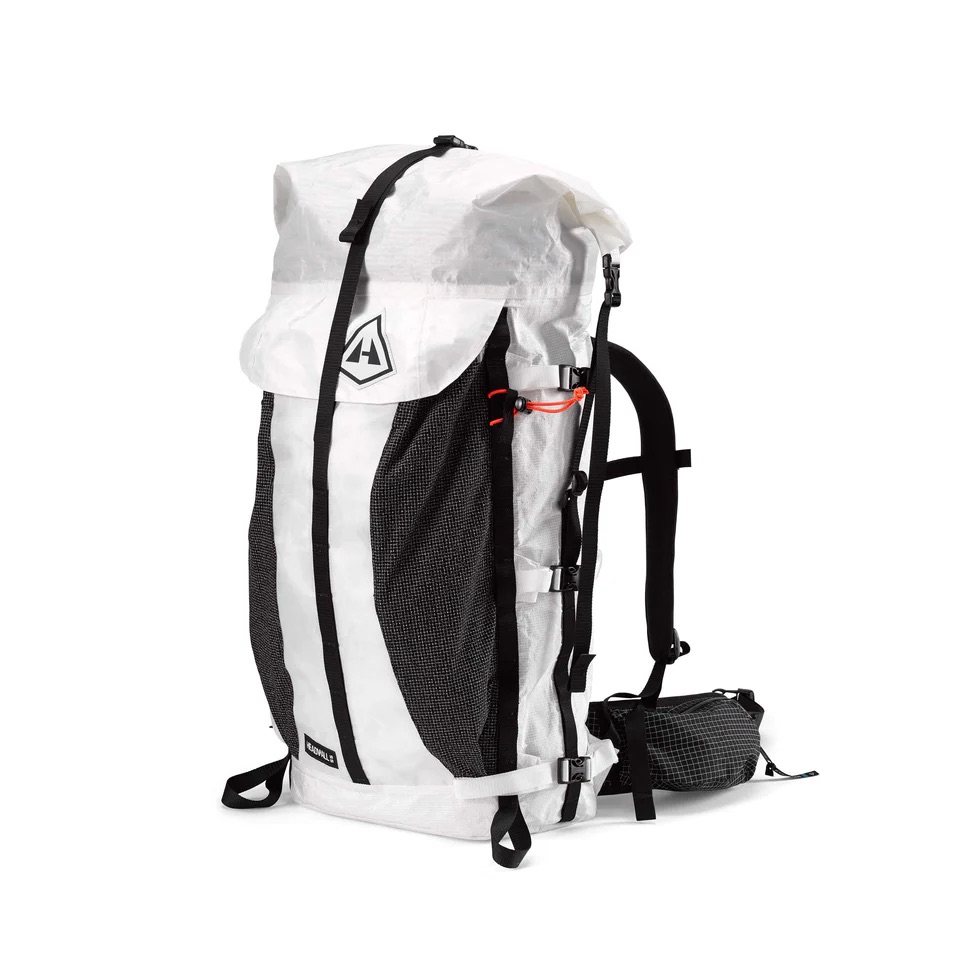
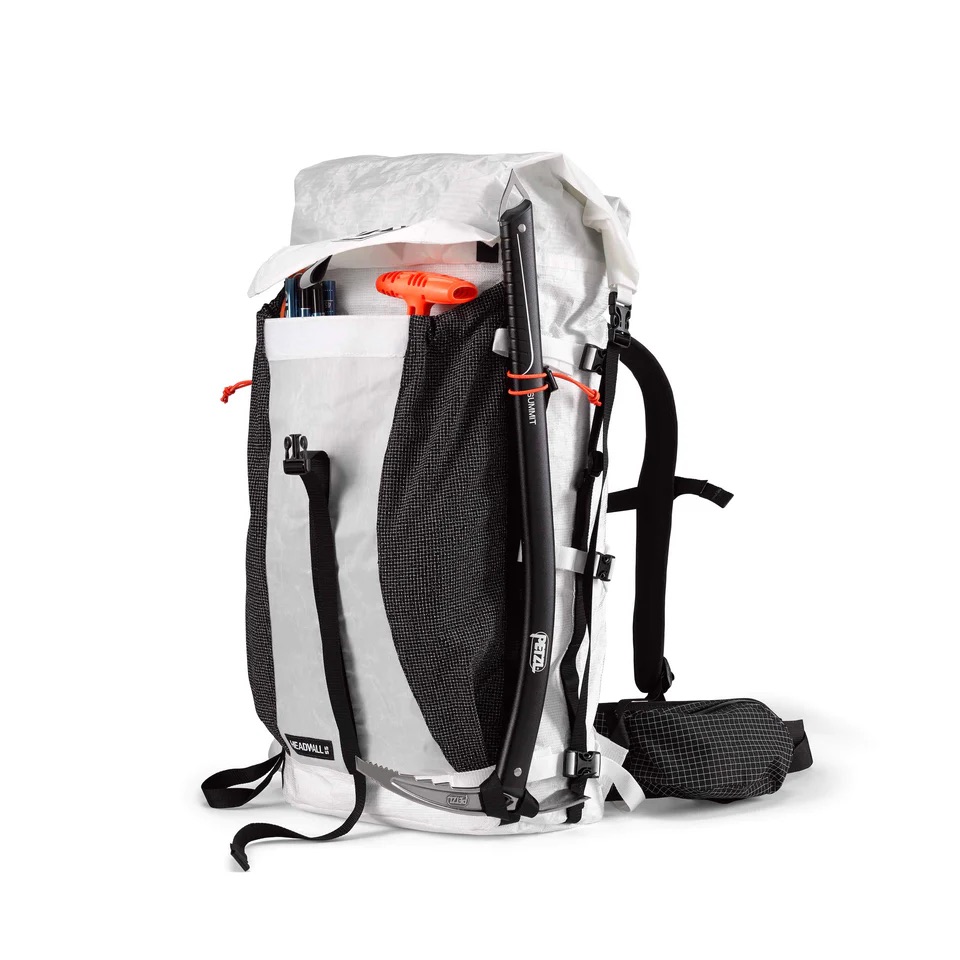
I’m a tall human 6’5″, so I look for backpacks that come with tall frames. I currently use the Hyperlite Headwall 55 (which comes in a tall) for everything from day touring to multi-day tours and ski mountaineering objectives. I highly recommend these packs made in the USA! If you’re thinking of getting a Hyperlite pack, you can use the link HERE to get 15% off your purchase. You’re welcome.
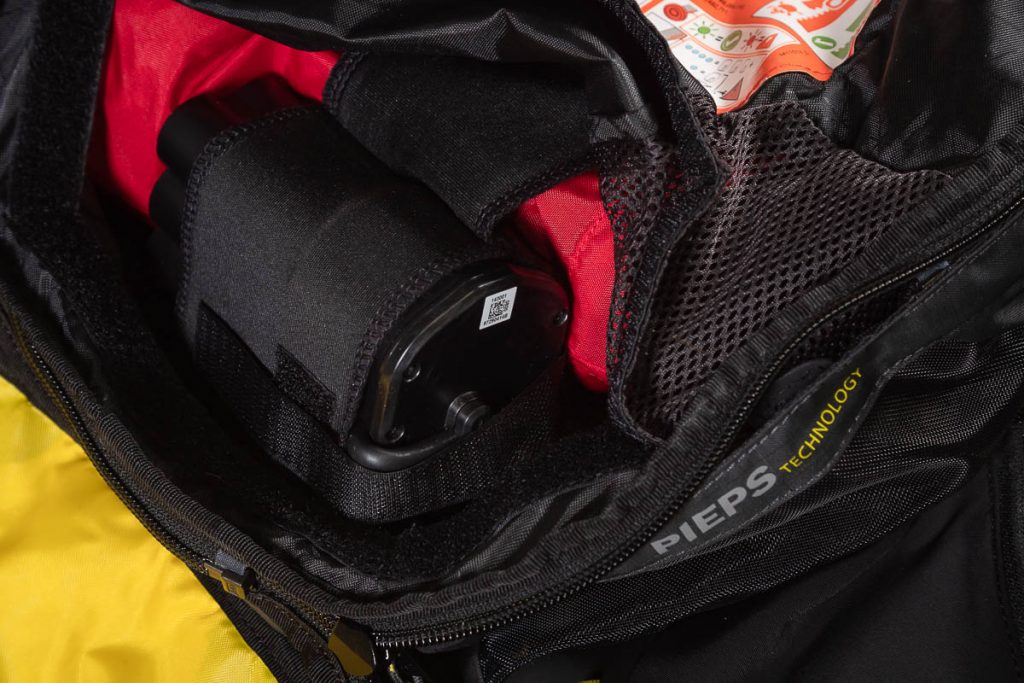
Storage for Essential Equipment
One of the best parts of a riding specific backpack is that it has an easy access pocket that fits your essential equipment: shovel, probe, and snow saw (if you carry one). Some also have an easy access pocket for your first aid kit. Having your essentials separate and easily accessible is quite nice in a rescue scenario when time is of the essence.
Ski/Board Carry
If you ever need to walk or boot for a while, shoulder carrying isn’t going to cut it. All riding specific backpacks have several available carry options (Diagonal, “A” Frame, or Straight). These systems are designed for skis/boards. So… rather than trusting the small, plastic buckles on your non-riding specific tension straps that could explode and launch your boards down the mountain anytime without you, treat yourself to a system that actually works.
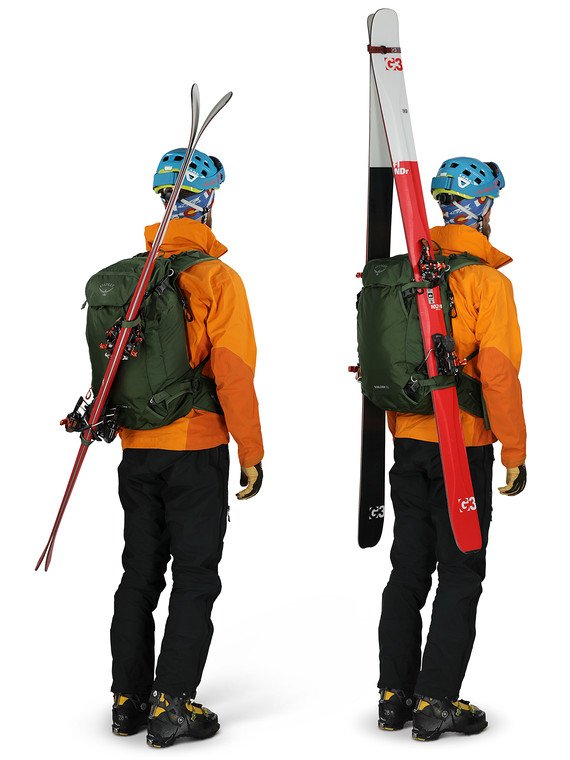
Riding Specific Pockets and Access
External helmet carry system, zippers in all the right places, hip belt pocket for your lip balm and sunscreen, goggle pocket, easy access to things in your backpack even while you’re carrying your boards on your back? Yep… Treat yo’ self.
Airbag Backpack
The research is there, peer reviewed, and clear: Airbag backpacks work to keep you on the surface in a slide. Unfortunately, they do next to nothing to save you from trauma if you’re carried into trees, rocks, or off a cliff, but they’re definitely worth putting on your short list of birthday or Christmas gifts to ask for. They’re spendy, but your parental units, friends, and other family will probably be psyched to lend a hand to keep you safer.
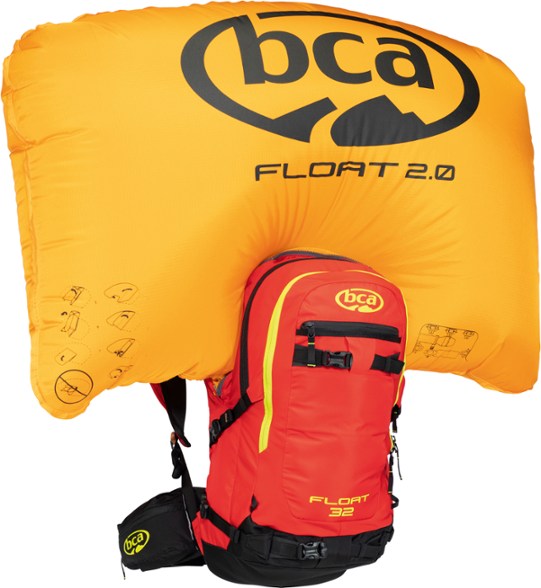
How They Work
You know how when you’re eating a delicious bag of Juanitas chips and all the chips near the top of the bag are whole or mostly whole? They’re so perfect for dipping because of how large they are. More surface area means more sauce to face. As you work your way through the bag, eventually you get to the bottom where there are no longer any whole chips… just crumbs. This is due to the law of inverse particles. If you shake the bag of chips, the larger chips make their way to the top while smaller chips and pieces go down. The airbag makes you into the biggest chip in the bag that, if everything works right, “floats” you to the surface like in the video below.
Since around three quarters of avalanche fatalities are due to being fully buried and dying of asphyxiation, having a tool that keeps you on the surface is pretty nice. As mentioned before, they do little to help you survive from trauma if you get carried into a tree at 50mph, but they do help with any trauma that would result from being tossed and turned in the washing machine of the avalanche.
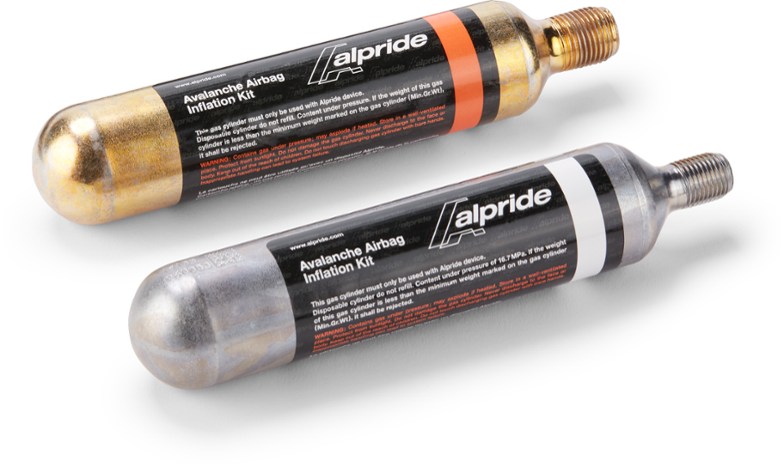
Inflation Systems
To inflate your airbag, you’ll need to pull a handle in your shoulder strap. Many of the fatalities linked to airbags resulted from the victim not pulling their airbag or the airbag not being loaded appropriately. There are two systems for inflating airbags: fan technology and compressed air. Compressed air systems have been around longer and come in the form of a small air canister that can be filled to an extremely high pressure. When you pull the handle, the canister releases the air into the airbag, causing it to inflate. Unfortunately, canisters are single use, so you’ll need to exchange them or get them refilled at a gas distributor, some homebrew stores, or scuba shop.
Fan airbag backpacks use battery technology or super-capacitors to power a turbofan to inflate the airbag. One of the major pros of this technology is that you can deploy your airbag multiple times and the airbag will deflate after a certain amount of time to create a potential air pocket if you were somehow fully buried with the airbag deployed. Most battery charged airbags just need to be plugged into an outlet to charge and come with international adapters for charging in foreign countries.
Other Considerations
Since you’ll either have air canisters or a big, dumb lithium-ion battery, air travel can be tricky with airbags. Check with a particular airline on their policies surrounding air bags.
In addition, airbags should not be viewed as your golden ticket to avoiding dying in an avalanche. As mentioned several times above, triggering an avalanche with or without an airbag is not a good idea. Airbags are meant to increase your margin of safety like your beacon, shovel, and probe and should never be the reason to ski a line. If you find yourself standing at the top of something saying… “I wouldn’t ride this without an airbag,” you shouldn’t drop in.
Repair Kit
One of the most overlooked pieces of gear you should always carry in the backcountry is a repair kit. Why? Let’s layout a little scenario. You’re out for a long day tour in perfect pow conditions. So sweet. To get away from the crowds, you crank hard to get out far and drop into a different drainage than the car is parked. You’re so fixated on getting the goods, that you fail to see a partially buried rock that you nail with one of your skis. You take a tumble and rip out your toe piece.

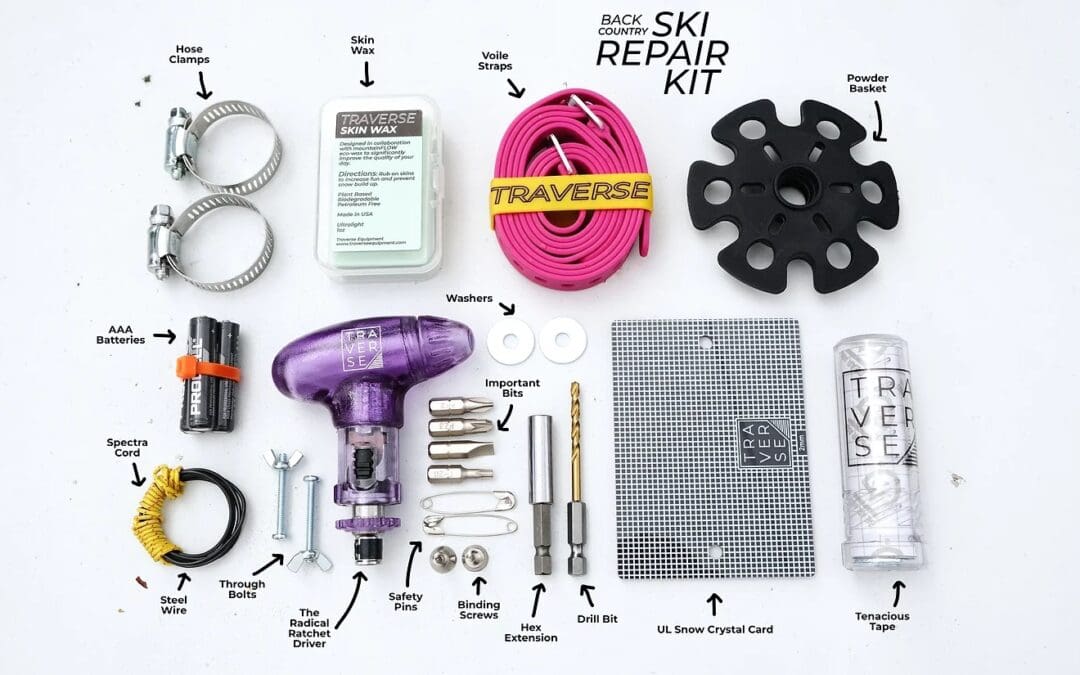
Without a repair kit, what are your options? How long will it take you to crawl out? Is that even possible? The way to avoid (at the least) a very frustrating and slow evacuation out of the field is to invest in a quality repair kit that can fix most gear/equipment problems. If you put together your own kit, you’ll be surprised how modest a financial investment it is. There are also some high quality repair kits pre-built out there now by our partner at Traverse Equipment for $90 if you want to go that route.
At the least, your kit should include some essentials:
- Spare batteries (AAA x3)
- Ski Straps
- Multi-Tool w/ pliers
- Scraper
- Spare powder basket
- Spare parts for your particular binding/boots.
Check out our full resource on repair kits to get some ideas on what to carry and how to use them effectively including how to fix a broken pole, a taco’d ski, or ripped toe piece.
First Aid Kit
Even if you aren’t caught in an avalanche, accidents happen just in the act of riding downhill at speed. Slamming into a tree, taking a hard fall, or just getting a blister are all events in the realm of possibility for you and anyone else traveling into the backcountry. Do you have the education to know how to help? Do you carry a first aid kit? A couple Advil, some band-aids, and a beer don’t count. Check out Alyssa’s resource on first aid kits for backcountry skiing and riding to get some ideas on what to carry. Hint: Everyone should carry a tampon.
Backcountry Skiing Skills/Techniques
(How do I do it?)
“Never become so much of an expert that you stop gaining expertise. View life as a continuous learning experience.”
– Denis Waitley
Practice makes Progress
Whether you’re just beginning your journey or have hundreds of days logged in the backcountry, there’s always more to learn. In this section, you’ll find resources to build confidence in the following categories:
Avalanche Rescue | Navigation | Uphill Travel Techniques |Downhill Travel Techniques | Crevasse Rescue | Roping up For Glacier Travel
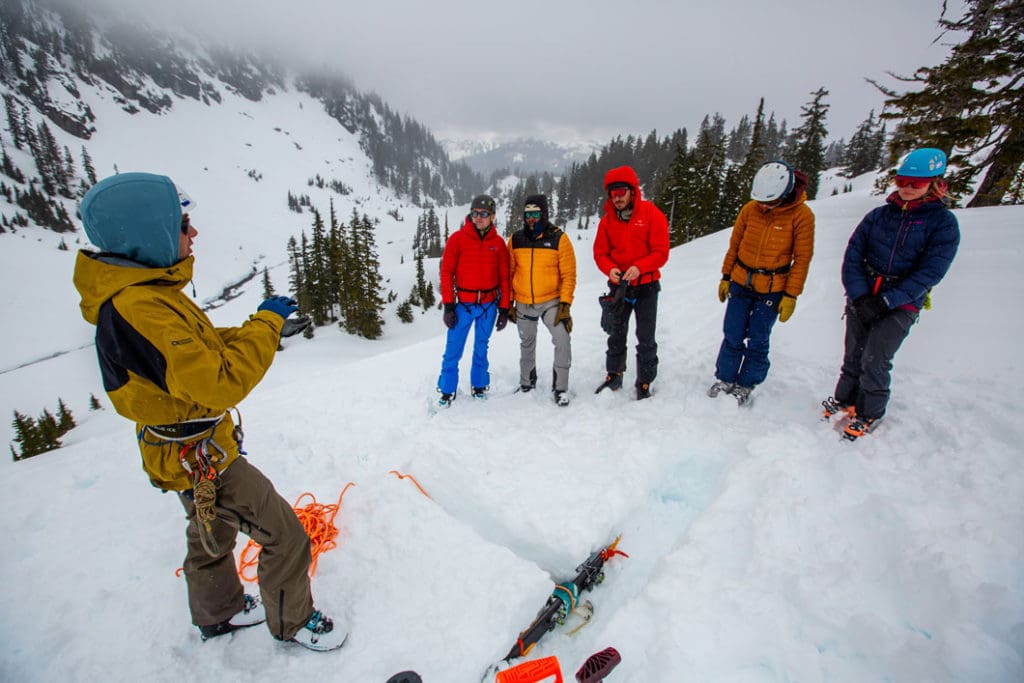
Avalanche Rescue
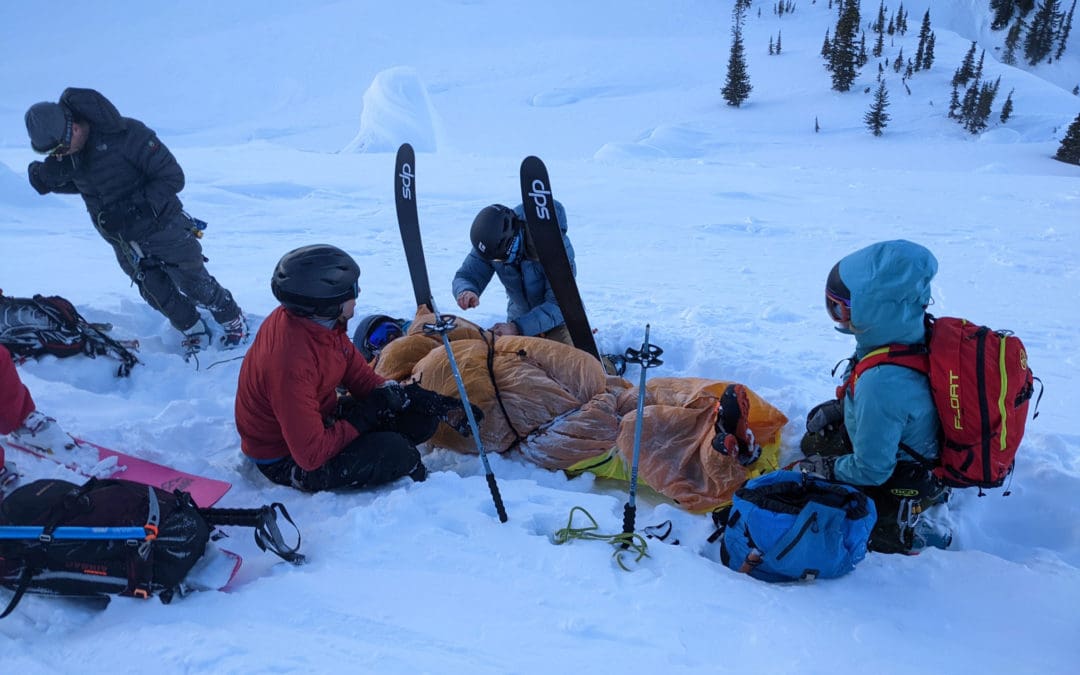
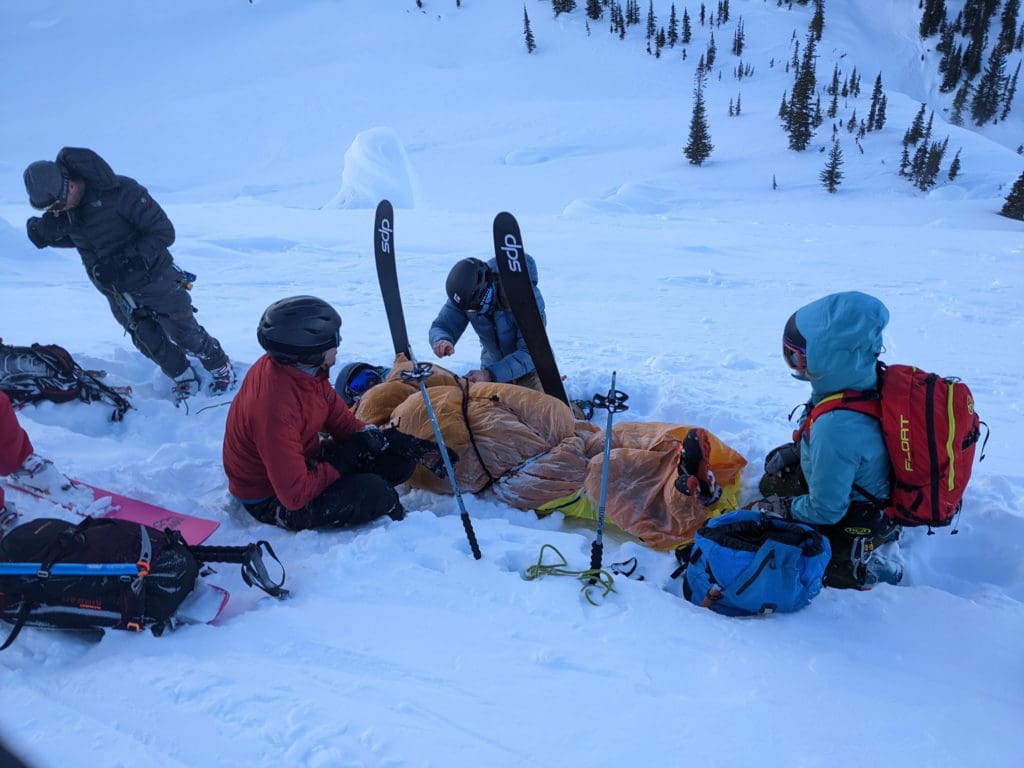
Anyone traveling in and around avalanche terrain should have fluency in avalanche rescue. Hopefully you and everyone else out there make good decisions and don’t end up caught in an avalanche, but be prepared for worst case scenario. In order to become truly competent in avalanche rescue, we recommend that you take an avalanche rescue course if you haven’t already and practice, practice, practice!
Single Burial Rescue
Often, avalanche incidents involve just a single buried individual, though its seems more and more multi-burial incidents happen each year. Regardless, single burial rescue is a great way to start gaining competency and honing the craft. In the most simple terms, an avalanche rescue requires one to use their avalanche beacon to follow a signal, probe to physically identify the buried human, and then shovel to extricate them. Our Single Burial Rescue resource walks you through all the details of how to perform this rescue.
Strategic Shoveling
You’ll spend the most amount of time in an avalanche rescue shoveling, so knowing how to do it efficiently will not only save your back, but potentially someone’s life. Check out Strategic Shoveling for Avalanche Rescue resource to dig well and with purpose.
Navigation
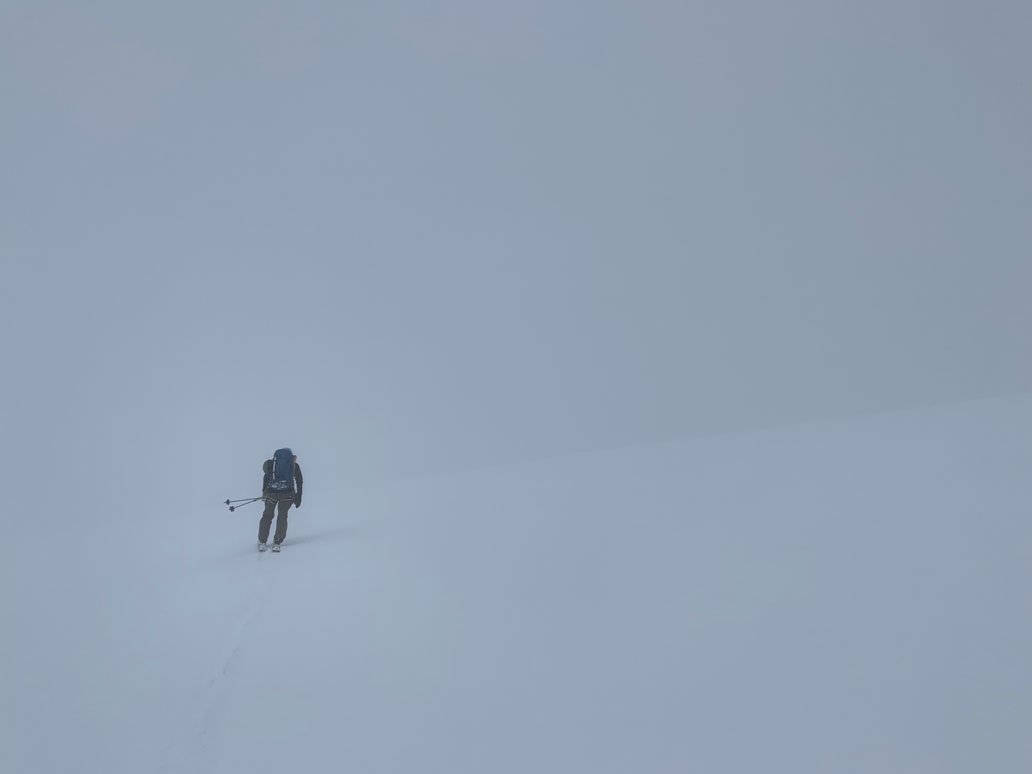
Whiteout Navigation
If you get caught out in a whiteout, especially in snowy, alpine terrain with no distinguishable terrain characteristics like trees or rocks, it’s easy to get disoriented. Folks can walk around for hours inside the ping pong ball unless they have a good Whiteout Navigation plan. Check out the resource on Whiteout Navigation to know where and how to navigate in whiteouts.
Basic Backcountry Navigation
Do you have the skills to navigate if your cell phone dies? We take it back to the essential building blocks of navigation: how to use a compass in conjunction with a map to find your way through terrain. In our Basic Backcountry Navigation resource, we go over parts of a compass, declination, magnetic vs true north, take bearings, and more.
Uphill Travel Techniques
Efficient uphill travel allows you to have more energy in the tank for the downhill and more runs overall. In our Skinning Techniques for Backcountry Skiing resource, you can learn the AVA turn, kick turns, how to travel through terrain without entering the “V of Doom,” ski crampon use, transitions, and tips for skin care. For travel strategies to help keep the group traveling safely together, check out the Travel Techniques for Backcountry Skiers resource.
Downhill Techniques
Backcountry skiing or riding is, in many ways, a team sport. Sure, you can go it alone out there, but most folks chose to venture into the mountains with partners. The reasons to ski with other people are numerous, from safety to fun with friends. However, just adding people into the equation doesn’t automatically equate to a safer touring day. Skiing downhill is fun, so heuristic traps creep in to influence us. Group management is key to a good day out.
Our Travel Techniques for Backcountry Skiing dives into a few group travel practices that you can use in the backcountry to enhance your touring days and shred well together.
Crevasse Rescue
If you’re going to travel in glaciated terrain, you need to have crevasse rescue dialed. Our Crevasse Rescue Resource is a collection of videos, photos, descriptions, and diagrams to help you understand some of the tools and strategies available to efficiently and safely extricate someone from a crevasse.

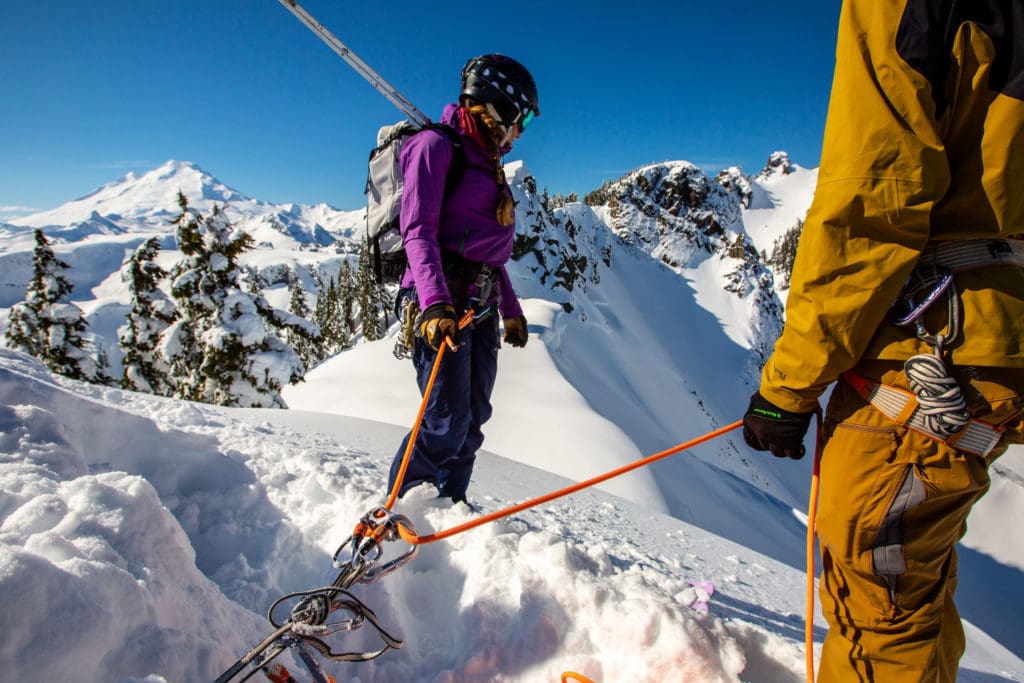
Roping Up For Glacier Travel
If you plan to ski in glaciated terrain, you’ll want to be well versed in how to travel safely through glaciated terrain and the technical systems involved beyond just crevasse rescue techniques.
There are many considerations when determining how to set up your rope team for glacier travel. How big of crevasses are you likely to encounter? What time of season is it? What is the experience level of folks on your team? Our How to Rig Your Rope for Glacier Travel resource will help you navigate the important points and questions you should answer for knowing how to rig your rope for glacier travel and goes into a bit about glaciology as well!
Planning Resources for Backcountry Skiing
(When and Where do I go?)
“A goal without a plan is just a wish”
– Antoine de Saint-Exupery

A common question we get after courses is: “where should I go skiing?” We get it… there’s endless terrain to explore and it’s pretty daunting to even know where to start if you’re newer to an area. In Washington, a lot of the terrain is difficult to access and pretty gnarly. You can read trip reports and have all the beta on route and still get shut down if you try to go at an inappropriate time. To that end, this section provides resources available to show you not just where you can go, but nail it with timing.
Avalanche | Books | Mapping & Navigation Resources | Weather Resources
Your Avalanche Center
In the United State, you can find your local Avalanche Center by going to Avalanche.org. Here you can connect to avalanche information and education for the zone you’re traveling in. As you can tell by the map below, not every place has an avalanche center providing a forecast, but the vast majority of the more well traveled zones do.
They are partnered with the American Avalanche Association (A3) and the US Forest Service National Avalanche Center (NAC). The site consolidates data from professional forecast centers to provide real-time avalanche information. In Canada, you can go to Avalanche Canada for information on avalanches.
To quickly access this information, on your smart phone, you should download the Avalanche Forecasts App to link into the national data base/forecast center closest to where you’re traveling.
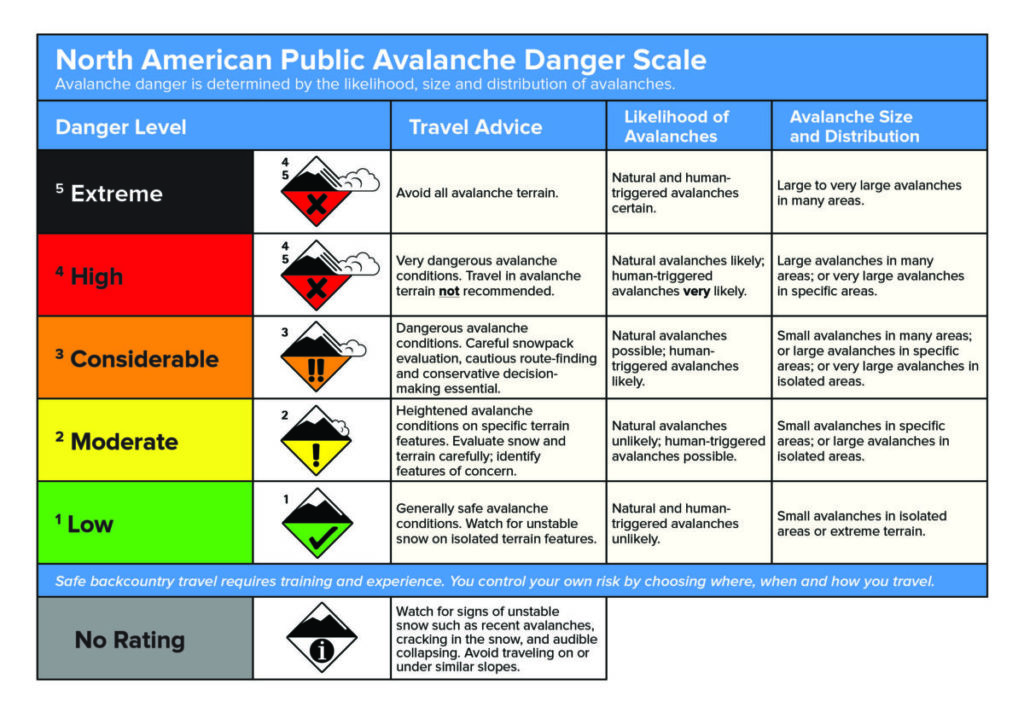
Avalanche Danger Scale
The North American Avalanche Danger Scale is a tool used by avalanche forecasters to communicate the potential for avalanches to cause harm or injury to backcountry travelers.
Avalanche Problems
99 Problems and 9 of them are avalanches. For real. In order to communicate the distinct personalities of avalanches, experts identified nine distinct problem types you could encounter on any given day in the backcountry. These are:
- Wind Slab
- Storm Slab
- Loose Dry
- Loose Wet
- Wet Slab
- Persistent Slab
- Deep Slab
- Cornice Fall
- Glide Avalanche
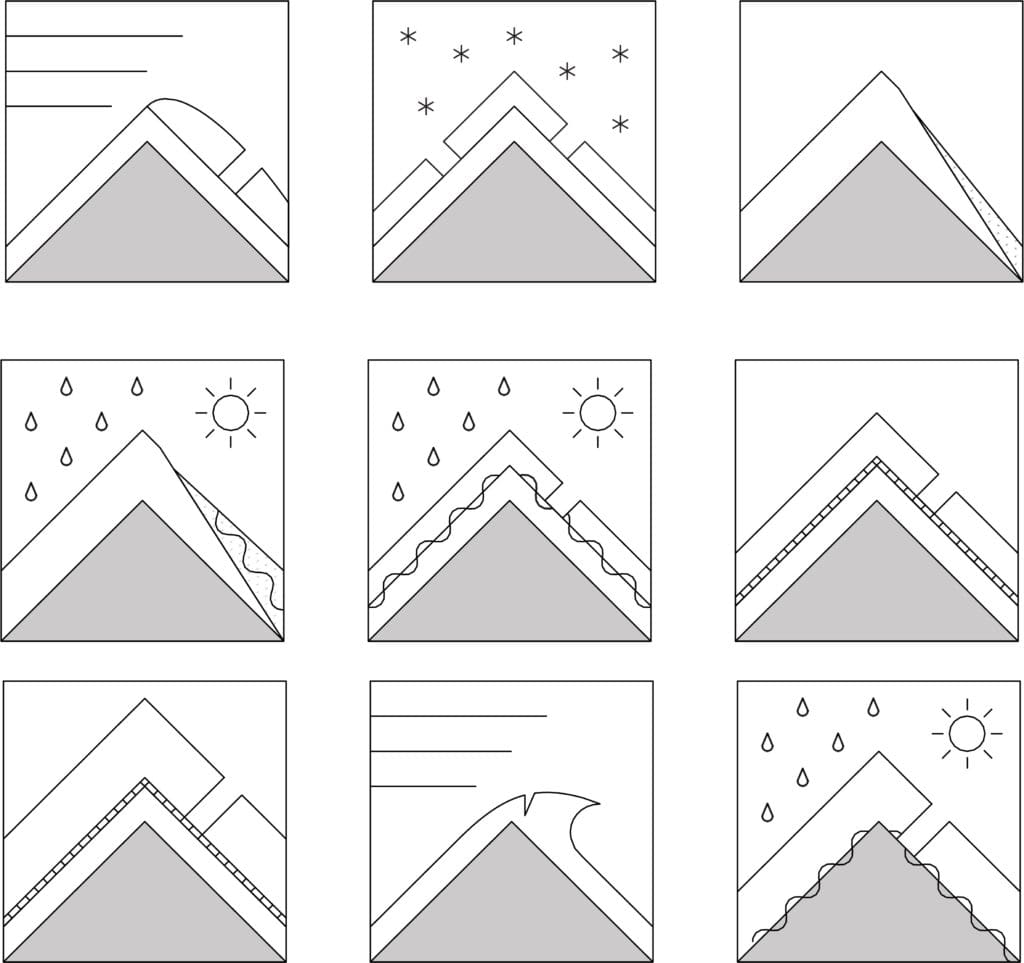
To learn about the different types of avalanche problems, check out our Avalanche Problems resource.
Back to Top | Back to Planning
Books
Backcountry Ski & Snowboard Routes Washington by Martin Volken
Backcountry Ski & Snowboard Routes Oregon by Christopher Van Tilberg
Backcountry Skiing: Skills for Ski Touring and Ski Mountaineering by Martin Volken, Scott Schell, and Margaret Wheeler
Staying Alive in Avalanche Terrain By Bruce Tremper
Snow Sense: A Guide to Evaluating Snow Avalanche Hazard by Jill Fredston
The Avalanche Handbook by David McClung and Peter Schaerer
The Ski Guide Manual by Rob Coppolillo and Colin Zacharias
Back to Top | Back to Planning
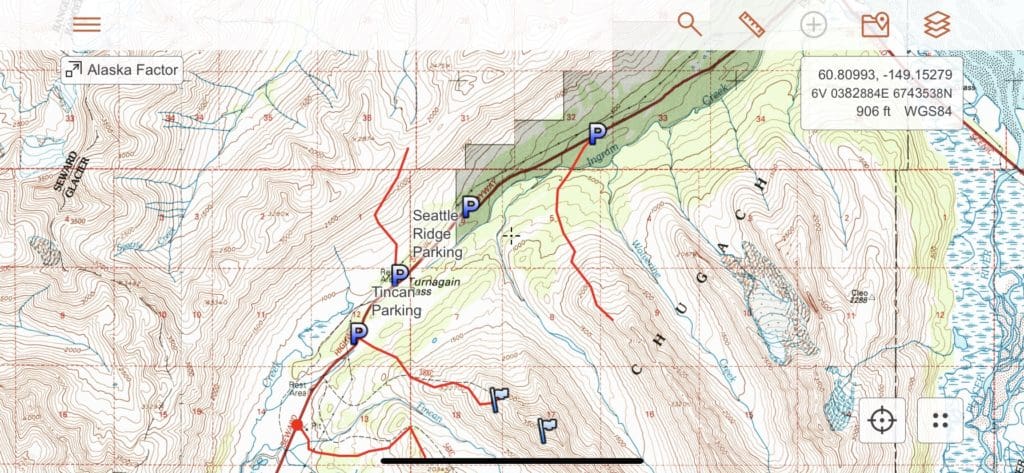
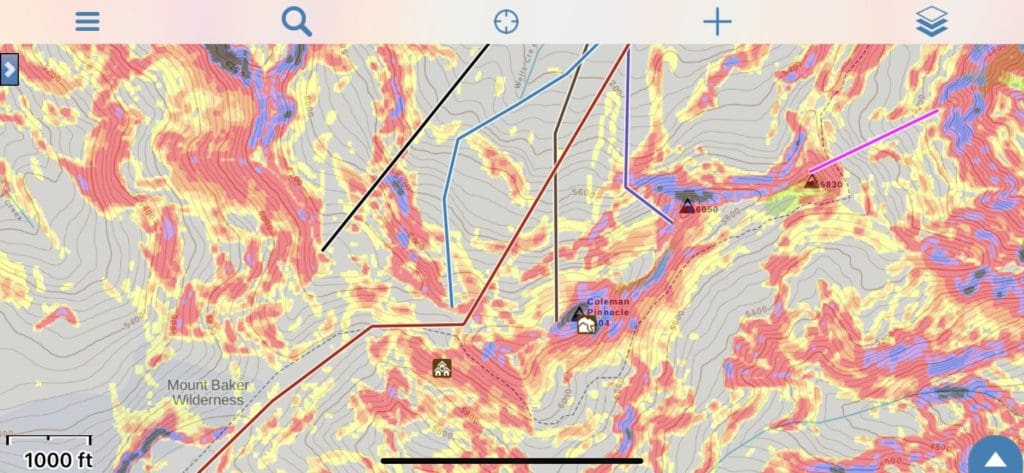
Mapping/Navigation Resources
On X Backcountry is a newer platform that boasts the ability to specialize the content shown on the map to the activity you’re doing. One of those activities is backcountry ski touring! Beyond the now standard slope angle and aspect shading that everyone has come to expect, On X integrates 3D mapping, comprehensive wind, weather, and SNOTEL data, and avalanche forecasts overlaid to your zone all in the app. It’s a pretty powerful tool once you learn to use it, but we have some MAJOR critiques.
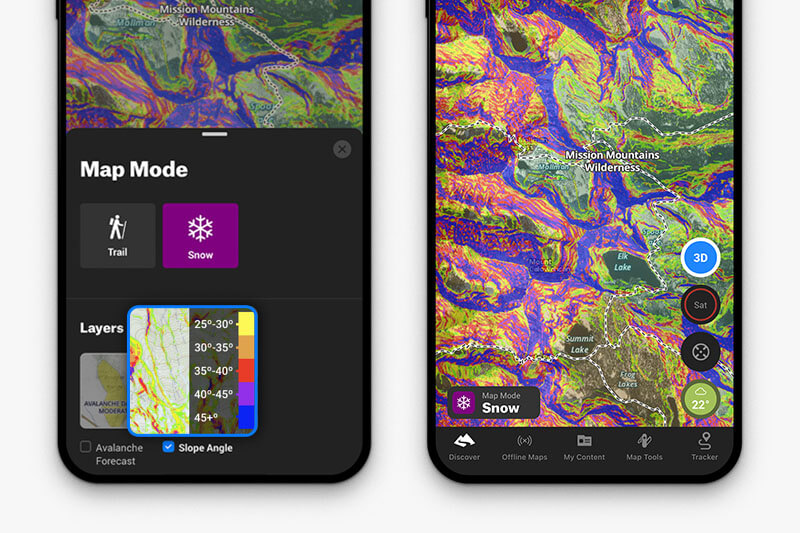
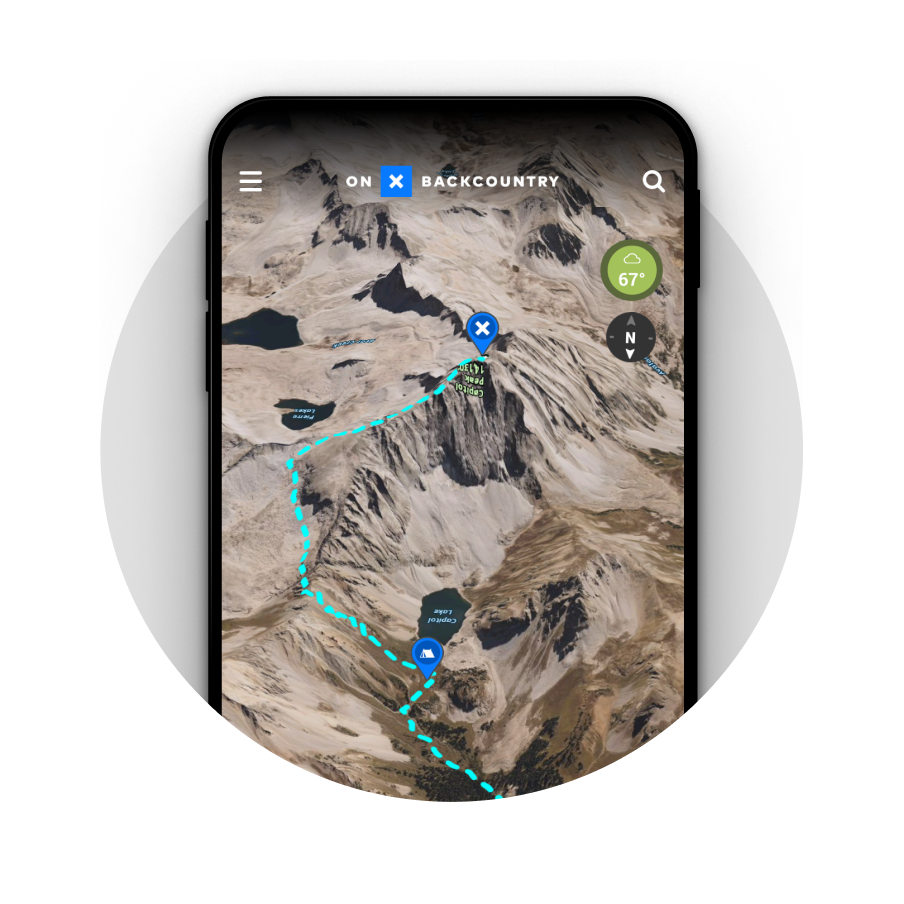
On X currently has some up-tracks that put you in avalanche terrain or, in extreme cases, just aren’t even feasible: put you skinning up a cliff or straight up a 60 degree icy glacial headwall. This brings up the point that ALL mapping information out there was created by human beings and anytime you’re actually in the field traveling, make sure you are observing conditions and thinking critically about terrain choice and not just blindly following the blue dot.
CalTopo allows you to build your own routes and run lists with multiple overlays from slope angle shading to sun exposure. You can also get all the terrain statistics from your routes including elevation change and loss, ground cover, total distance, and more. Then, you can make PDFs of your maps, print them, or upload tracks to your phone or GPS via their app. Some of the pro features and overlays cost money, but the base application and package is free!
Gaia is quite similar to CalTopo, but is a yearly subscription. It’s track or route building is not as refined as CalTopo, but it’s tracking features in their phone application is fantastic for turning your smart phone into a GPS. Also, there are tons of community tracks you can explore to see where folks are climbing and how they are accessing certain terrain. If the tracks are public, you can download them and save them to your own devices, saving you the trouble of creating the track yourself! Gaia also allows you to upload photos and tag their exact locations for more detailed trip reports.
Back to Top | Back to Planning
Weather Resources
Windy is a fantastic tool for weather forecast visualization. This fast, intuitive, detailed accurate weather app is the most up-to-date weather forecast around. It brings you all the world’s leading weather forecasting models: global ECMWF and GFS, plus local NEMS, AROME and ICON (for Europe) and NAM (for the USA) so you can compare forecasts. 40 weather maps from wind, rain, temperature and pressure to swell or CAPE index.
NOAA provides weather, water, and climate forecasts and warnings for the United States, its territories, adjacent waters and ocean areas, for the protection of life and property and the enhancement of the national economy. These services include Forecasts and Observations, Warnings, Impact-based Decision Support Services, and Education in an effort to build a Weather-Ready Nation. The ultimate goal is to have a society that is prepared for and responds to weather, water, and climate events.
Mountain Weather – Most avalanche centers are tasked with developing a mountain weather forecast as well as an avalanche forecast. Since weather creates snowpack which, in turn, creates avalanche hazard, the mountain weather forecast is actually used to inform the avalanche forecast.
Weather Station Lists – Most avalanche center websites conveniently link to weather station data for commonly used areas within their forecast zone. Every hour you get up to date information for precipitation totals, max/low/avg temps, wind speed, and so on. You can find the weather station nearest where you are traveling and get real-time numbers of what is actually happening out there.
It’s important to note where these weather stations are, however, so you can understand the limitations of the data. Some are placed in areas that are more sheltered, so they don’t provide reliable wind speed/direction data. On the opposite side, some may be placed high in alpine areas where they are subject to riming and heavy winds that can cause gauges to freeze or malfunction. In addition, some lesser used stations that don’t get much maintenance love are pretty decrepit and unreliable. As always, it’s up to you to actually confirm what’s happening out there with your own observations.
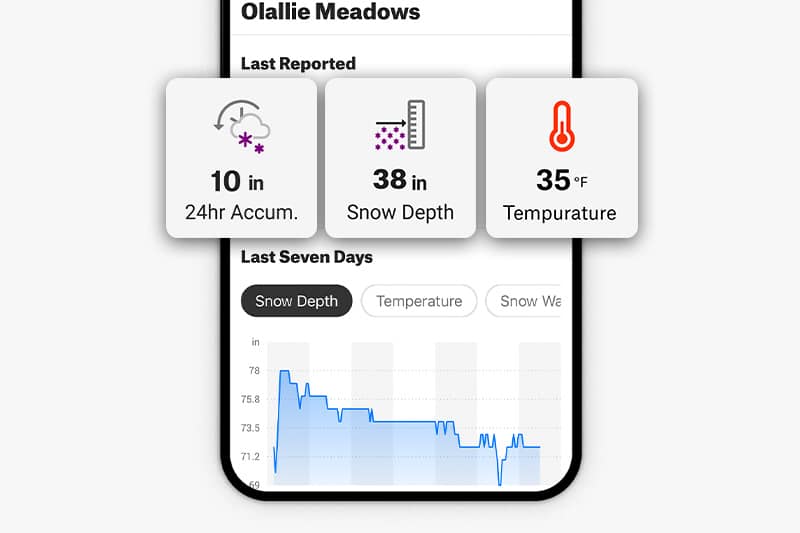
Snow Telemetry (SNOTEL) – Not every single weather station is listed on avalanche center websites. In fact, in the Mount Baker region, NWAC only lists one of the three local telemetry stations. SNOTEL data allows you to see real-time numbers from telemetry sites all over the United States including Alaska. These sites provide data on precipitation, temperatures, Snow Water Equivalent (SWE), Snow depth, etc. As mentioned above, these sites are subject to the same pitfalls, so data should be confirmed by the nowcast in the field.
Back to Top | Back to Planning
Continuing Education
(How do I get better?)
“Education is a progressive discovery of our own ignorance”
– Will Durant
The Mountains Don’t Care
There’s no replacement for hands-on experience with certified professionals for getting better at anything. If you’re learning to fly a plane, you don’t just read a book about being a pilot, play flight simulator on the computer a few times and then jump in a real plane, confident that you can fly. If you tried this, you might get away with it, but odds are you’d crash at some point.
Instead, you go up with a certified flight instructor who can teach and mentor you as well as be a safety net if things go wrong. In any activity where your life is potentially forfeit for a wrong decision, you should try to stack the odds in your favor as much as possible. Like it or not, the majority of backcountry skiing and riding takes place in avalanche terrain, and avalanches don’t care if you’re highly ignorant or highly skilled. They just are. Knowing where they are and how to avoid them as well as how to respond in case of an emergency is essential. So here’s a list of courses available to you to continue your education and make sure you’re set up for success.
AIARE 1 | AIARE 2 | Avalanche Rescue | Avalanche Mentorship | Pro 1 | Pro 2 | Intro to Backcountry Skiing | Steep Ski Mountaineering | Glaciated Ski Mountaineering | Wilderness First Aid | Wilderness First Responder
Avalanche Courses
AIARE Rec Level 1 Avalanche Course
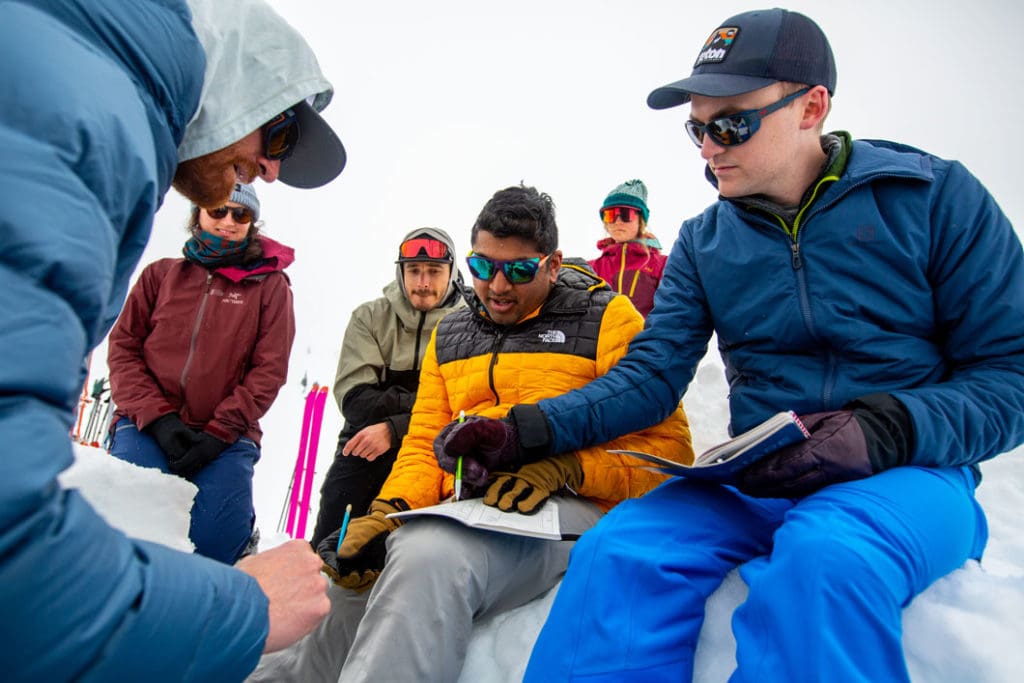
The AIARE Level 1 Avalanche Course is designed to provide you with a foundational understanding of avalanches, observational and decision-making techniques, avalanche terrain assessment, and companion rescue. By the end of course, you should feel confident contributing valuable insights and asking relevant questions in your backcountry group. The AIARE Level 1 Course also provides students with tools and resources for thorough tour planning. This three day course packs in A LOT of information into a short time frame. Get ready for the fire hose of information!
AIARE Rec Level 2 Avalanche Course
The AIARE Level 2 Avalanche Course is designed for recreational backcountry skiers and snowboarders who have at least a year of experience skiing and riding in the backcountry who are looking to become leaders (facilitators) in their backcountry group. The 3-day curriculum meets the highest standards in avalanche education (AAA approved) and provides backcountry travelers with opportunities to hone their skills in decision making, terrain management, and tour planning. Students will build upon the introductory hazard management tools used in their level 1 course and expand their skill set around snowpack, weather, and avalanche processes. Student need to have completed the AIARE Level 1 Course and Avalanche Rescue Course.
Avalanche Rescue Course
Avalanche rescue is a skill that should be brushed up on at least once a season! It’s crazy how quickly you get rusty at it. The AIARE Avalanche Rescue Course is a great way for you and your squad to brush up on the latest and greatest in avalanche rescue. It is also a pre-requisite for both the AIARE Level 2 Avalanche Course, and the AIARE Pro 1 Avalanche Course. Students can expect to learn fundamental avalanche rescue skills for both single and multiple burials. Instructors on course facilitate realistic practice scenarios, and provide mentorship and feedback.
Avalanche Mentorship Tour
After a level one or two, you are left to go out on your own and “gain experience” in the backcountry. But how do you gain “good” experience without proper mentorship? Some folks are lucky to have a strong group of people around them with knowledge and patient enough to answer questions, but the vast majority of folks do not. Hiring a professional to be that mentor is massively helpful, but not possible for most folks because of the price tag. Our Avalanche Mentorship Tour is designed to fill this gap in mentorship while also being affordable: $100 per person. On the tour, you’ll get to repeat the tour day on your level 1 or 2 from a planning session via zoom the night before to executing your plan in the field. These tours are only available to folks who’ve taken an avalanche course with Cascade Mountain Ascents.
Back to Top | Back to Education
Avalanche Courses: Pro Level 1 and 2
Professional level courses are run directly through AIARE and other AAA approved providers. You will begin your professional avalanche education with the Professional Avalanche Training 1 course. The AIARE Level 1 and the AIARE Avalanche Rescue Courses are pre-requisites for the Pro 1.
Professional Avalanche Training 1
The Professional Avalanche Training 1 Course is designed for entry-level avalanche professionals, or those seeking employment in the avalanche industry. The Professional Avalanche Training 1 is similar to the old AIARE Level 2, but allows more time for students to develop their standardized observational skills, recording methods, and operational decision making. The Pro 1 is 5 days in length and includes an examination at the end of the course to ensure student competency.
Professional Avalanche Training 2
The Professional Avalanche Training 2 course replaces the old AIARE Level 3. Pre-requisites for the Pro 2 include the AIARE level 1, AIARE Avalanche Rescue course, and Pro 1.
From the AAA: Professional Avalanche Training 2 (Pro 2) is designed for developing avalanche professionals with several seasons of applied professional experience. This course focuses on skills and proficiencies that enable the student to step into a leadership role within an operational avalanche program. The student will be taught proficiencies to develop operational risk management decision-making skills, including forecasting, risk mitigation strategies, and professional communication.
Back to Top | Back to Education
Backcountry Skiing and Riding Courses
At Cascade Mountain Ascents, all our backcountry skiing and riding courses are taught by AMGA trained Ski Guides with strong backgrounds in educational pedagogy.
Our courses are designed to provide specific technical knowledge in a short amount of time for recreationists seeking a concise and affordable approach to learning technical backcountry skiing and riding skills. Our three courses range from introductory skinning techniques to belayed riding techniques and rappelling into couloirs.
Despite the short course format, our instructors set participants up for success by not only demonstrating and practicing skills in the field but providing folks with a strong list of resources and a plan for continued development at the end of course. One of those resources is us! Once you take a course with us, we are a resource to you for any questions for years and years to come. We’re happy to help.
Below are our three available backcountry skiing and ski mountaineering courses. These courses are designed to be taken in any order as long as you meet the prerequisites.
Intro to Backcountry Skiing and Riding
Learn the basics to backcountry skiing and riding: gear, uphill travel, transitions, and downhill techniques on our one day Intro to Backcountry Skiing & Riding Course. This course is also an excellent way to prepare for your first avalanche course if you have limited experience touring. It’s best to feel comfortable on your equipment and with travel before taking an avalanche course or else you’ll be concentrating on the gear and how you walk rather than engaging with avalanches.
Steep Ski Mountaineering
If you’re looking to step your backcountry skiing or riding up a notch, getting the run down on steep ski techniques will help to open up more terrain on your run list. The Steep Ski Mountaineering course is designed to teach students secure, efficient, and fun travel in high angle terrain. This three-day program introduces advanced students to the gear, technical skills, and travel practices needed to push into steep terrain. Students should be advanced skiers or riders and have a Level 1 Avalanche Course.
Glaciated Ski Mountaineering
With the most glaciated terrain of any mountain range in the lower 48, much of the North Cascades can feel off limits to backcountry skiers and riders who do not have experience in glaciated terrain. Learn the skills to open up new terrain with a Glaciated Ski Mountaineering course. This four-day course covers the gear, technical skills, and travel practices that you need to explore glaciated lines and culminates in a summit ski descent of Mount Baker. Students should be advanced skiers or riders and have taken a Level 1 Avalanche Course.
Back to Top | Back to Education
Wilderness First Aid/Responder
If you are a part of a group traveling in the backcountry, you should have the skills to provide medical assistance to an injured human. Since you will likely not have quick access to emergency care out there, you are the first responder to any emergency. Thus, the Wilderness First Aid (WFA) and Wilderness First Responder (WFR people say “woofer”) courses.
There are many providers of these two different courses. NOLS Wilderness Medicine is the most recognized and known for quality in the business, so we’ve linked them here, but Desert Mountain Medicine and Remote Medical Training also deliver a really high-quality course, so check them out as well. As a small guide service, we like supporting fellow small businesses.
Wilderness First Aid
The Wilderness First Aid course is an introduction to wilderness medicine, taught over two or two and a half days. It’s great for some base knowledge if you recreate outdoors where EMS response can be expected in a timely manner (fewer than eight hours). “You’ll learn the Patient Assessment System, how to provide effective first aid treatments for injuries and illnesses common in the outdoors, and how to make appropriate evacuation decisions.” (NOLS WMI) The course consists of indoor and outdoor components and is a lot of experiential learning through the use of scenarios. If you really want to feel more confident handling a variety of circumstances, take the WFR course.
Wilderness First Responder
The Wilderness First Responder Courses are the industry standard for professional guides, trip leaders, search and rescue team members, outdoor recreationists, and international travelers, but they are fantastic knowledge for anyone that plans to travel to more remote locations where access to care is greater than eight hours. After the 9-10 day course, “you will be able to conduct a thorough physical exam, obtain a patient history, assess vital signs, provide emergency care in the wilderness, and make crucial evacuation decisions.” (NOLS WMI)